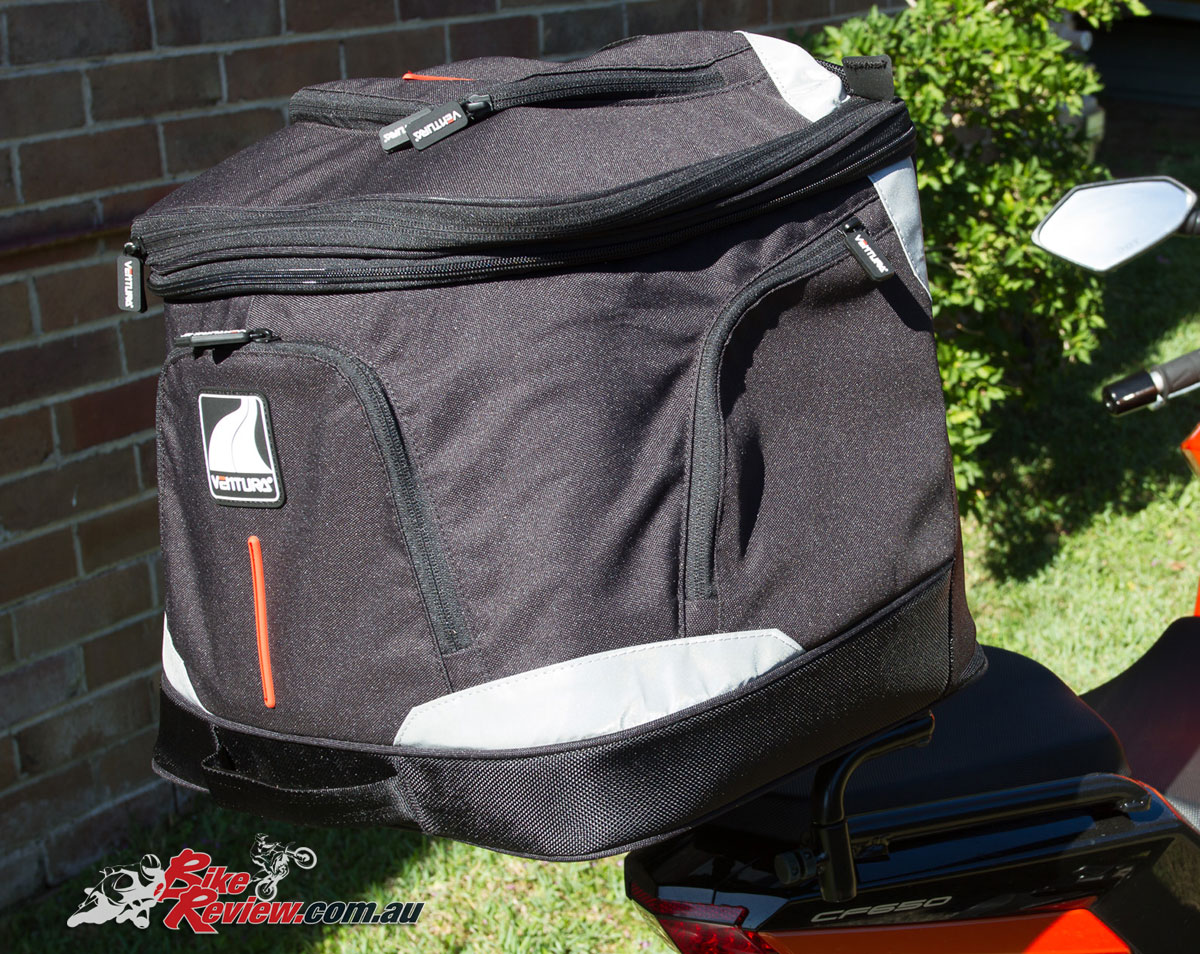
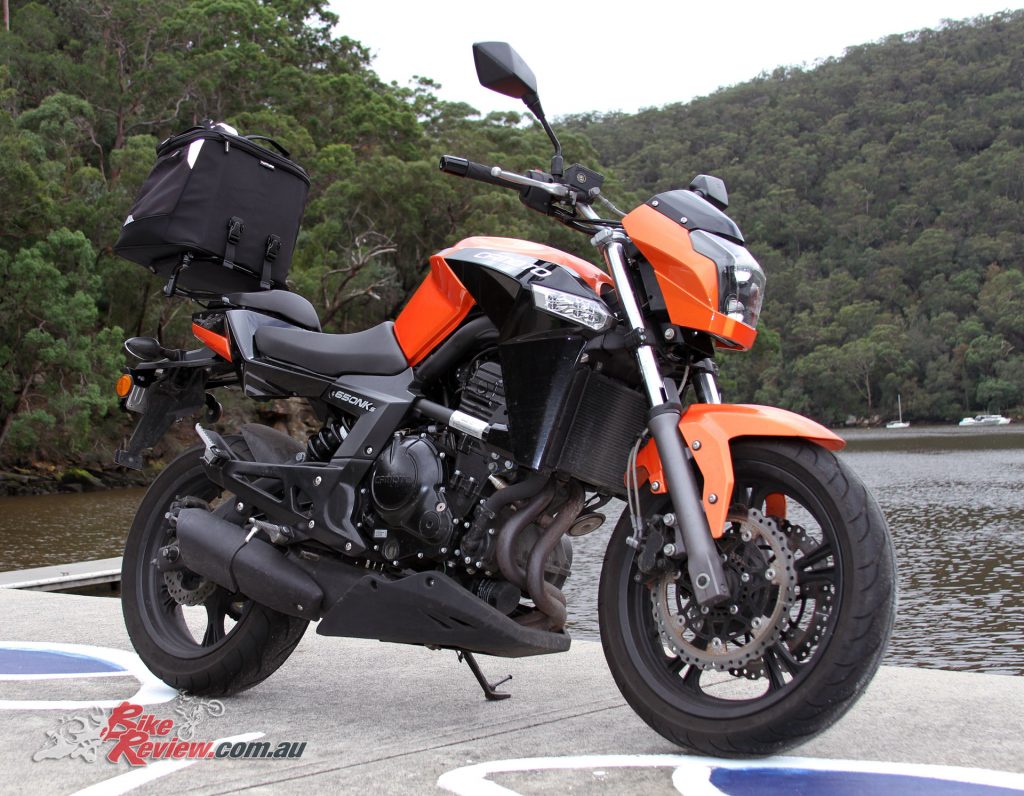
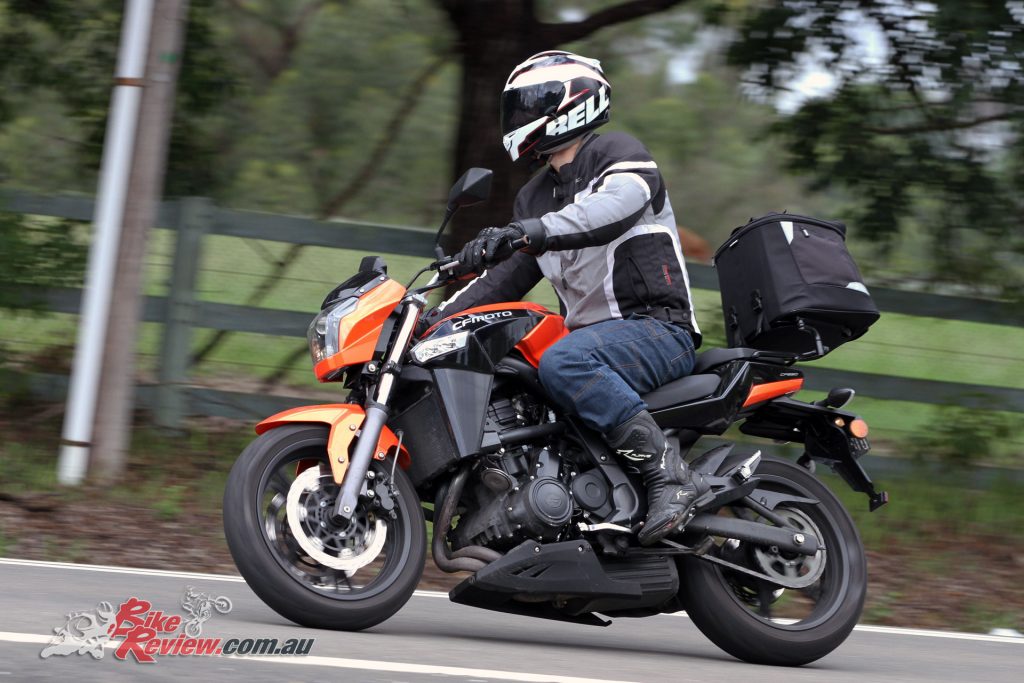
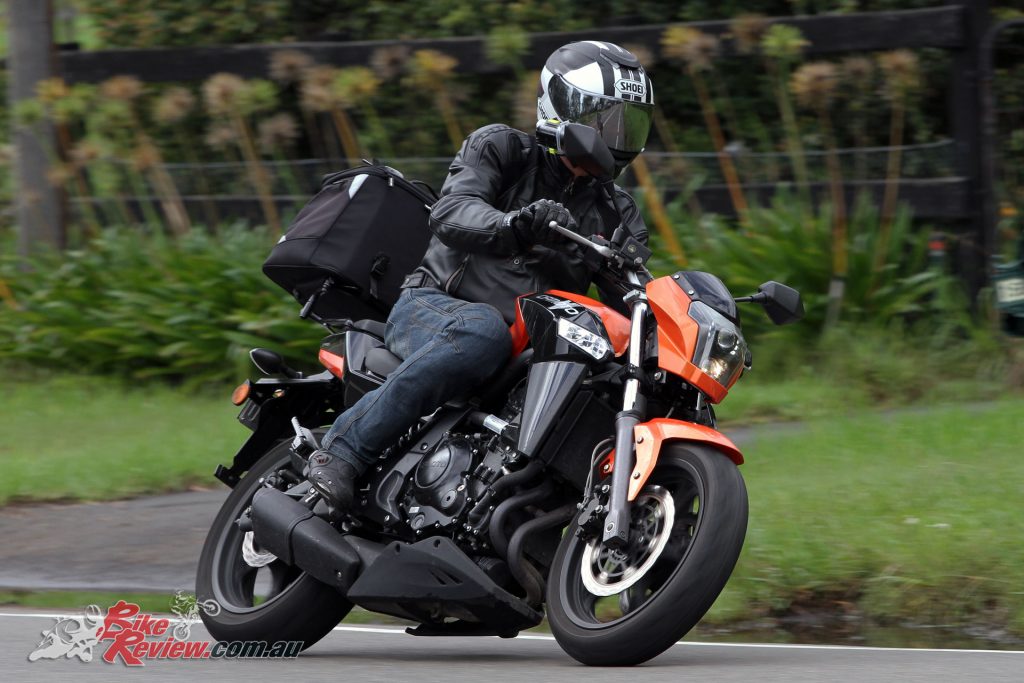
David Earp fits an Ventura EVO-40 Complete Luggage Kit to his CF-Moto and gives a full run down of fitment and ownership. Words & Images: David Earp
As someone who has a fairly fluid work life, since beginning to ride to some of my workplaces, I have found that there are only so many bits of kit you can carry in a backpack or satchel. Enter the Ventura EVO-40 Luggage kit from Ventura.
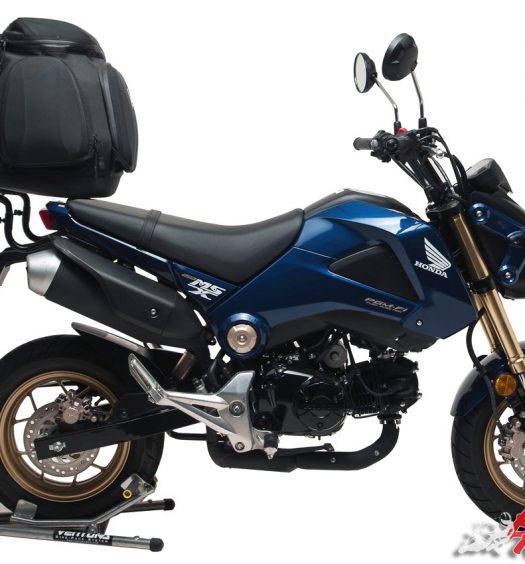
Imported by Kenma Australia Pty Ltd, the new range has a 10L (EVO-10) and 40L (EVO-40) capacity option which cater for both the simple day pack, to a more serious travel pack.
Before I get into the pack and how I’ve found it, I’ll give you an idea of how simple it was to install the EVO Rack on my CF Moto 650 NKs. Looking back at Kris’s Tech Tips on installing Rally-Euro rack kit, it seems that Ventura have a much simpler installation for attaching this system to my CF Moto, with additional adjustability built into the design.
Ventura EVO-40 rack and mounts installation guide:
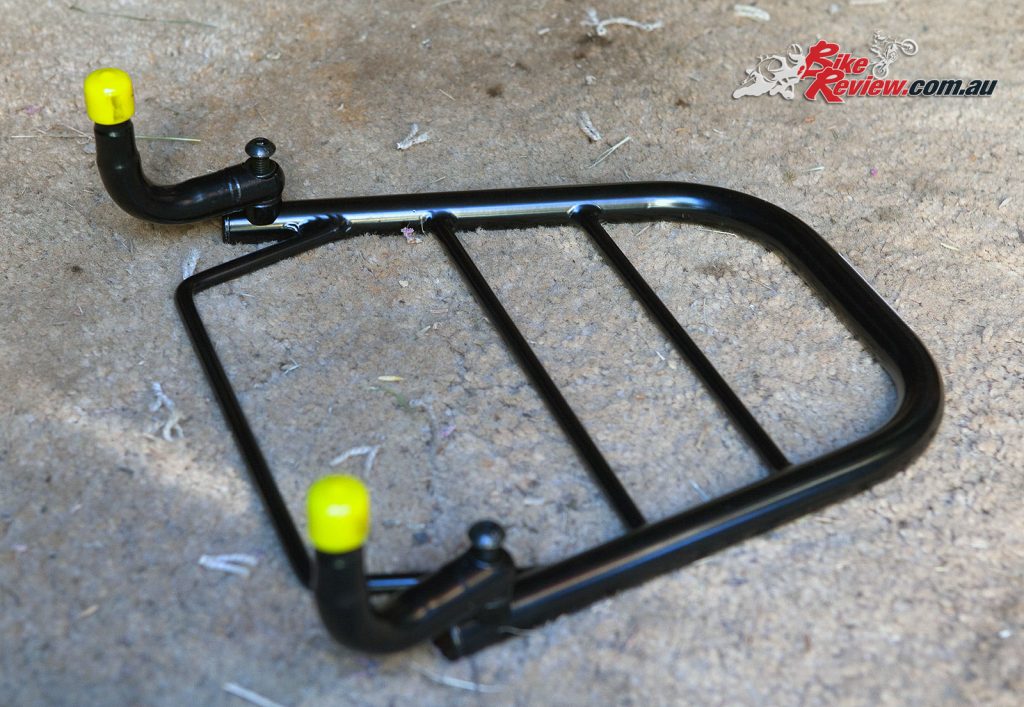
The mounting system comes in two packs, with the EVO Rack including adjustable position rack arms brackets and L-brackets for fitment to the CF Moto, plus the EVO-40 pack.
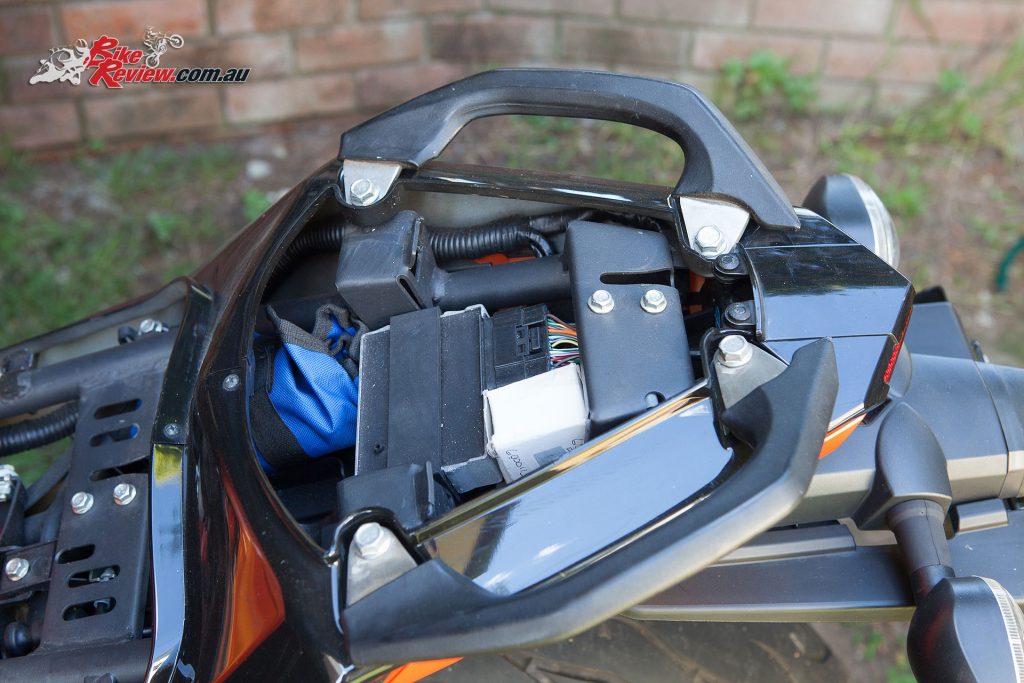
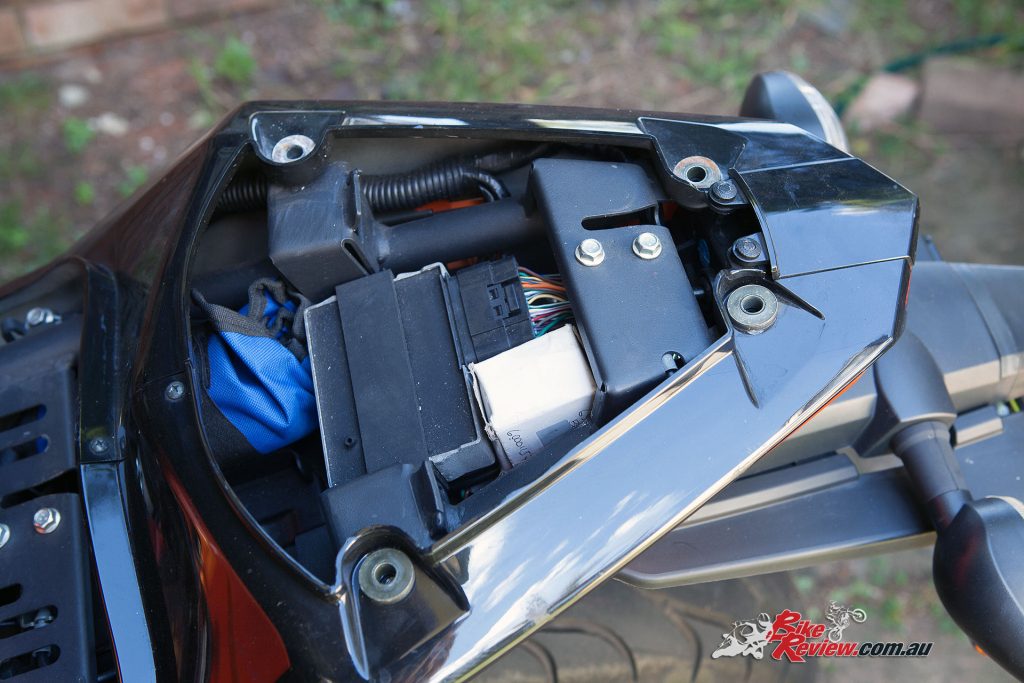
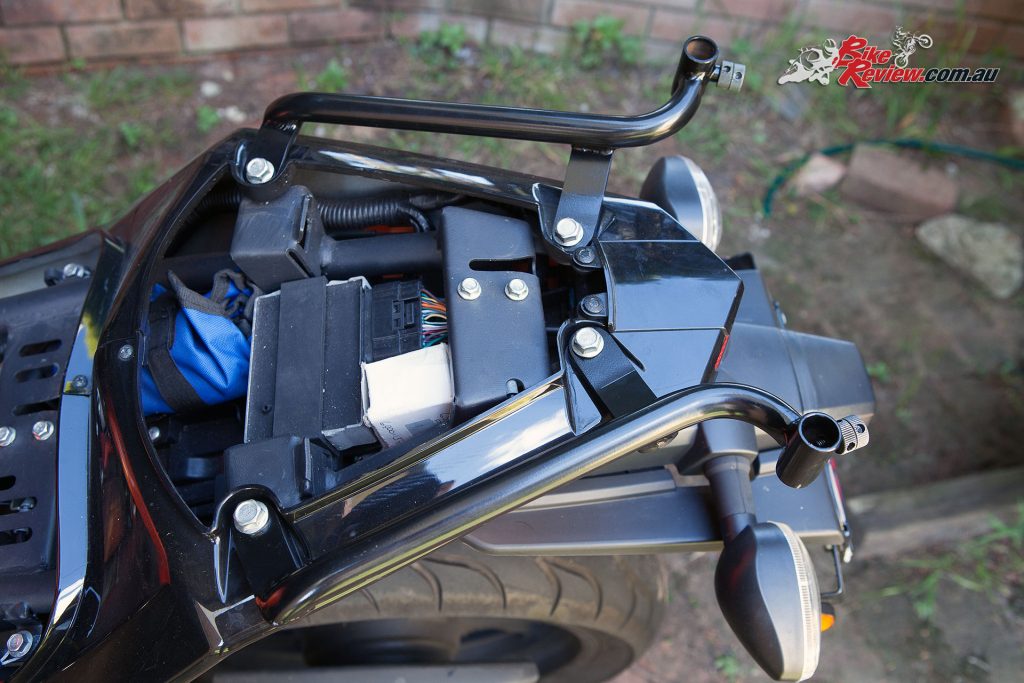
- Remove the passenger seat and then using a 13mm spanner, remove the four bolts securing the two passenger grab handles.
- Place the two L-Brackets on either side of the tail with the holes facing in to the bike and the curved section facing up and to the back, then replace the bolts and leave loose.
- Place the EVO Rack upside down, and fit the arm-brackets with the bolts, washers and nuts provided. I didn’t tighten this all up too much at this stage.
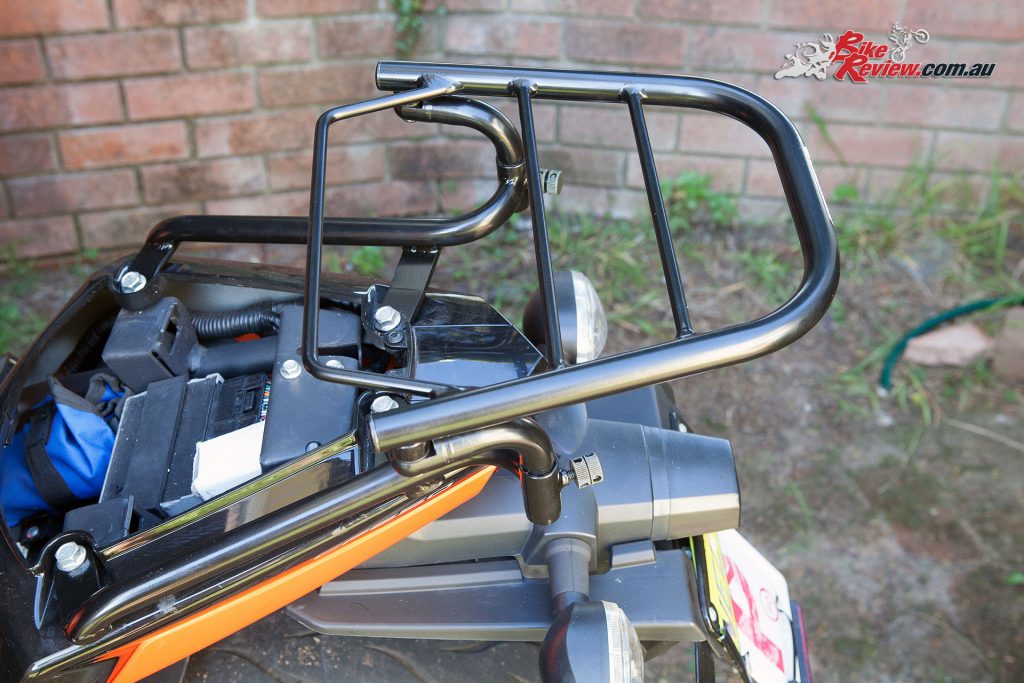
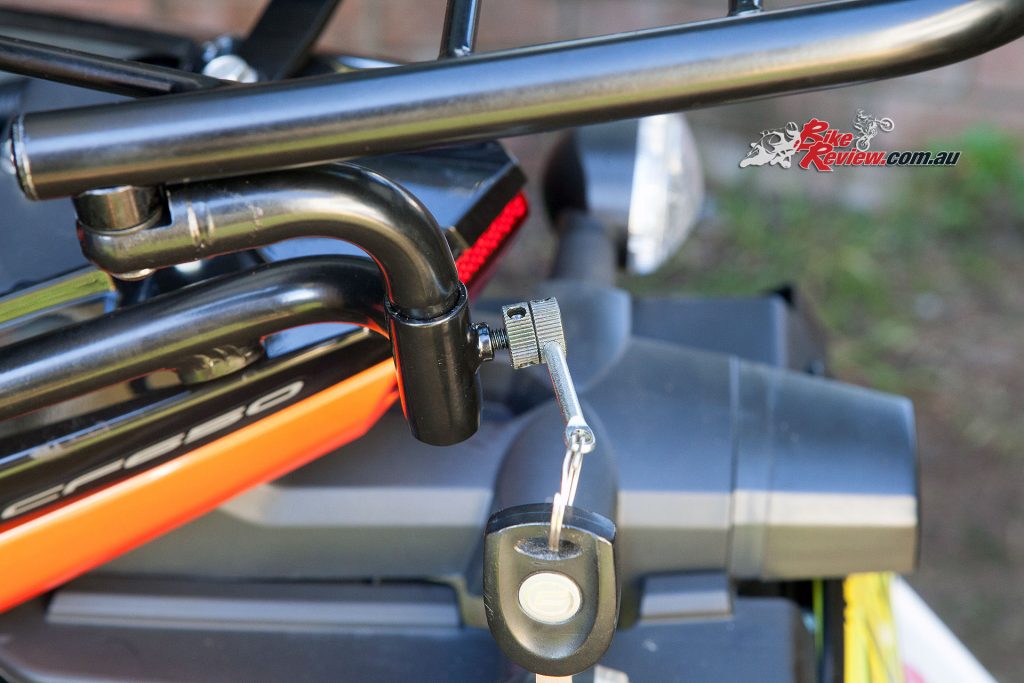
- Flip the EVO Rack and line up the L-Brackets with the openings in the rack arms. Then insert the locking nuts for securing the rack in place.
- Using the included locking nut key tighten off the locking nuts and then ensure everything is aligned, before tightening the bolts on the L-Brackets as well as the rack arm brackets.
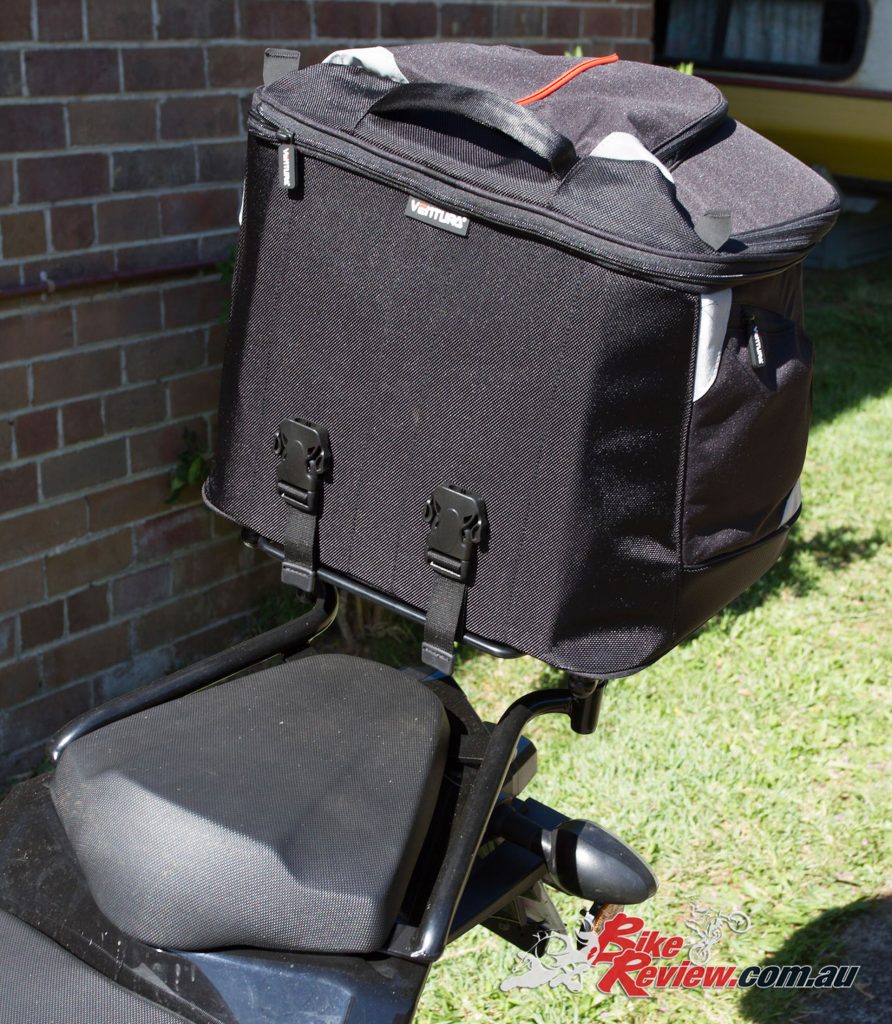
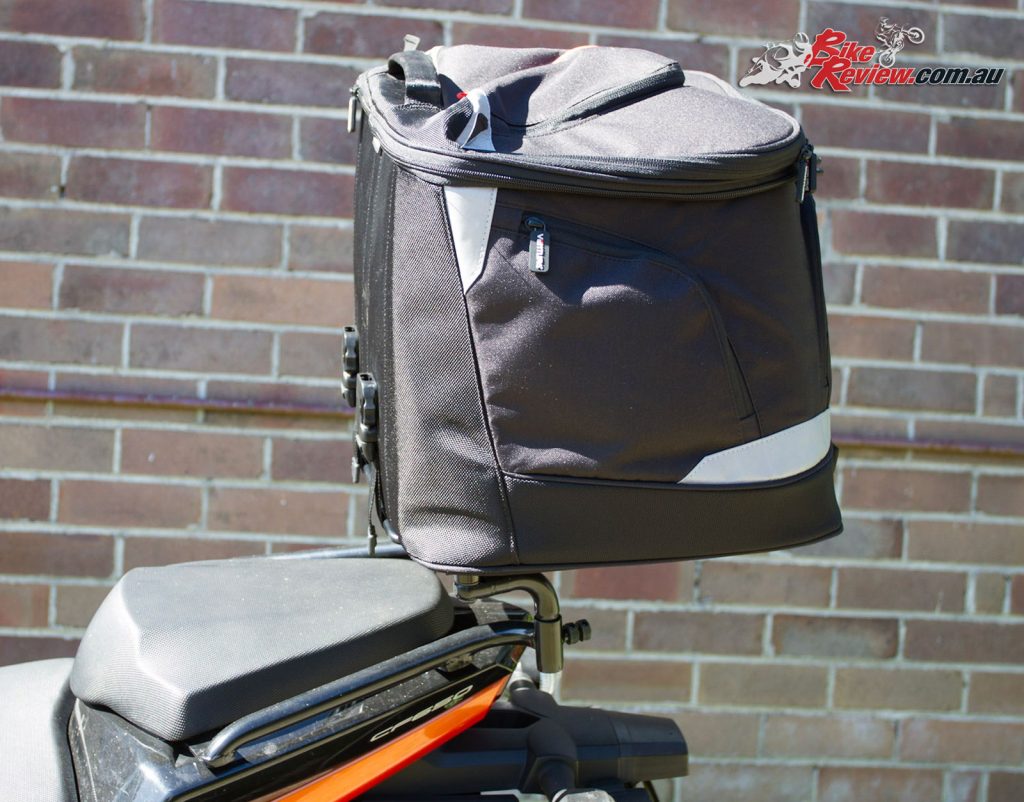
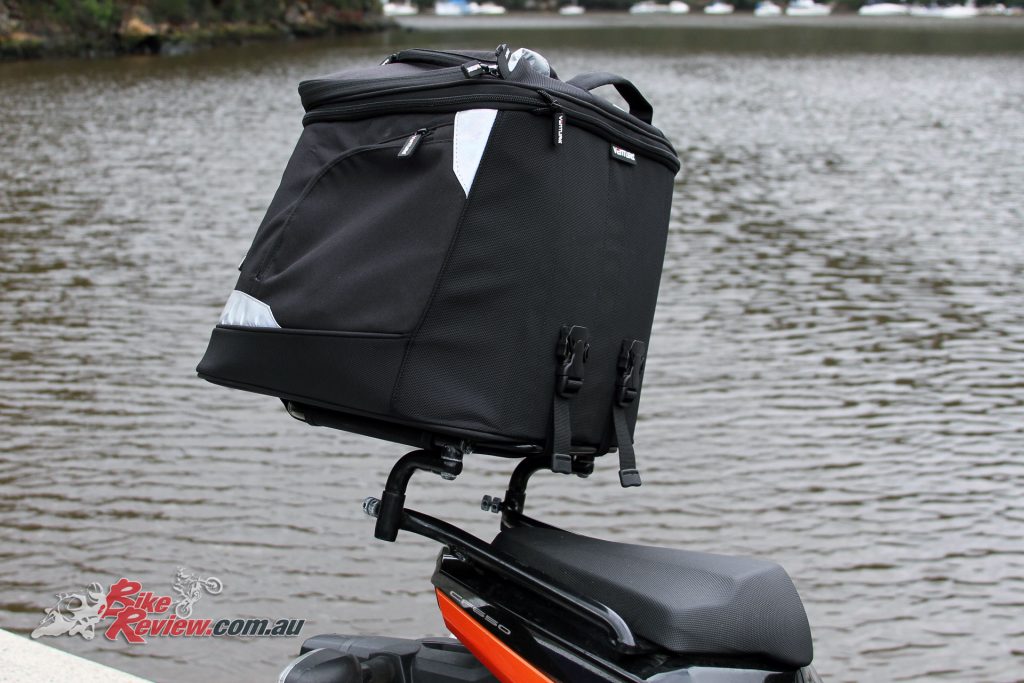
- Once the EVO Rack is installed and tightened the EVO-40 pack (or EVO-10) slides on from the back and fastens with the two clips at the front of the pack. As a side note, the pack is a tight enough fit that should you forget to fasten the clips like I did on a shortish ride, you don’t necessarily lose the pack… not that I’d make a habit of it!
- By loosening the locking nuts you can shift the position of the rack to accommodate a pillion, by running it over the rear of the tail instead of over the pillion seat.
The EVO Rack system allows moving the pack load forward on the bike when you aren’t carrying a passenger. The rack arm-bracket nuts allow for easy loosening and adjustment as required.
Note: If there was one criticism of the old system, which didn’t use the arm-bracket pieces between the Rack and L-brackets, it was that it could at times be difficult to fit the rack into the brackets and slide it into place if the alignment wasn’t perfect. This new innovation solves this small issue.
The Ventura Australia site offers a video that explains the procedure quite well, and it wasn’t difficult to work out by myself anyway. In the video, we are told there is an included allen key as well as the locking nut key, but this was not the case in my pack.
In the month or so that I’ve been using the EVO-40 I have found it a valuable addition to the bike. It has freed up my backpack when I’m riding to work, and the large capacity allows me to keep wet weather gear in it pretty much all the time.
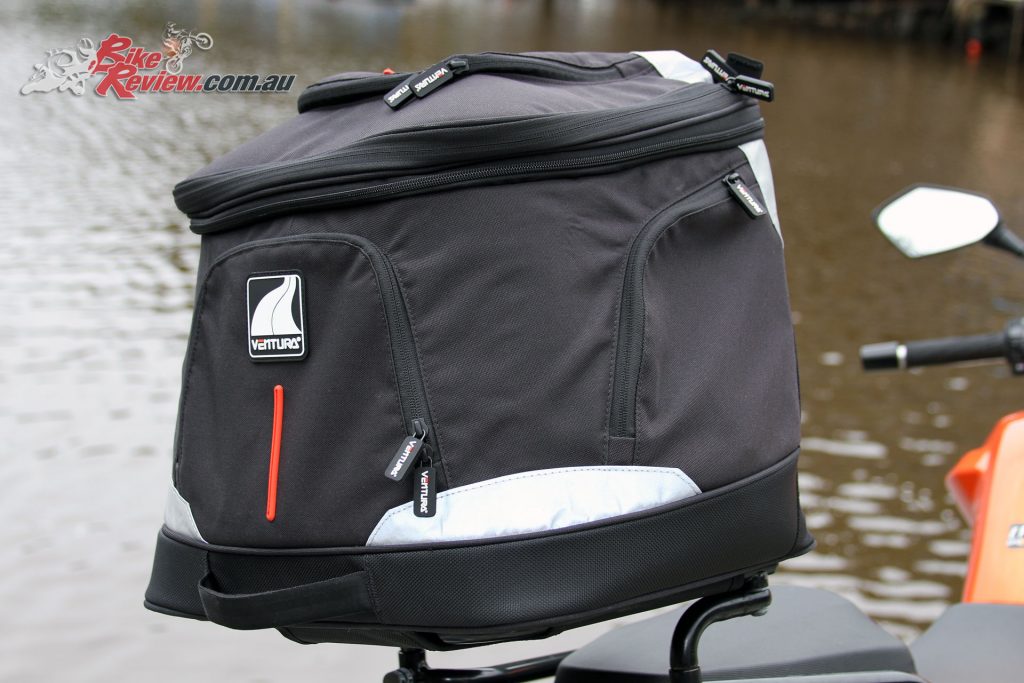
I haven’t really used the four side and top pockets yet, but no doubt I’ll find items that find their way into each of them over time. Maybe one of Kenma’s Gryyp tyre puncture kits
I found Ventura’s trademark red interior helpful on a few occasions when looking for smaller items. The zips and fabric seem quite sturdy so far, and I expect that this pack will last me a long while.
Should I upgrade my bike in the future, it will only need a different set of L-Brackets to attach the EVO Rack to, which will minimise costs for changing over the whole luggage system.
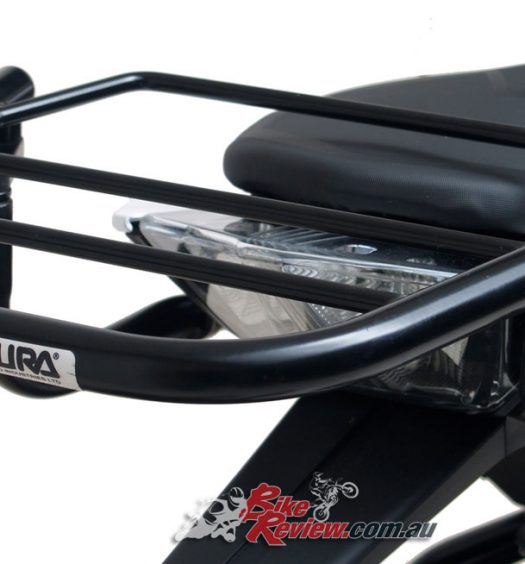
The EVO Rack is a simple yet effective flat rack, which aside from fitting the EVO-40 and EVO-10 packs, also allows you to utilise it for smaller atypical loads when necessary.
I have yet to ride in heavy rain, to get an idea of how weather proof the EVO-40 is, however there is an optional storm cover available so I suspect that there may be a limit to how much it can take, and using a liner like a rubbish bag is always a smart choice for anything valuable or that needs to be kept dry.
One of the limitations of the pack that I have found is its practicality once you take it off the bike. The two handles (top and lower front) are designed for ease of mounting it and removing it from the sports rack.
Outside of that, the handles aren’t in practical positions to carry the pack over short to medium distances – say from the parking station one block away from a work site, particularly if the pack is full. A strap system would be a welcome addition to allow a balanced and comfortable carrying position when needed. I know Kris runs a camera bag shoulder strap off his Rally-Euro Bike-pack for carrying the bag around.
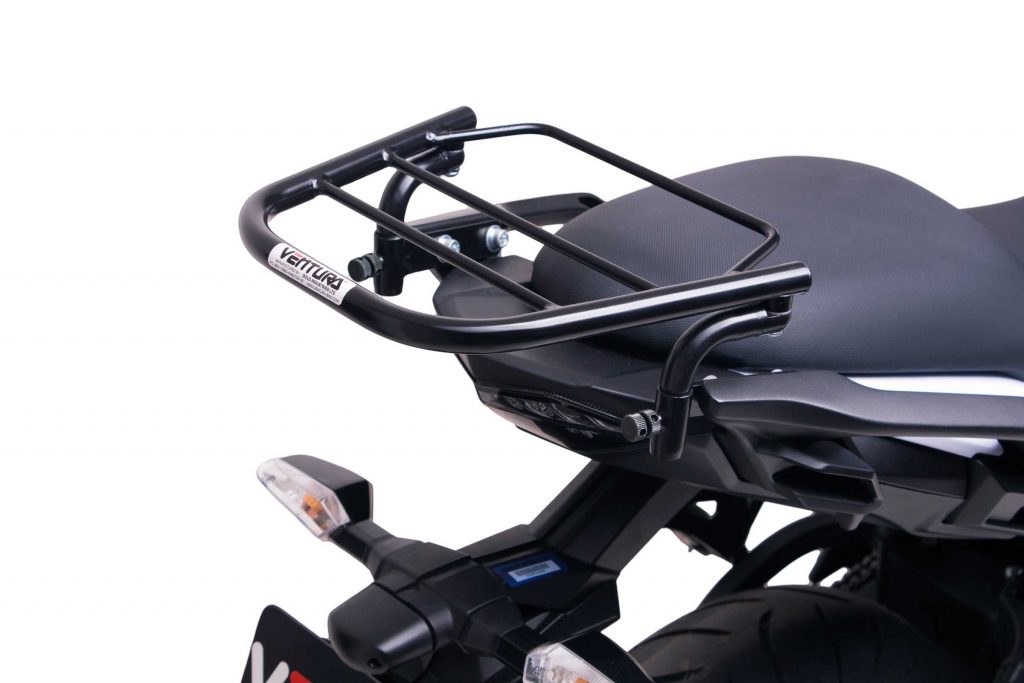
Ventura EVO Rack to take the EVO bags. Instead of using a vertical loop over which the back slips down, these new racks slide into the base of the bag and the bag is then clipped into place.
Also because there isn’t any practical way to secure (lock) the pack to the rack (that I’ve have found), you either risk having someone unclip it and take it (or even potentially loosen the locking nuts and pull the whole rack off), or you lug it with you even if you may not need everything in it for that particular trip.
All in all, I’m very happy with the EVO-40 and I’ll certainly be giving it a lot of use, particularly as I look to potentially commute from the Central Coast to Sydney on occasion in the future. It’s a valuable, stylish addition to my bike.
Check out the Ventura range here and head to your local shop – you can also give Kenma a call on (02) 9484 0777.
The Verdict | Ventura EVO Rack and EVO-40 Pack Review
Convenient!


