John adds some important mods to his V-Strom 1000XT, ensuring it's ready for the long miles and off-road adventures... Words and Images by John Arens
In this update we fit some useful, and in some cases, integral mods to my Long Term V-Strom 1000, with a Givi belly pan (sump guard/skid plate) and set of crash bars, ensuring that even being adventurous won’t catch you out. Two other mods which are good regardless of your riding habits are a RadGuard radiator guard, and a headlight protector.
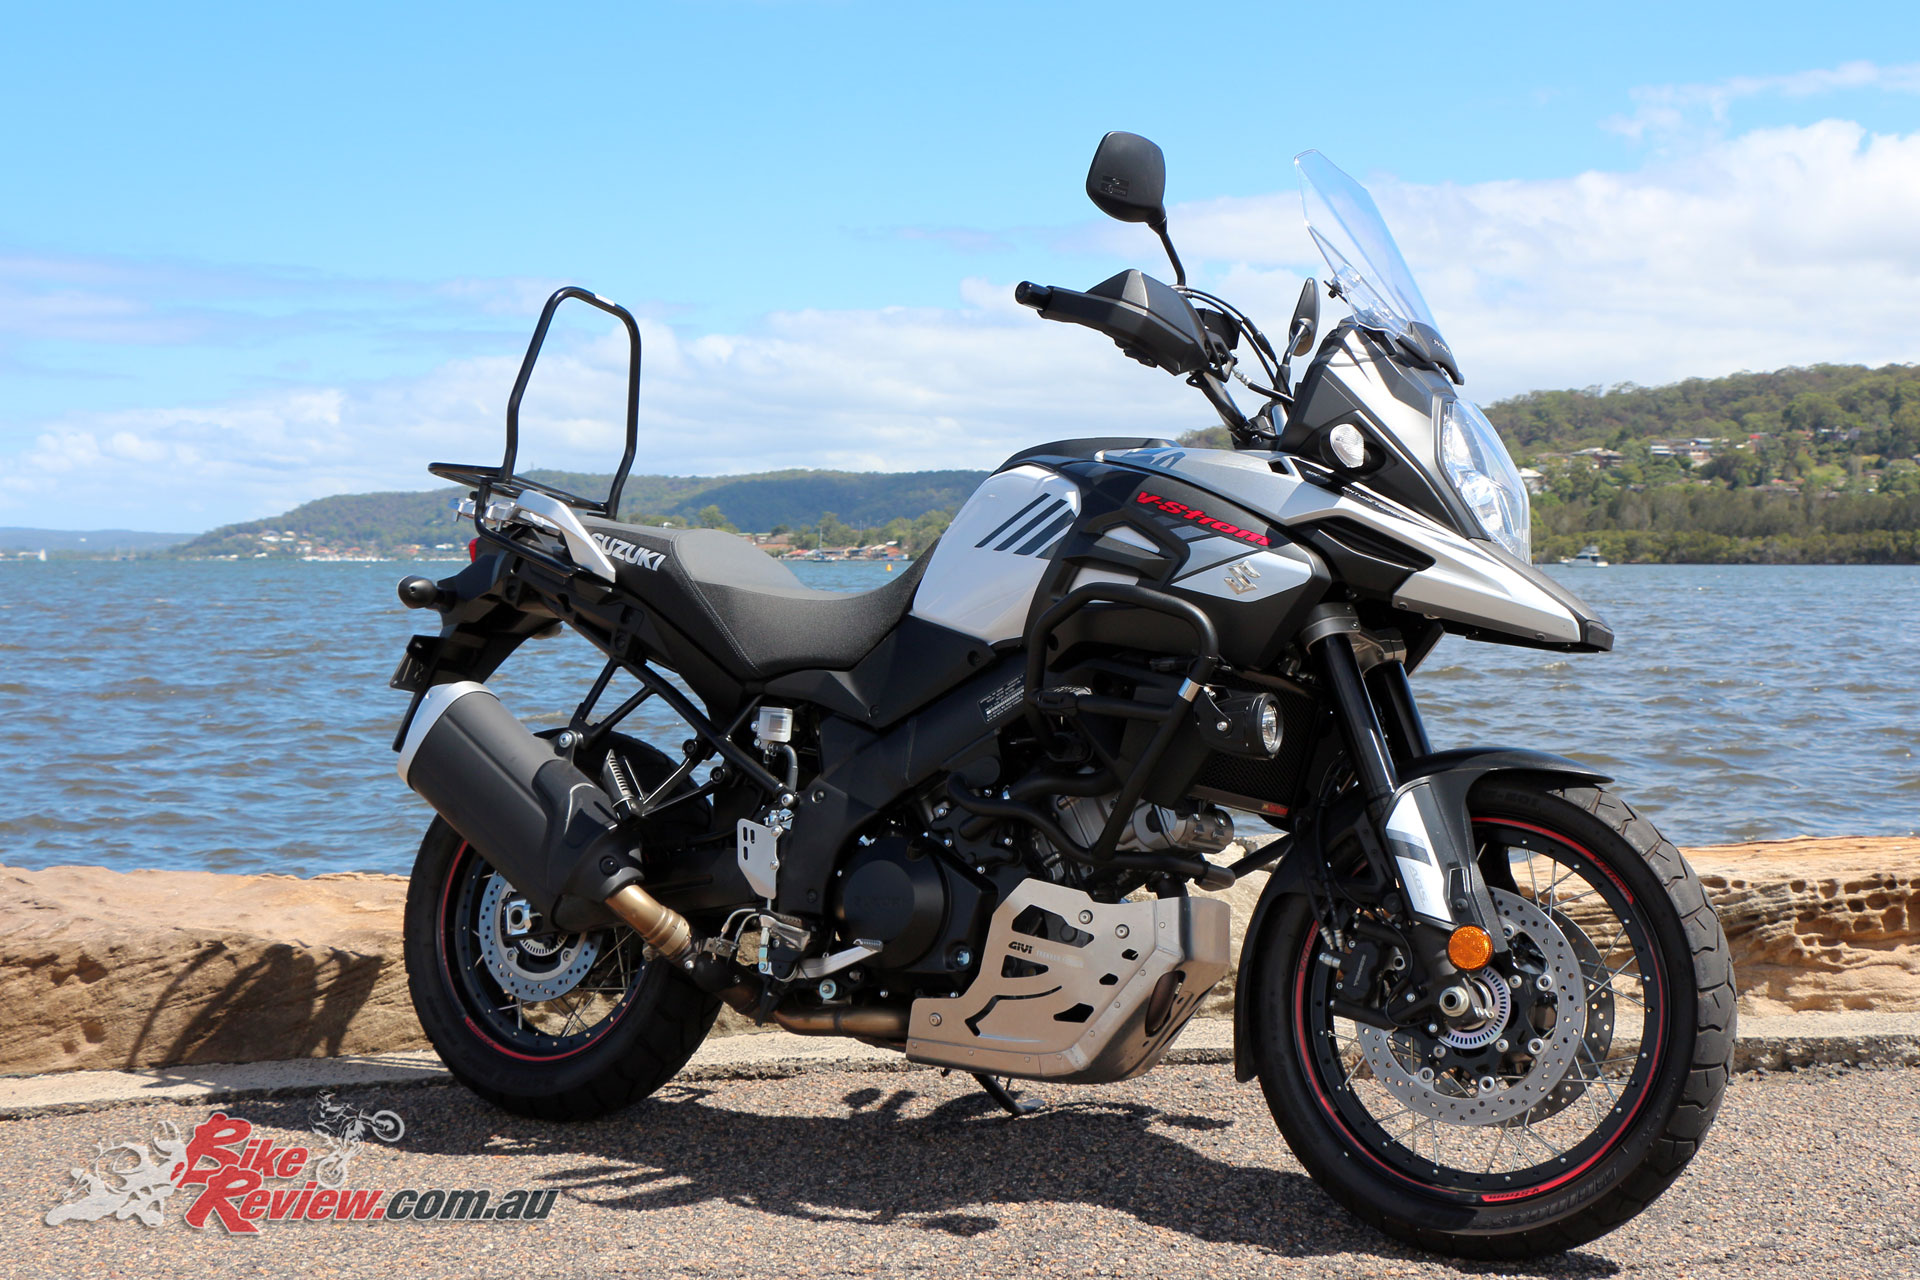
Upgraded! John’s fitted a number of modifications to his V-Strom 1000, with Givi crash bars and skid plate, as well as a headlight protector and RadGuard, not to mention one of our favourites – a Ventura rack system.
If you are handy and have a small set of tools you can save yourself a few bucks by doing this yourself, don’t be too worried about it because it’s not that hard and if you are worried ask a mate to help, or get your local dealer to do it for you as a last resort.

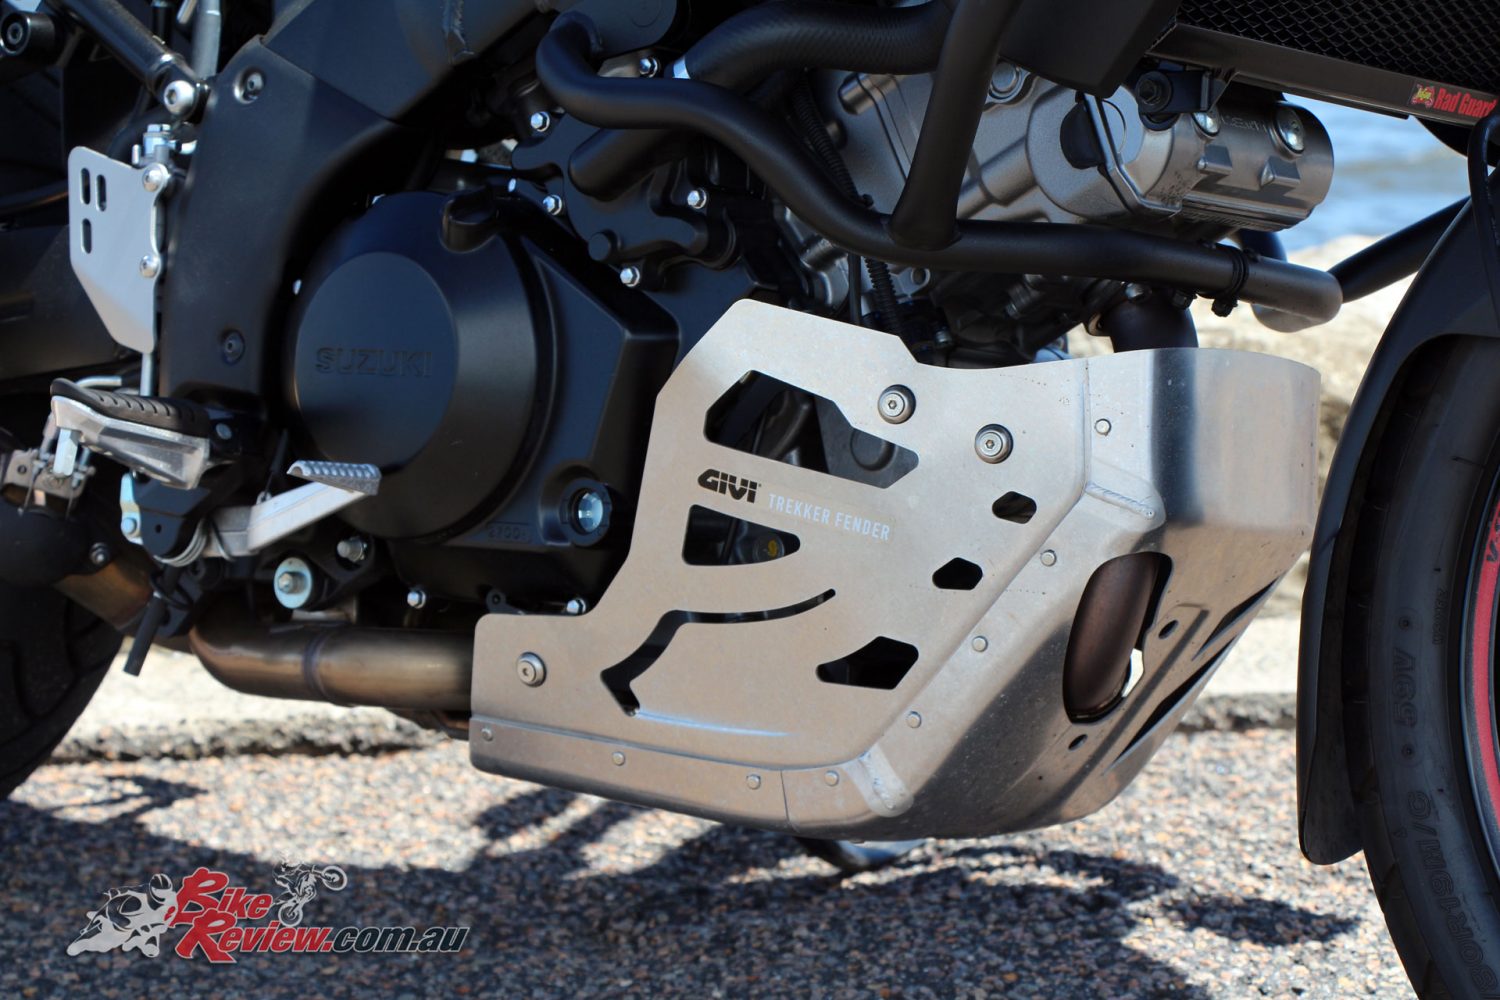
Givi Skid Plate Fitment
Fitting the Givi belly pan (sump guard/skid plate) is a fairly simple process all you need to do is have some simple tools like some metric Allen keys, an 8mm socket and bar and you’re on your way.
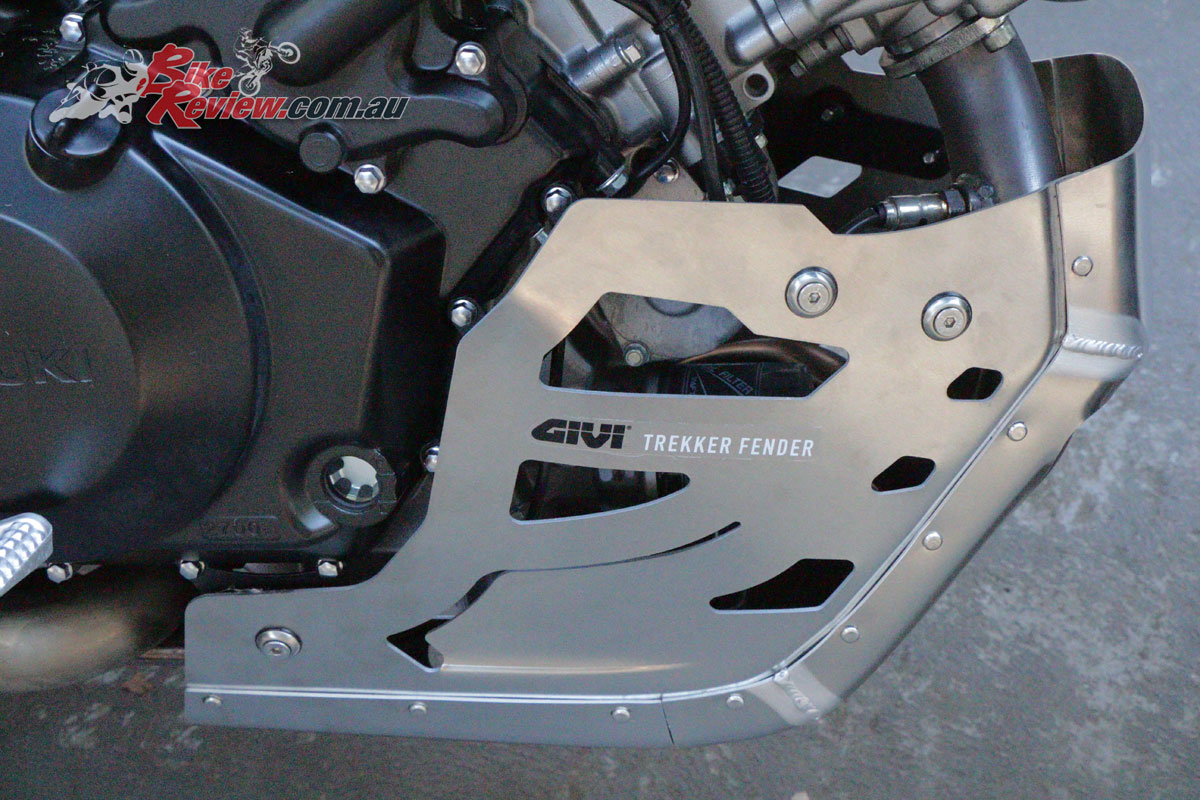
The Givi Skid Plate fitted and ready to go
First remove the plastic cowl that covers the front exhaust pipe, then with your socket and bar remove the four stock mounting brackets. The instructions aren’t that good but you’ll figure it out as you go along.

Ensure you use the correct brackets one each side!
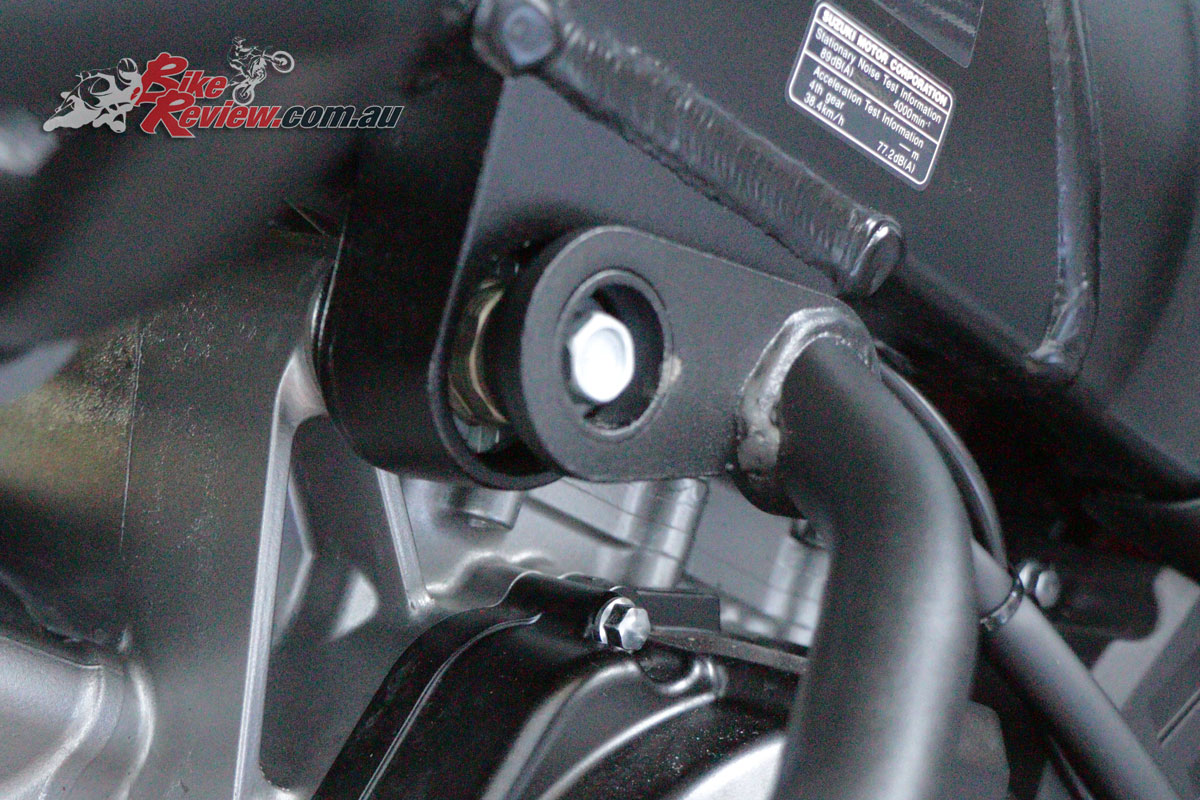
Replace the old brackets with the four new ones supplied in the kit making sure that the long one is on the front of the engine and the smallest pyramid shaped ones are both on the RHS of the engine, the other two will be on the LHS.
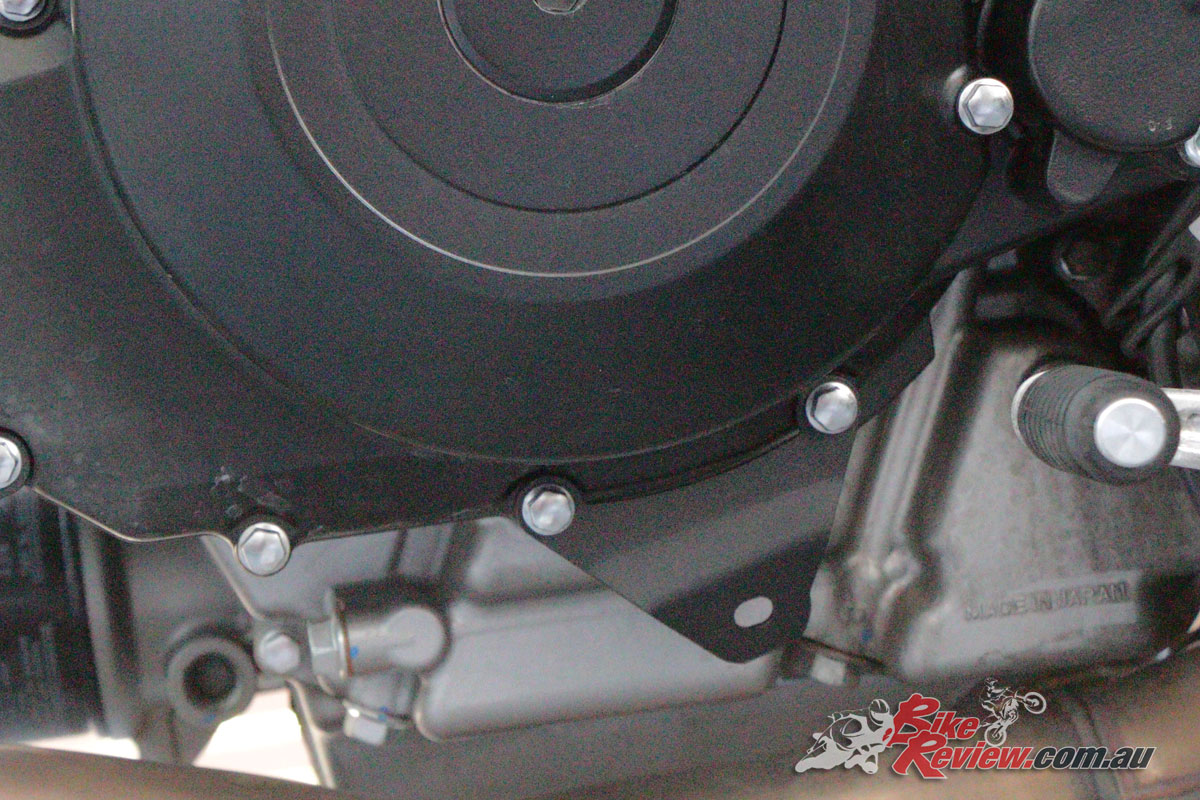
The opposite side’s mounting bracket
Once the brackets are fitted then fit the rubber grommets to the belly pan leaving the largest part to the outside of the pan. Next it’s just a matter of placing the screws and cup washers through the grommet then tightening the nuts, trying not to lose the nuts inside the pan, as they can be a bugger to get back out, and a magnetic screwdriver can be a handy item to have.
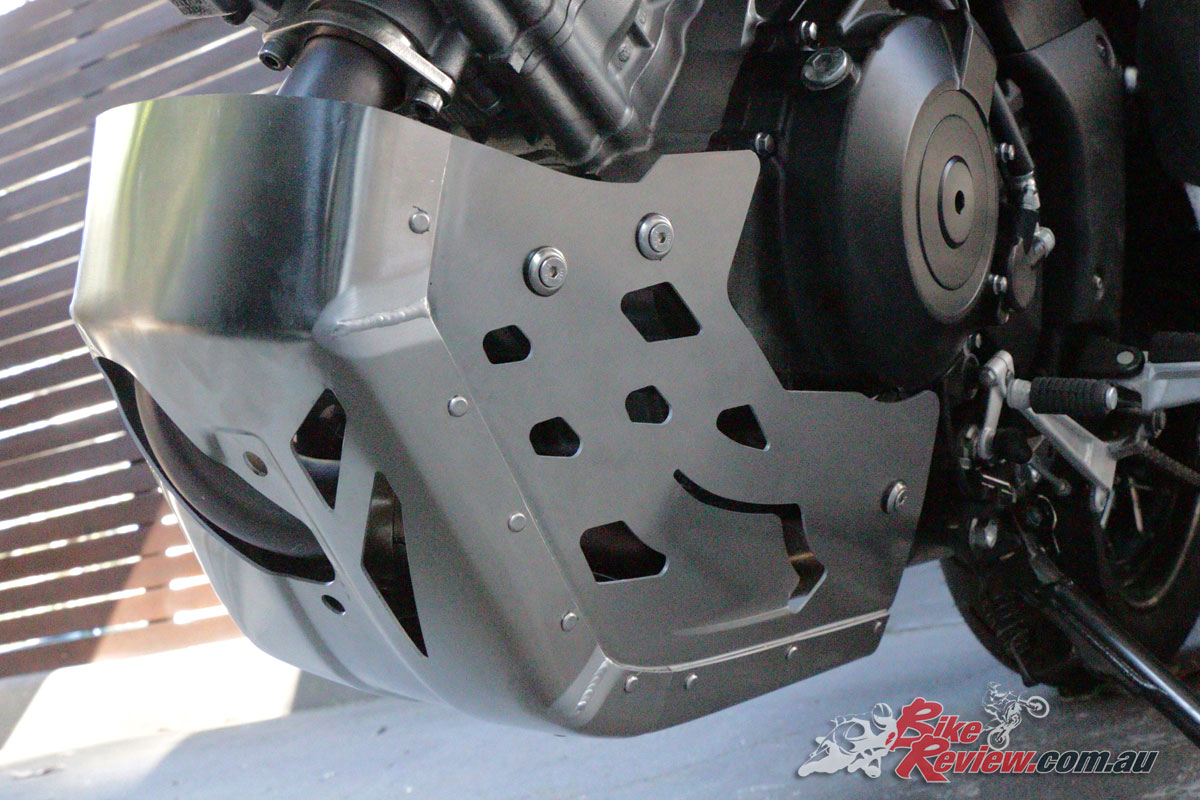
This is an easy job and shouldn’t take much time
Givi Crash Bar Fitment
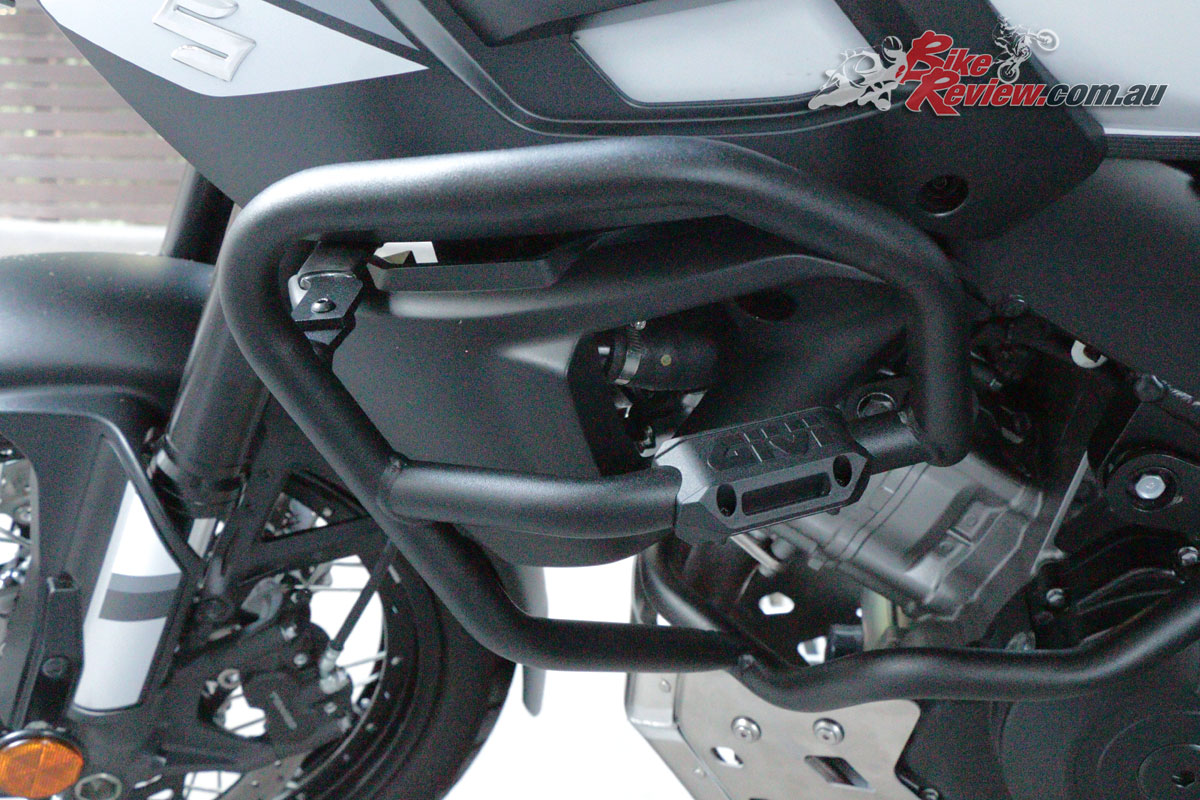
Fitting the crash bars is not as simple, with the kit consisting of a set a frame for each side of the bike, which are joined by a sleeve in front of the header, as well as an additional mounting bracket onto the radiator mounting point.
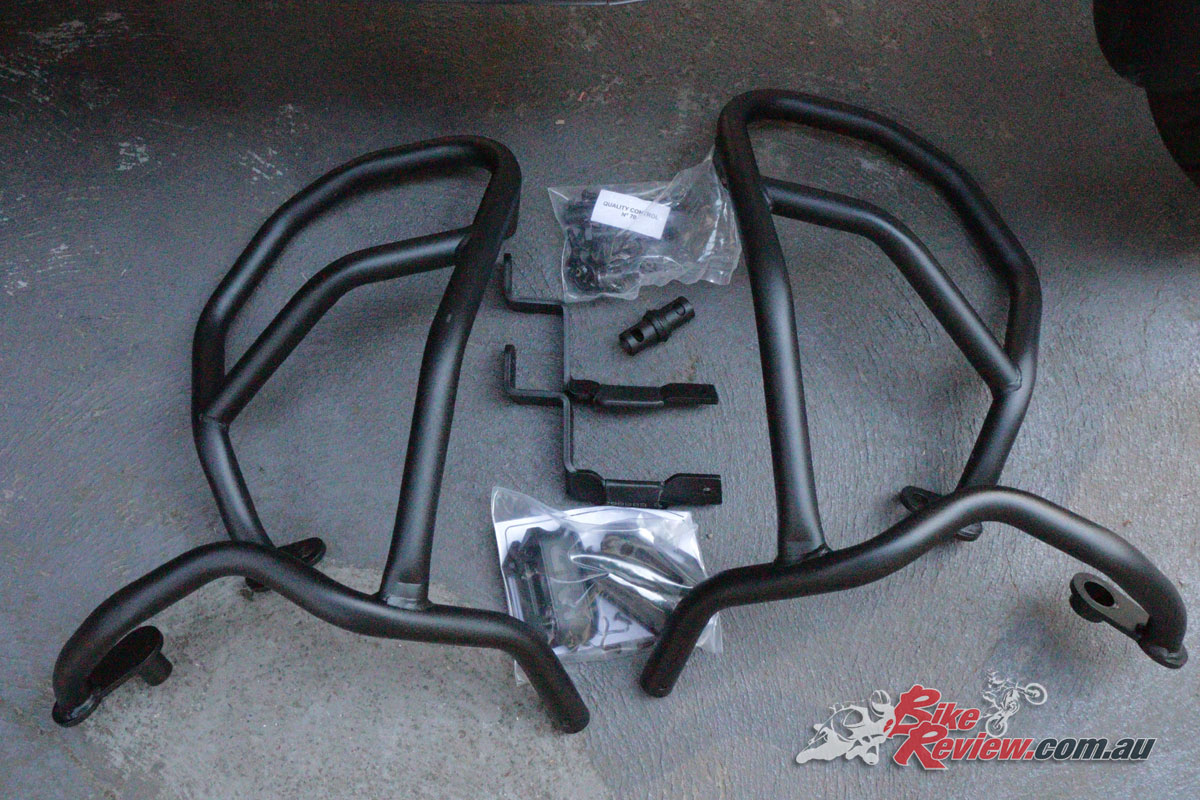
Here’s the full Givi Crash Bar assembly for the V-Strom 1000
There are three mounting points as such, including engine/frame points, plus the point where the two sides of the crash bars come together and you will need to have the following tools:
- Large socket set with a breaker bar
- 14mm and 17mm sockets
- 10mm ring spanner
- 8mm ring spanner
- Metric Allen keys
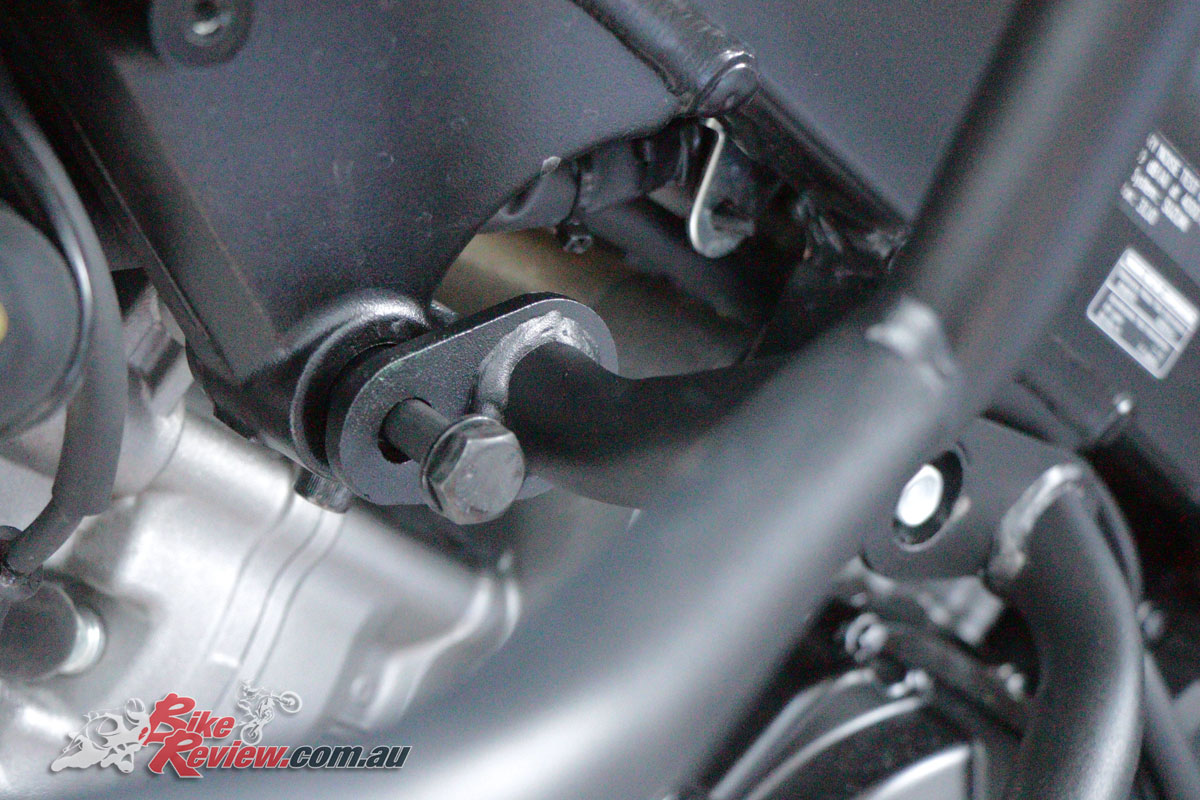
The hardest part here is to undo the main bolt that travels through the frame, and even though you can do it yourself, having an extra person to hold one side of the bike would be a safe choice.
The main mounting point is through the frame and engine mount
Once this main bolt is removed, then remove the bolts under the petrol tank on both sides with a 14mm socket. You will find two spacers in the kit, using the deeper one on the main bolt on the LHS, slide the bolt through the LHS crashbar assembly, through the spacer, then place into the frame.
Ensure you use the spacers for the correct mounting points
Fit the small spacer in the bolt hole under the tank on the LHS using the larger of the two bolts in the kit. Do not fully tighten any bolts until the bars are completely in place.
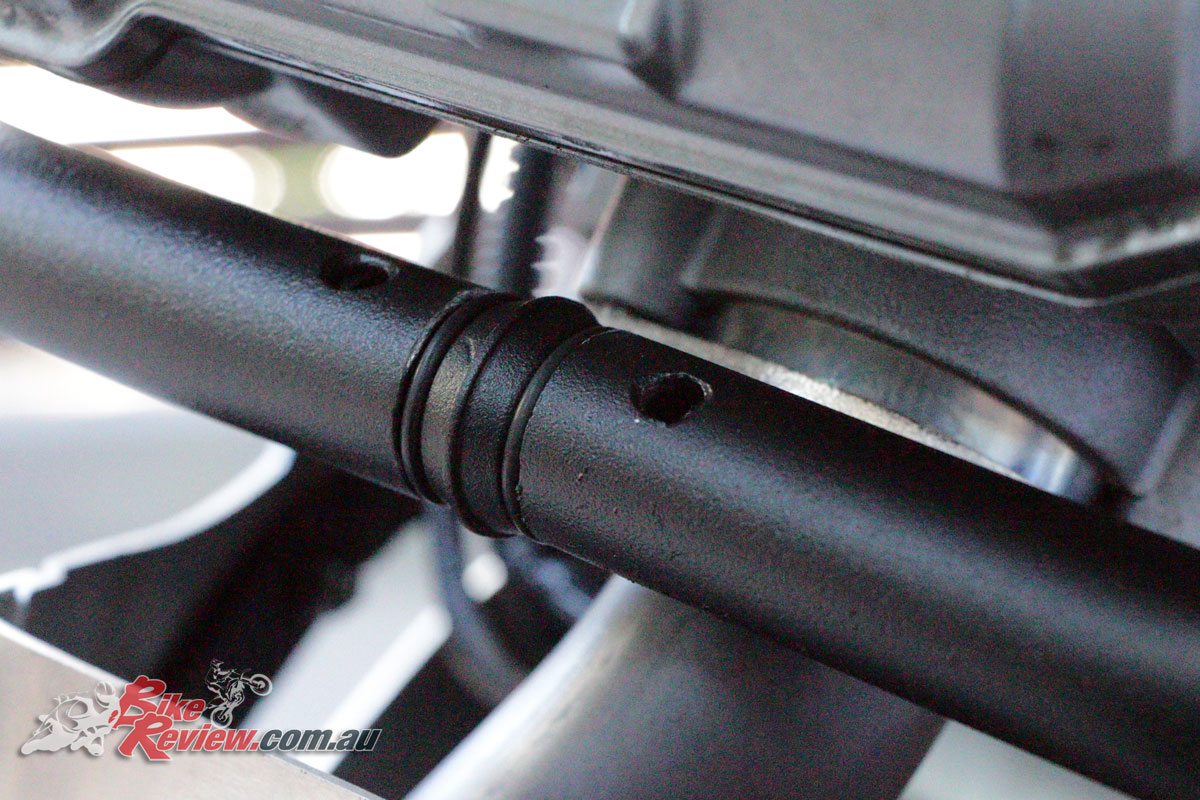
The two side’s crash bar assemblies are joined in front of the header as seen here. The two holes are where the bolts are added.
Place the RHS crashbar assembly into position and tighten the main bolt into the threaded part of the RH bar but don’t fully tighten it. You will also find a 50mm long sleeve and two O-rings in the kit, fit the O rings over each end of the sleeve and line up the hole on the LHS bar, joining the two crashbar assemblies. Fit the bolt and nut.
Here’s the RHS crash bar assembly fitted
Once done fit the replacement bolt under the tank on the RHS and then fit the last bolt into the sleeve and check all bolts are still slightly loose.
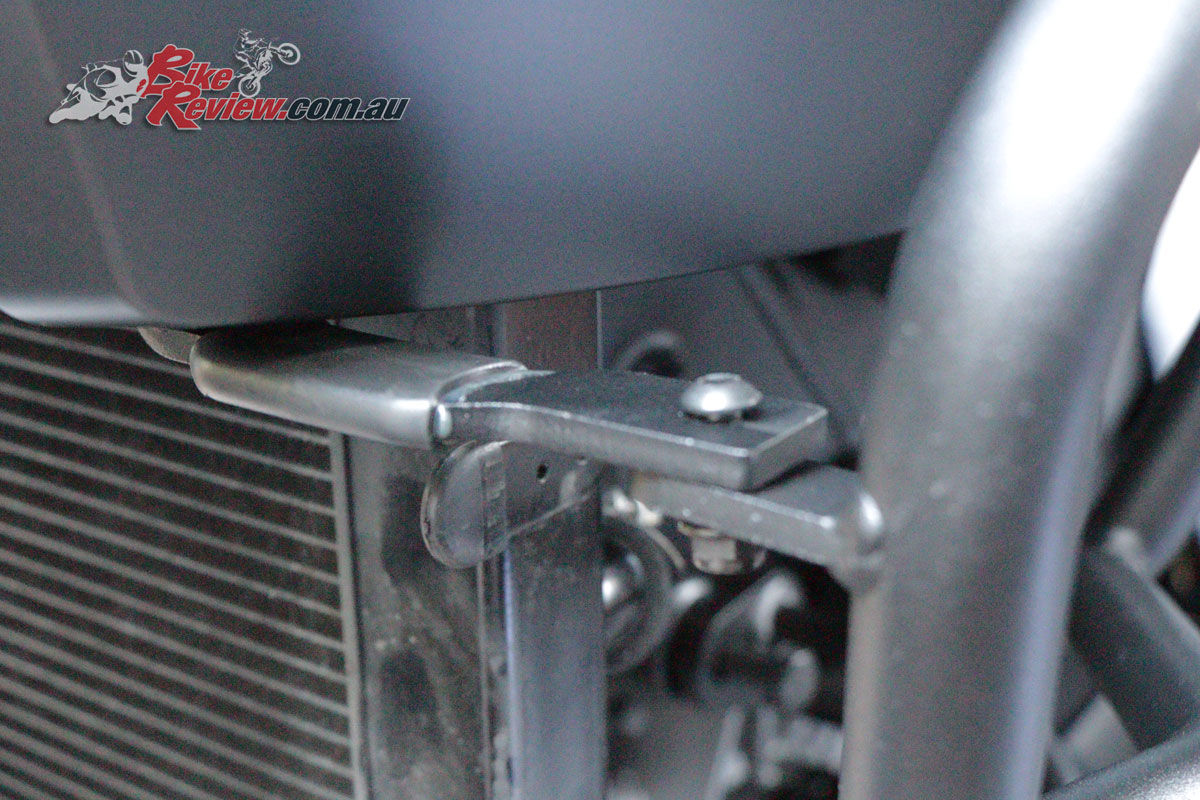
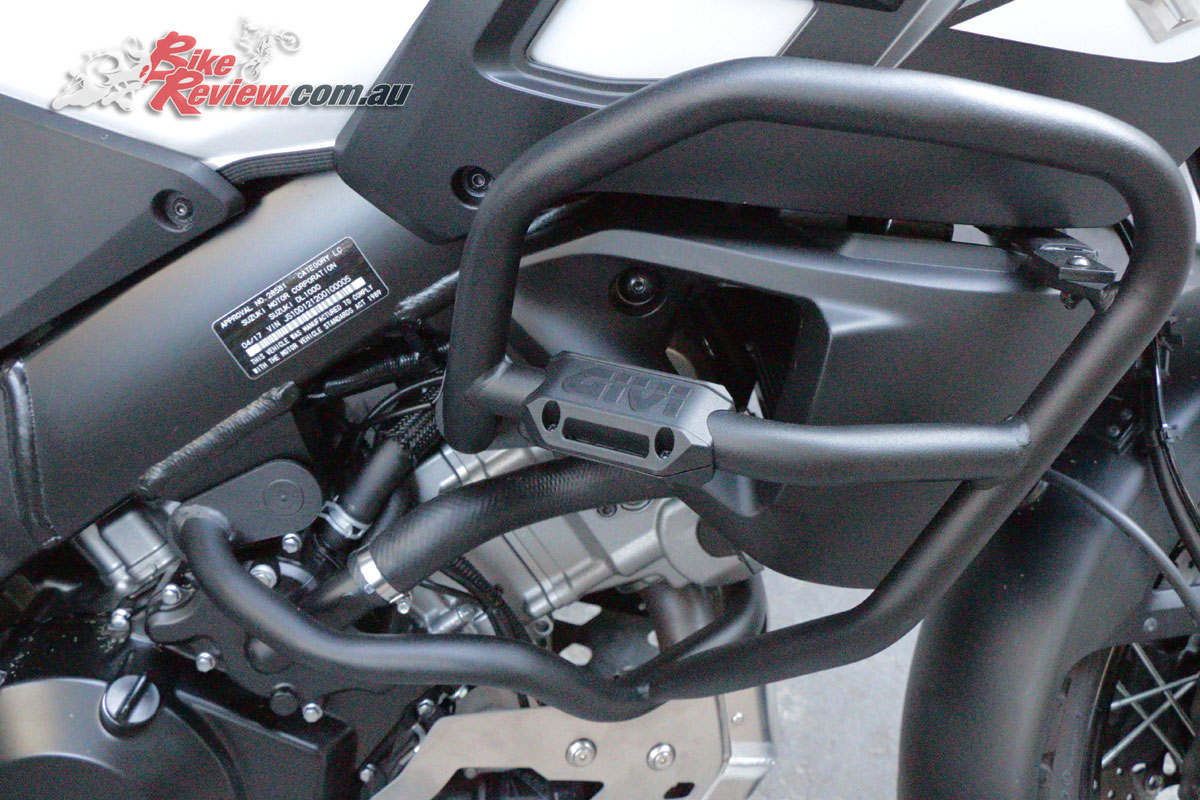
Also don’t forget the radiator brackets!
There are two brackets which are mounted on each side of the radiator, once you have removed the stock bolt one side at a time, fit the bracket using the replacement bolt supplied. Repeat for the other side, making sure that the bracket sits on top of the lug on the bar, and fit the two small bolts supplied and tighten all bolts and recheck.
And here’s the LHS assembly
RadGuard Radiator Guard & Headlight Protectors
There are another two parts getting fitted to our long termer and both are vital to saving you a lot of heartache and your hip pocket, one is a Radiator guard! Yes, there are many bikes running around without them, maybe their owners feel it won’t happen to them but if you’ve ever holed a radiator you’ll know what a bummer this can be.
Our very good friends at RadGuard have been manufacturing guards in Coffs Harbour for many, many years and I know that they produce a great product, in our case there are two different models available to choose from, there’s one for a standard DL1000 and this will cost you $174.00 inc Postage, the other has been designed around Givi Crash bars and this one will cost you $199.00 inc Postage.
Yes, I can hear you saying I’ve never broken a headlight before why should I fit one now! Well now is the right time! Have you asked the spare parts guy how much your headlight is worth? No, then do yourself a favour and find out.
‘Where’s Zed’ was formally known as Australian Motorcycle Headlight Protectors and are an Aussie company and they manufacture on the Central Coast of NSW and produce a great product. Depending on your bike prices start from as little as $45.00. Check out their website here.
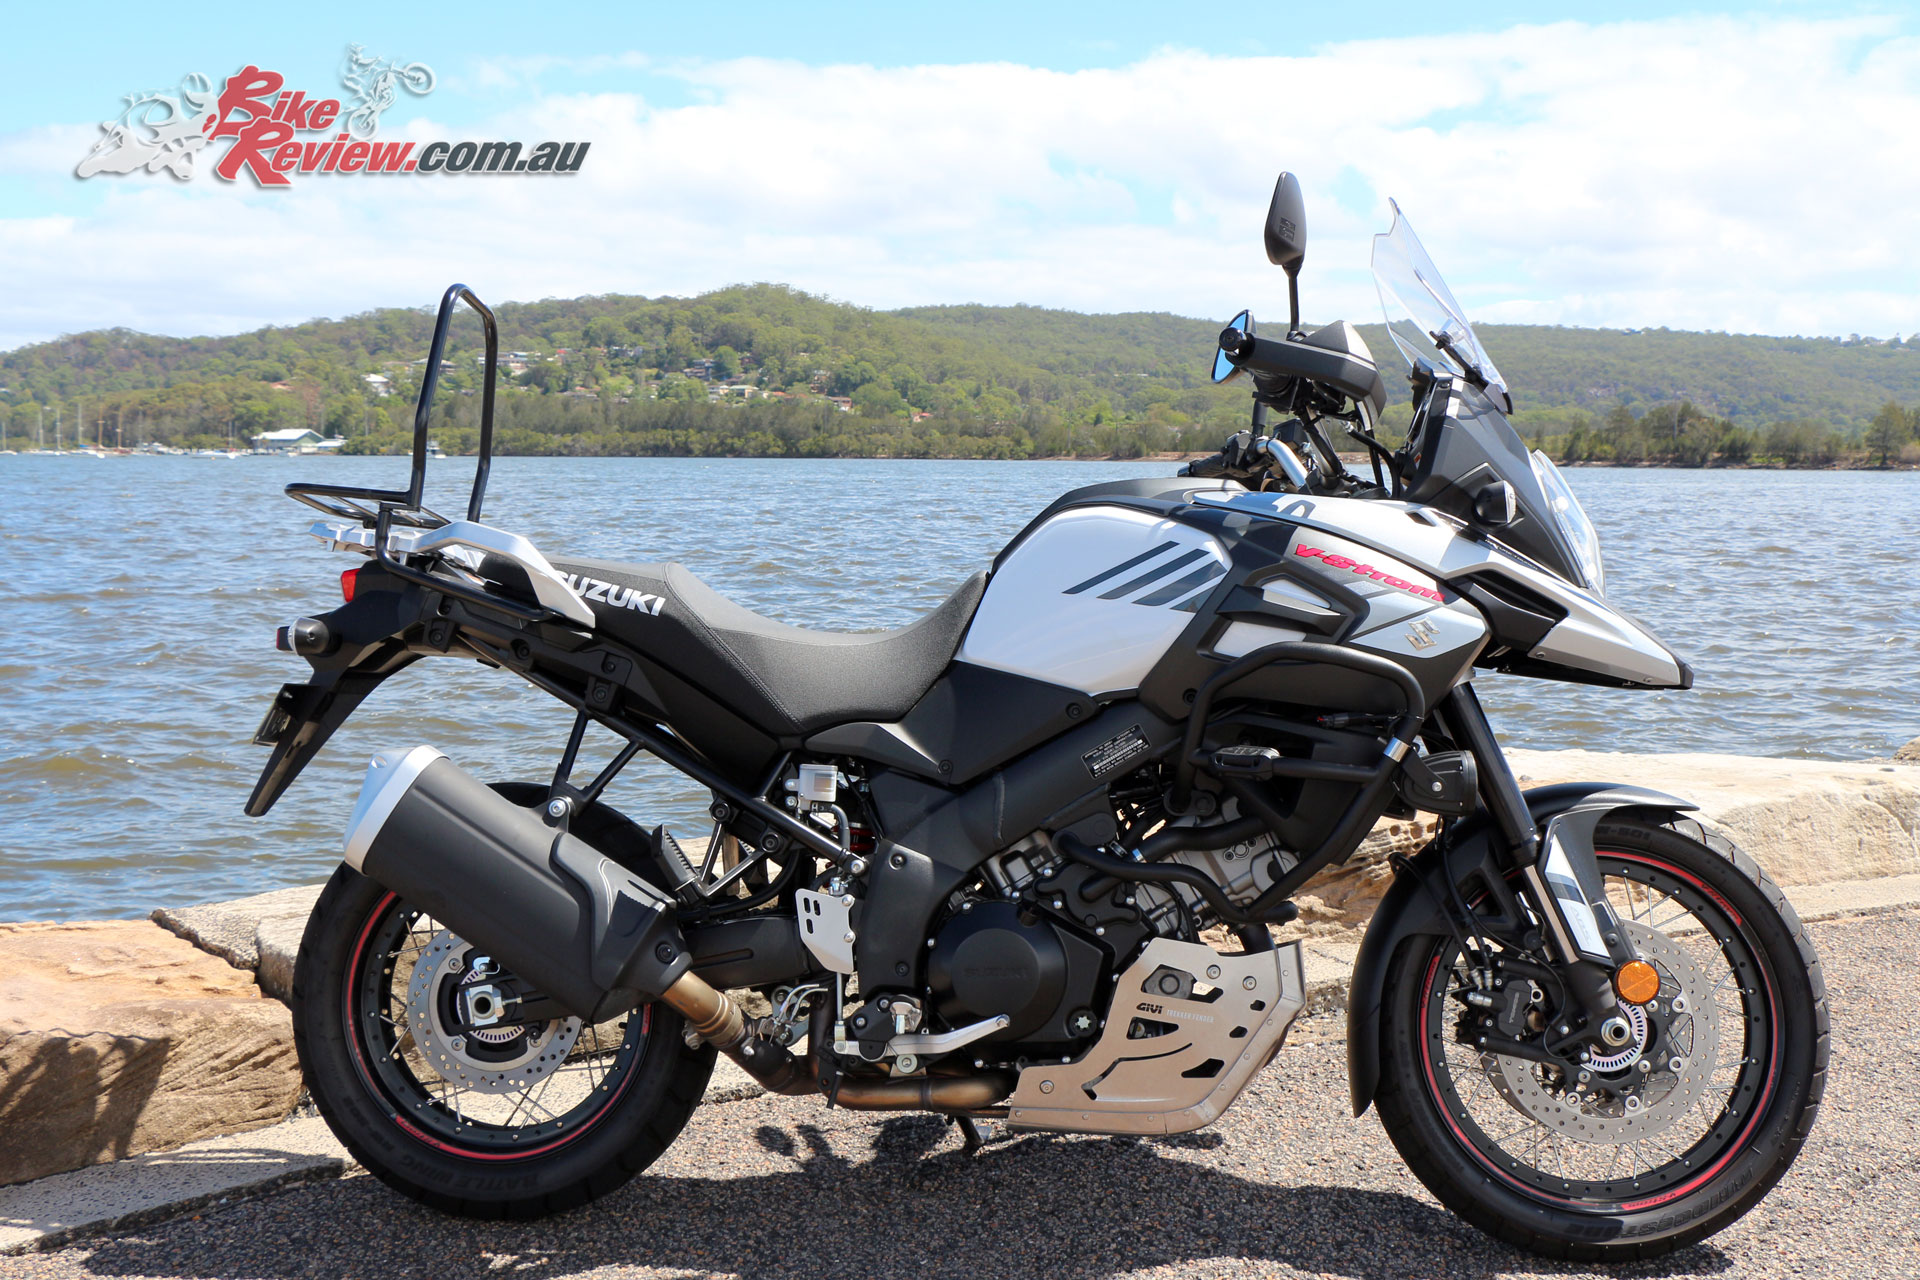
Looking great with all the new mods, with a Staintune exhaust next on the list
The next stage will be a Staintune exhaust and DNA filter fitment, so stay tuned.
You Might Also Like