How to adjust your motorcycle chain and lubricate it. Words: Kris Hodgson
Checking and correcting your chain tension is an important part of ongoing maintenance and a job to add to your regular chain cleaning and lubing.
Generally speaking you’ll eventually pick up on what is normal tension and what doesn’t look right when you’re doing your chain clean and lube, or figure out what can suggest chain tension needs looking at, like chain snatch or gear changes that aren’t smooth.
It’s also a good idea to check your sprockets when you’re changing chain tension as they are a good indicator of wear and if there’s damage it’s time for a new chain and both sprockets.
 Here I’ve just given the Daytona 675 a quick wash and stripped off the fairings as I’m doing the chain and an oil change at the same time. You don’t need to worry about either of these steps, but cleaning your chain prior to doing the chain tension can be a good idea if it is filthy. It’ll cut down on the amount of rubbish you get on your hands and also ensure the chains ready for lube after the correct slack is adjusted.
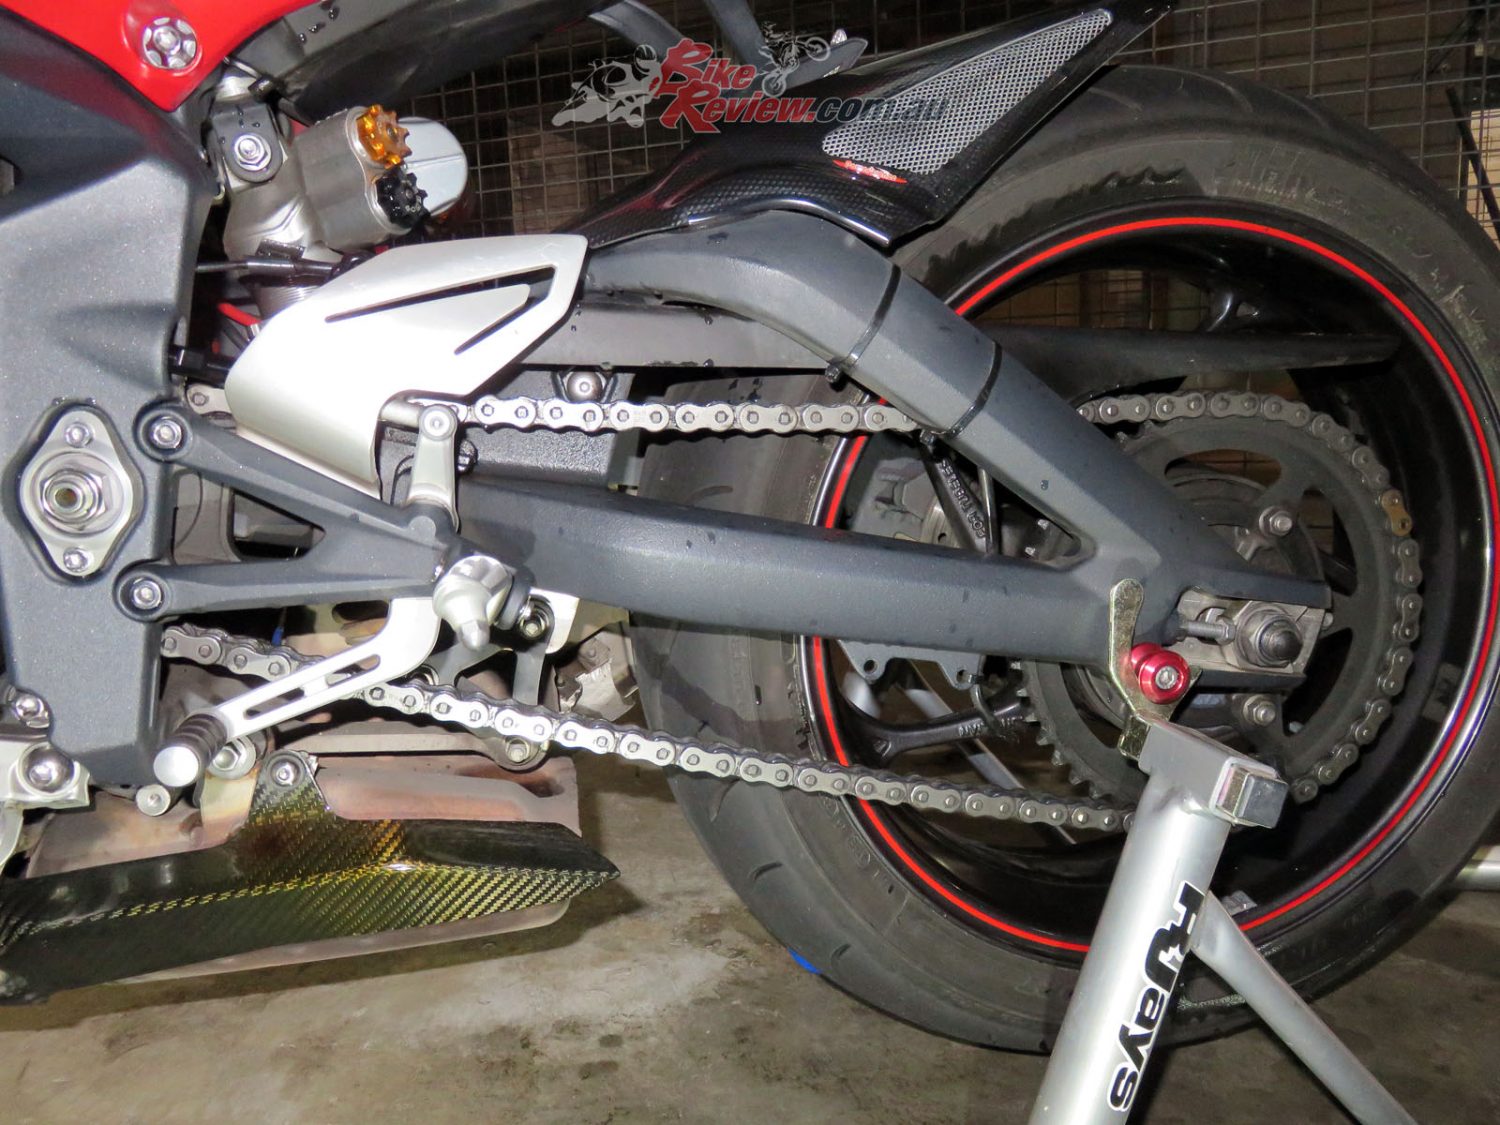
As you’ll see here we’ve also got the bike on a rear stand, which isn’t necessary but makes life much easier, especially when you’re finding the tightest point on the chain.
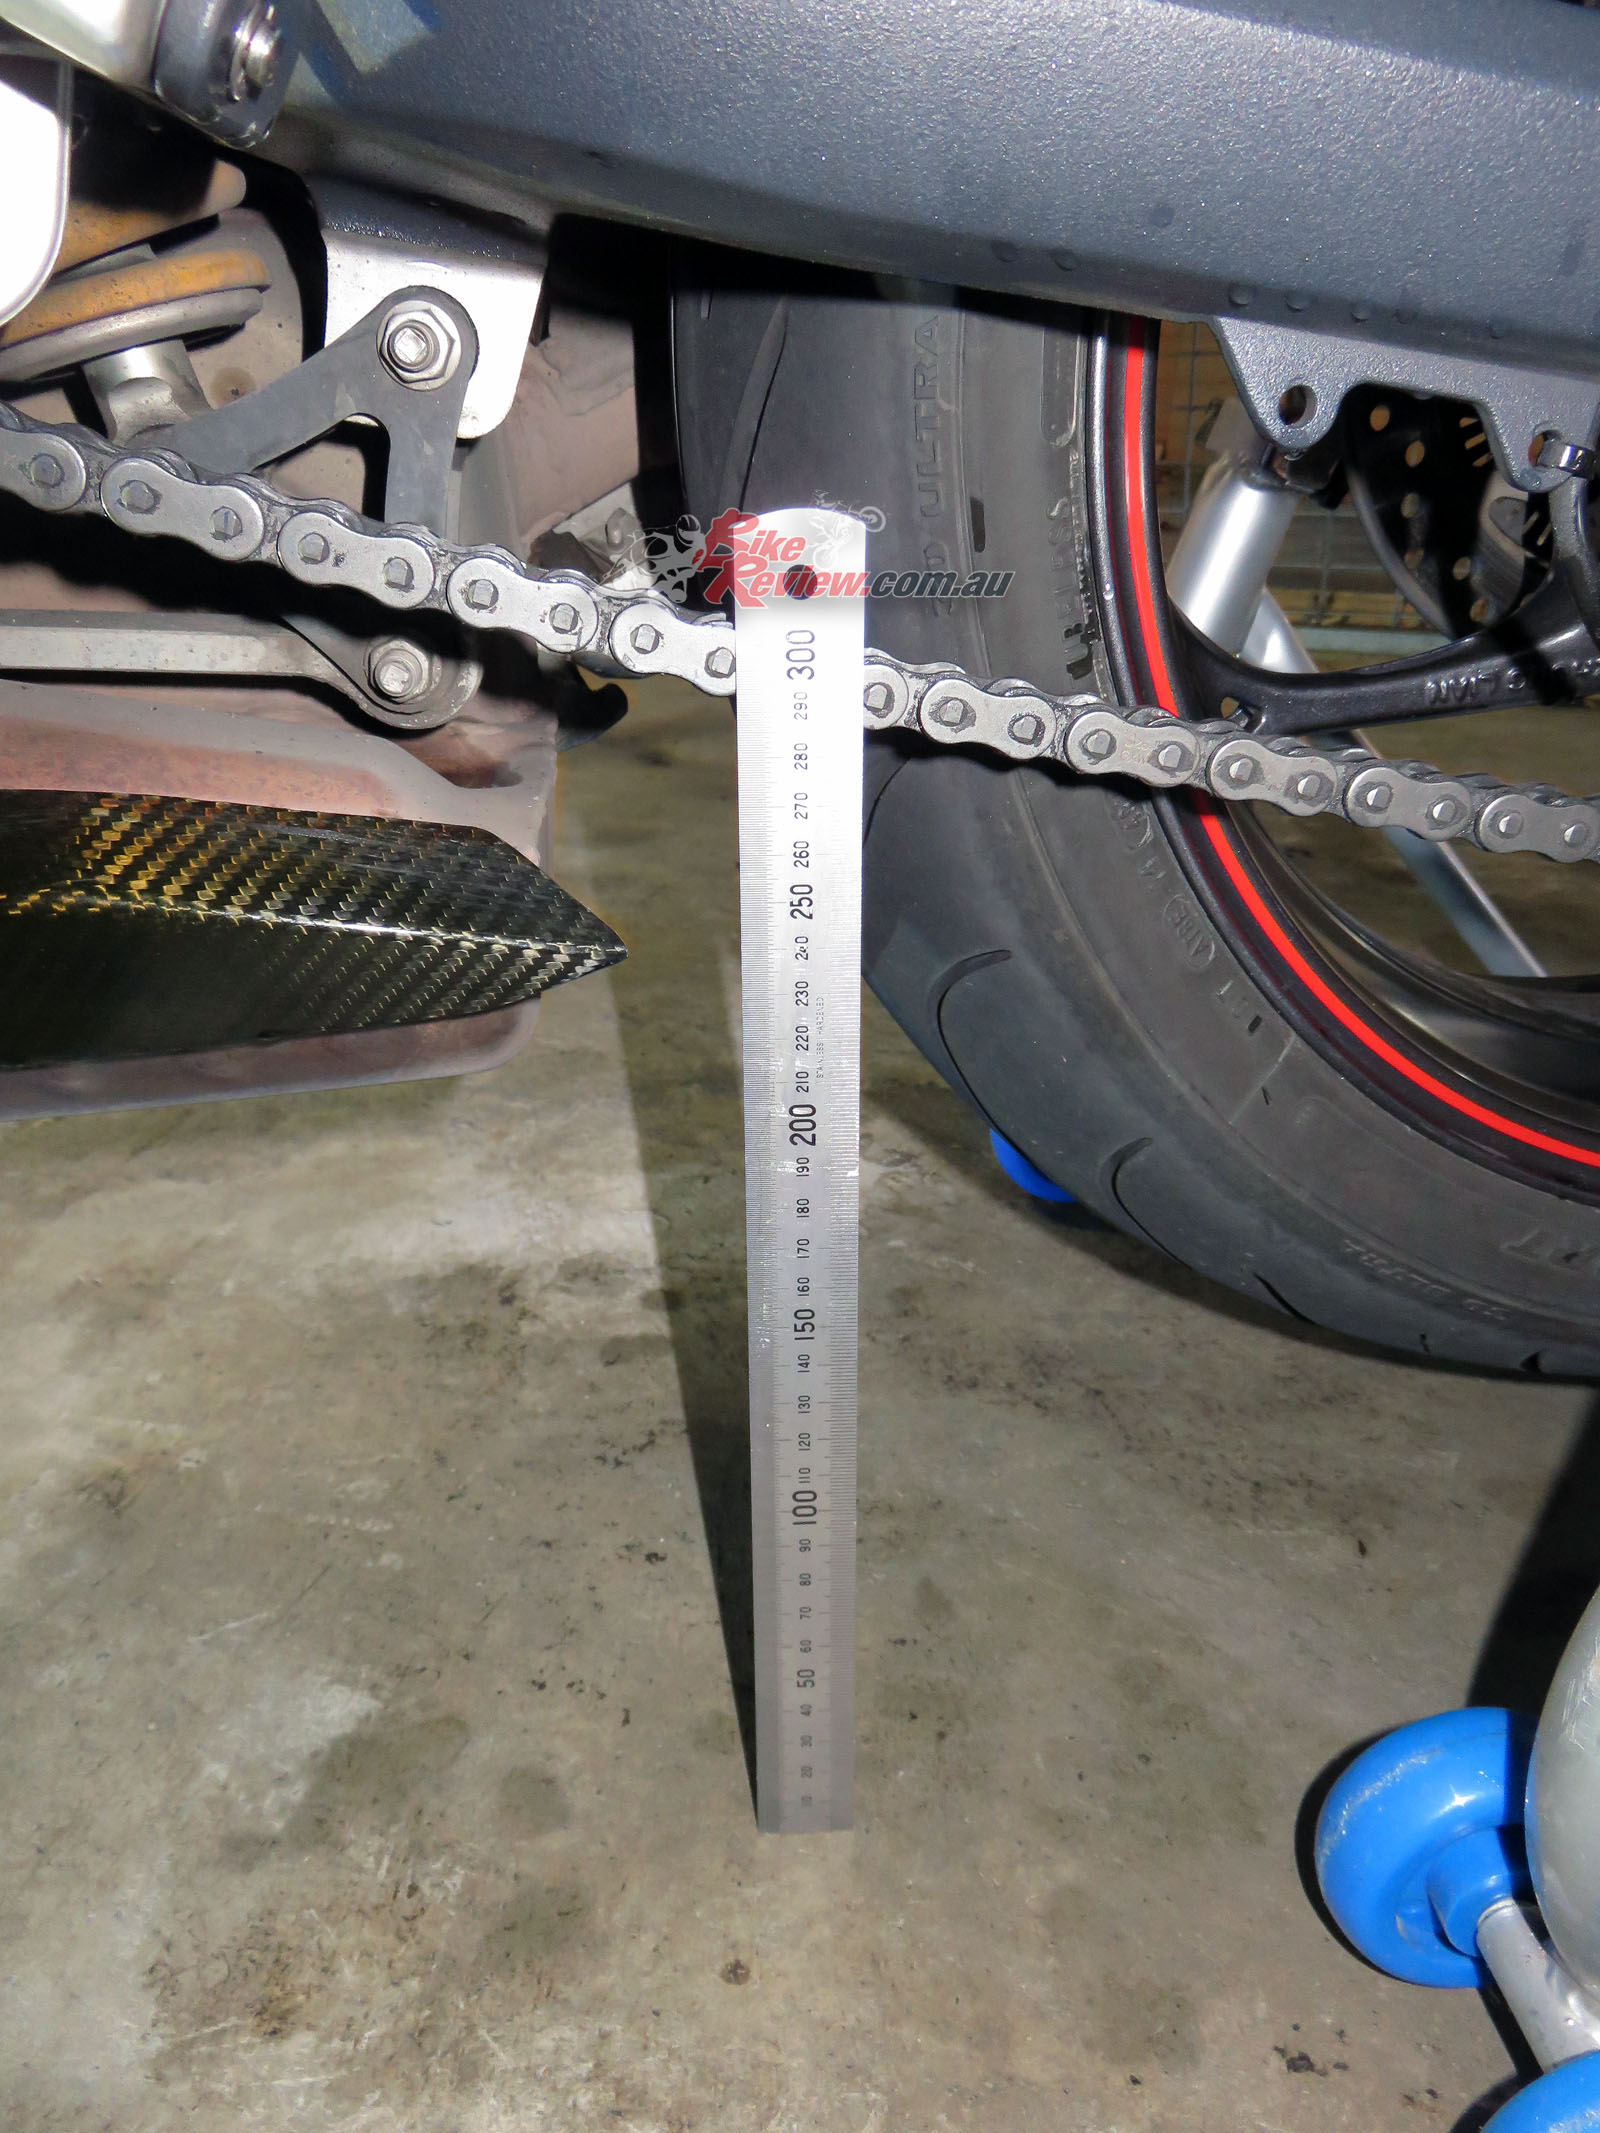
You’ll want to measure from thefloor or swingarm for consistent measurements.
First up check your chain tension. It’s a good idea to check with your Owner’s Manual to find out what out what the slack should be as it’ll vary from bike to bike, especially between double sided and single-sided swingarms.
If it’s within spec and you’ve cleaned the chain, you can just give it a good lube with a quality chain lube or wax and you’re done.
If not it’s time to break out the tools. You’ll need the rule you already used for measurement of chain slack, a socket for your rear axle, and open ended spanners for the chain tension adjusters. A torque wrench is also a good idea for when it comes time to tighten that rear axle back up, so that it is to the correct tightness.
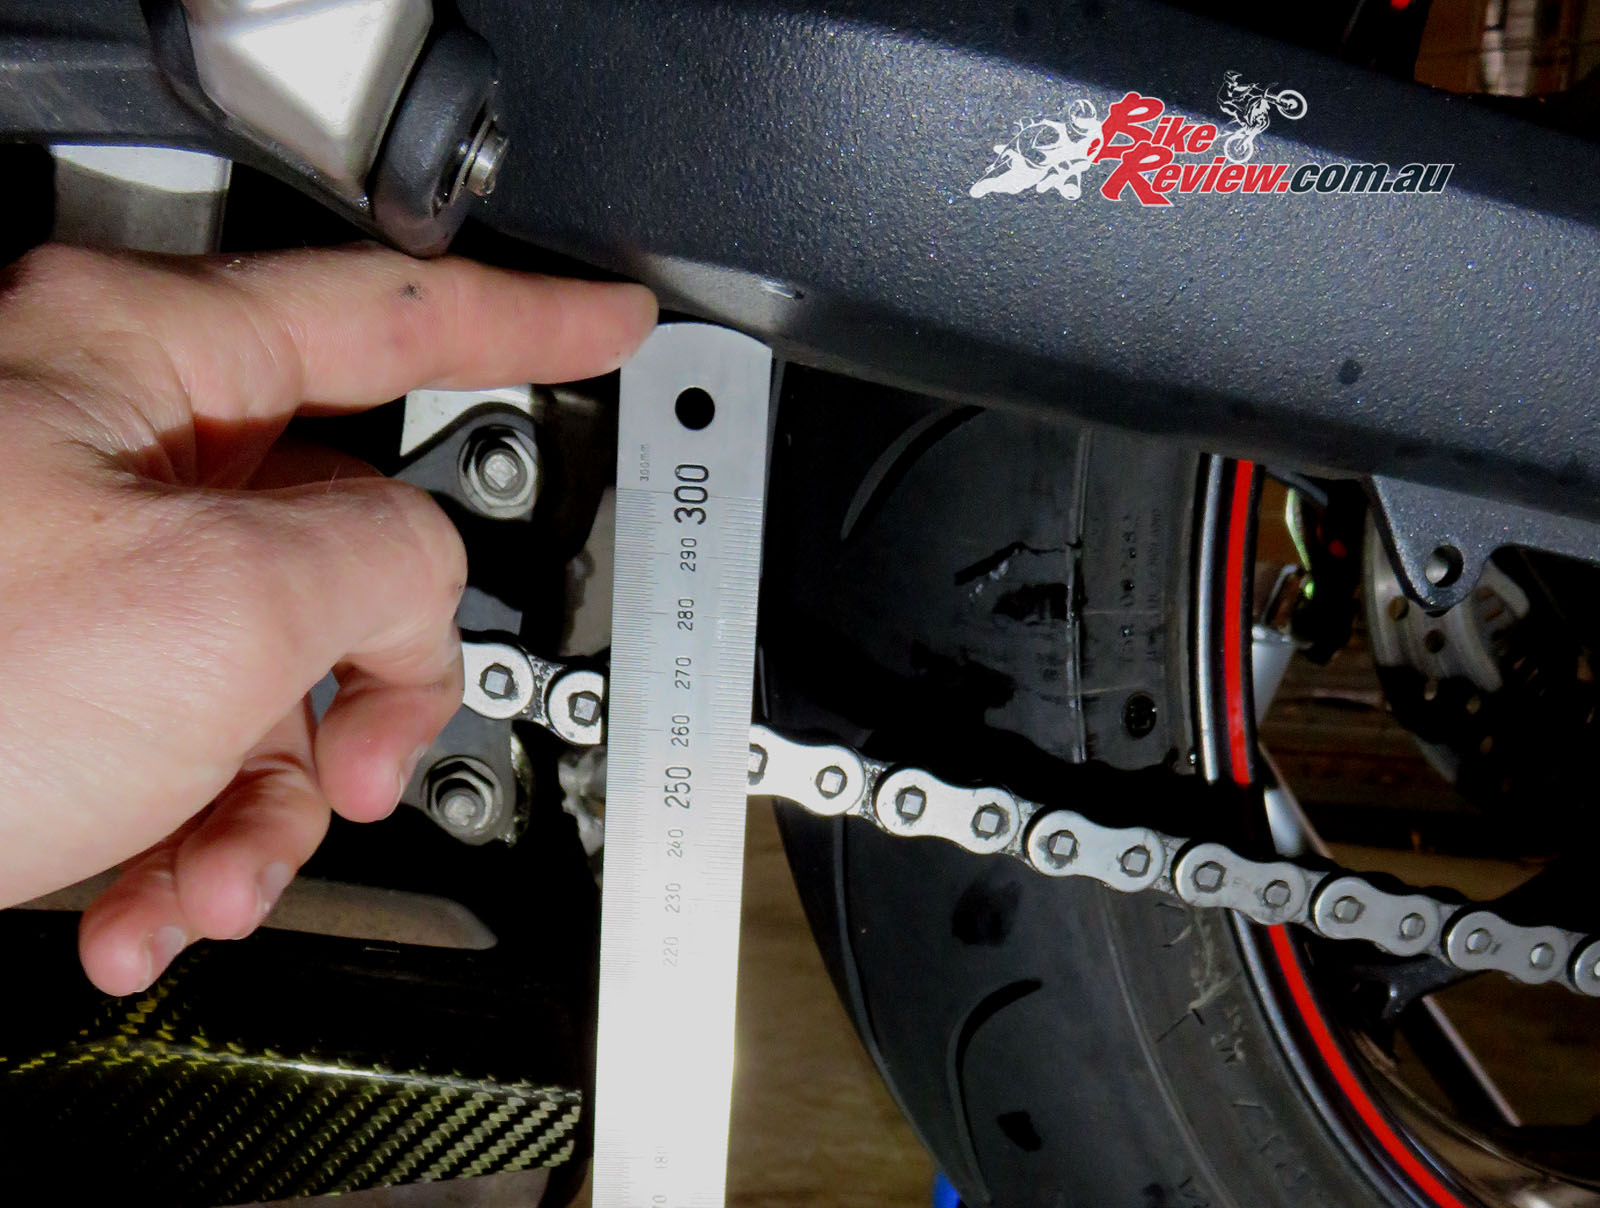
From the tightest point in the chain, measure the amount of slack. Make sure you apply pressure to the chain to get an accurate reading, both up and down.
When measuring your chain tension find the tightest point in the chain by checking the amount of slack while turning the rear wheel. There’s be a noticeably tighter point that you want to work from.
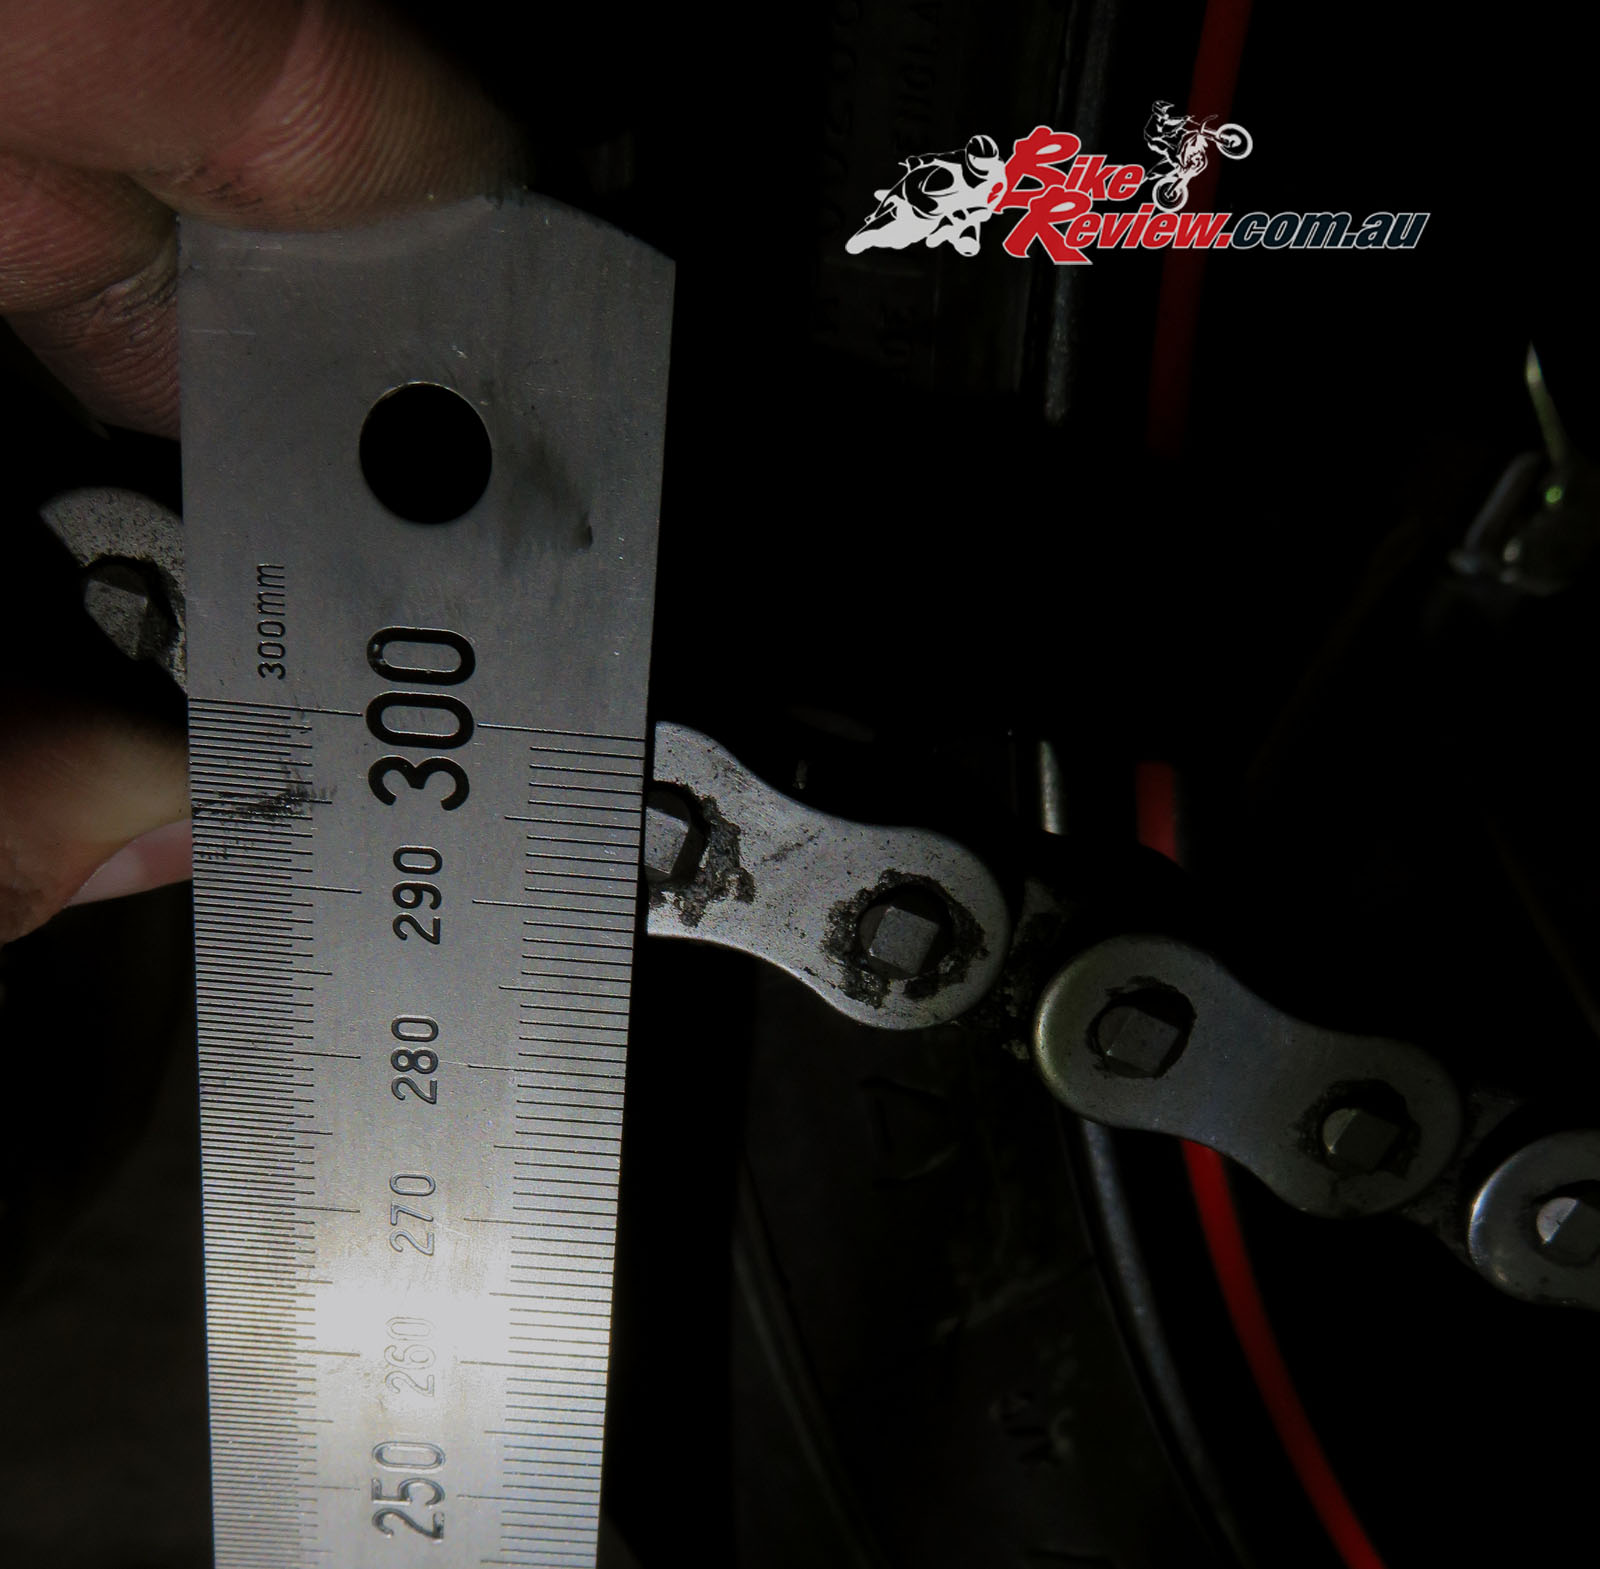
With the measurement itself, you want to see the amount of play in the chain and you can measure from the top of the chain, the bottom, or the pins, but you want to be consistent, so that all your measurements are from and to the same point, as the same point in the chain.
I like to use a rule that’s sitting flat on the ground and measure against that, as it’s a constant and consistent. Simply apply pressure down on the chain, measure to your point, and then apply it upwards at the same point and check against the same point.
The difference is your chain slack. For this bike it should be 35-40mm.
Your second measurement, with upwards pressure on the chain. If the first reading is 255mm and this reading is 295mm that’s 40mm slack, ensuring you’ve measured to the same point on the chain each time. Write the figures down to avoid confusion.
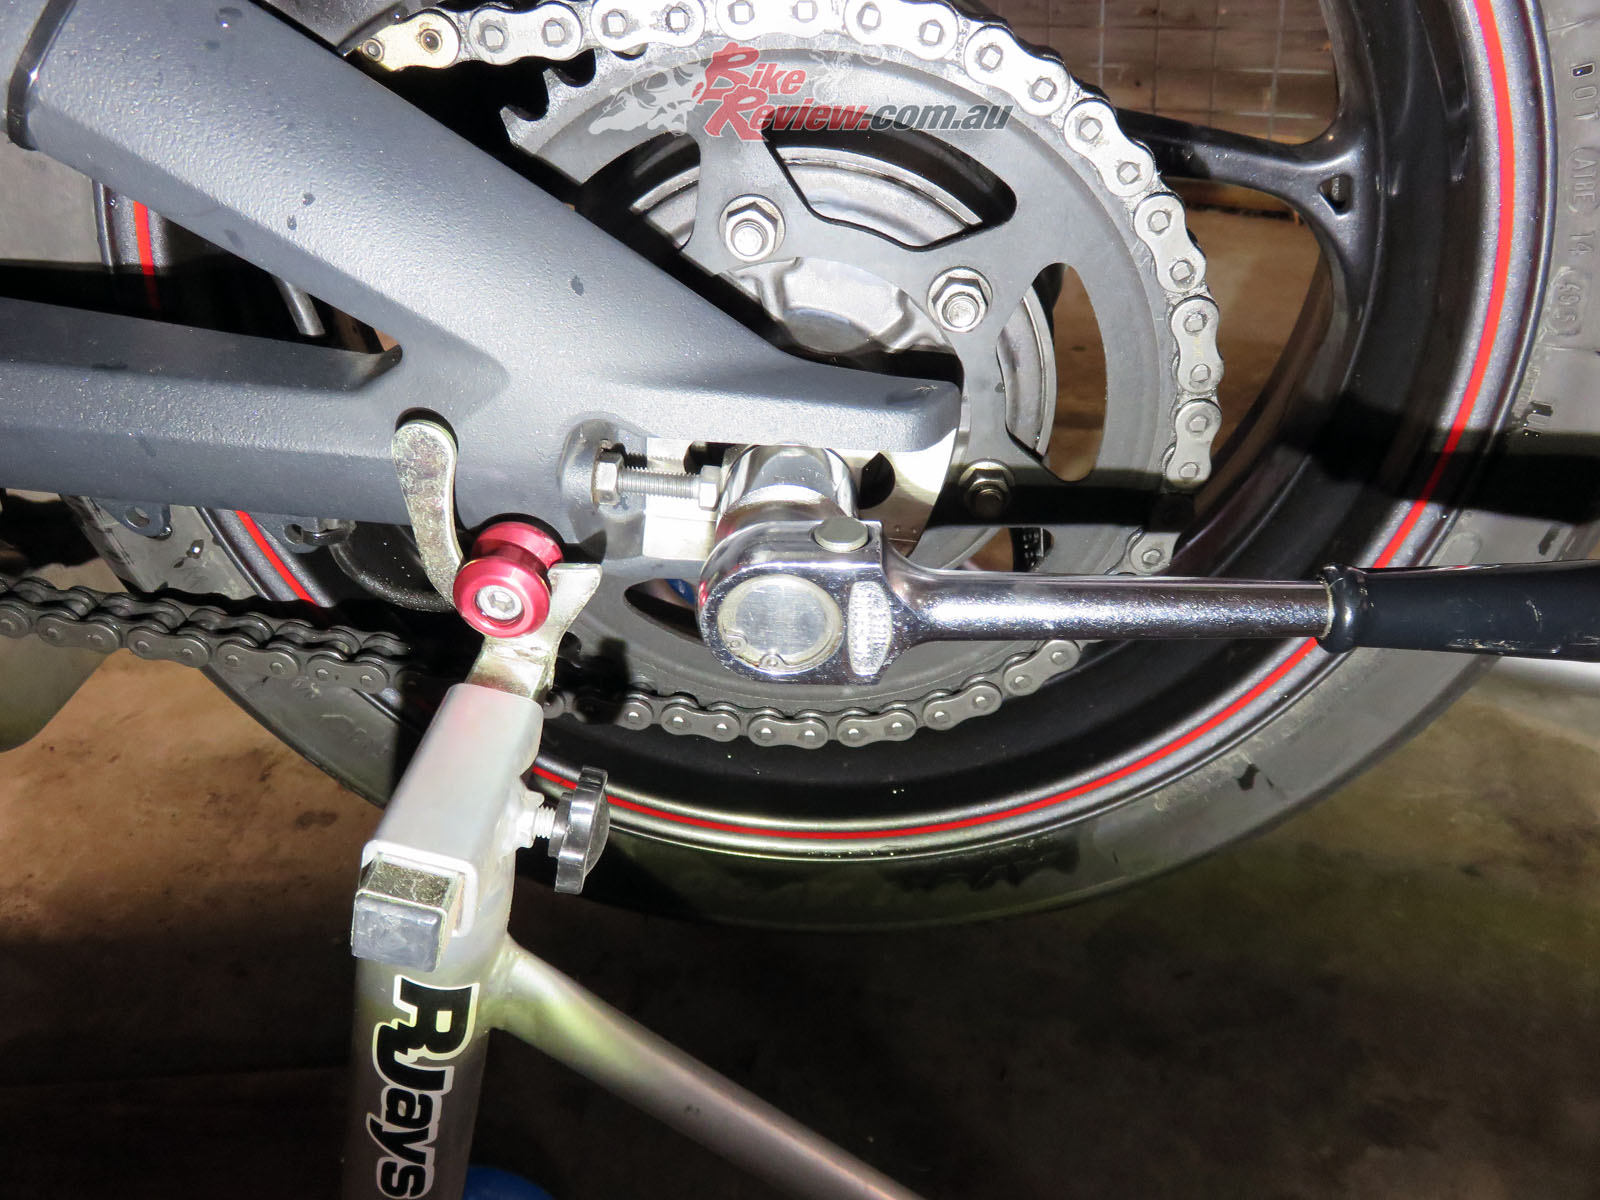
If you do need to adjust the chain tension, you’ll need to first loosen the rear axle nut, as it prevents the tension adjusters from actually moving the wheel backwards or forwards when tight.
Make sure you’ve got the appropriate rear axle socket before starting, it’s a good item to have in your toolbox and often those that come in a standard socket set won’t come in a large enough size. A fair amount of pressure will be required to loosen the axle nut. The bolt is held in place on the other side of the swingarm, so you don’t need to worry about that. But, especially with the bike on a stand be careful not to imbalance the bike and knock it over during this step. Get a second set of hands to steady the bike if you aren’t confident.
You will need a large socket to fit your bike’s rear axle nut and a socket wrench to loosen the nut. Make sure you’re loosening it in the right direction – you may need to apply a fair bit of pressure to loosen the nut, and you can carefully apply weight with a foot (preferably protected in a work boot).
The lock nut.
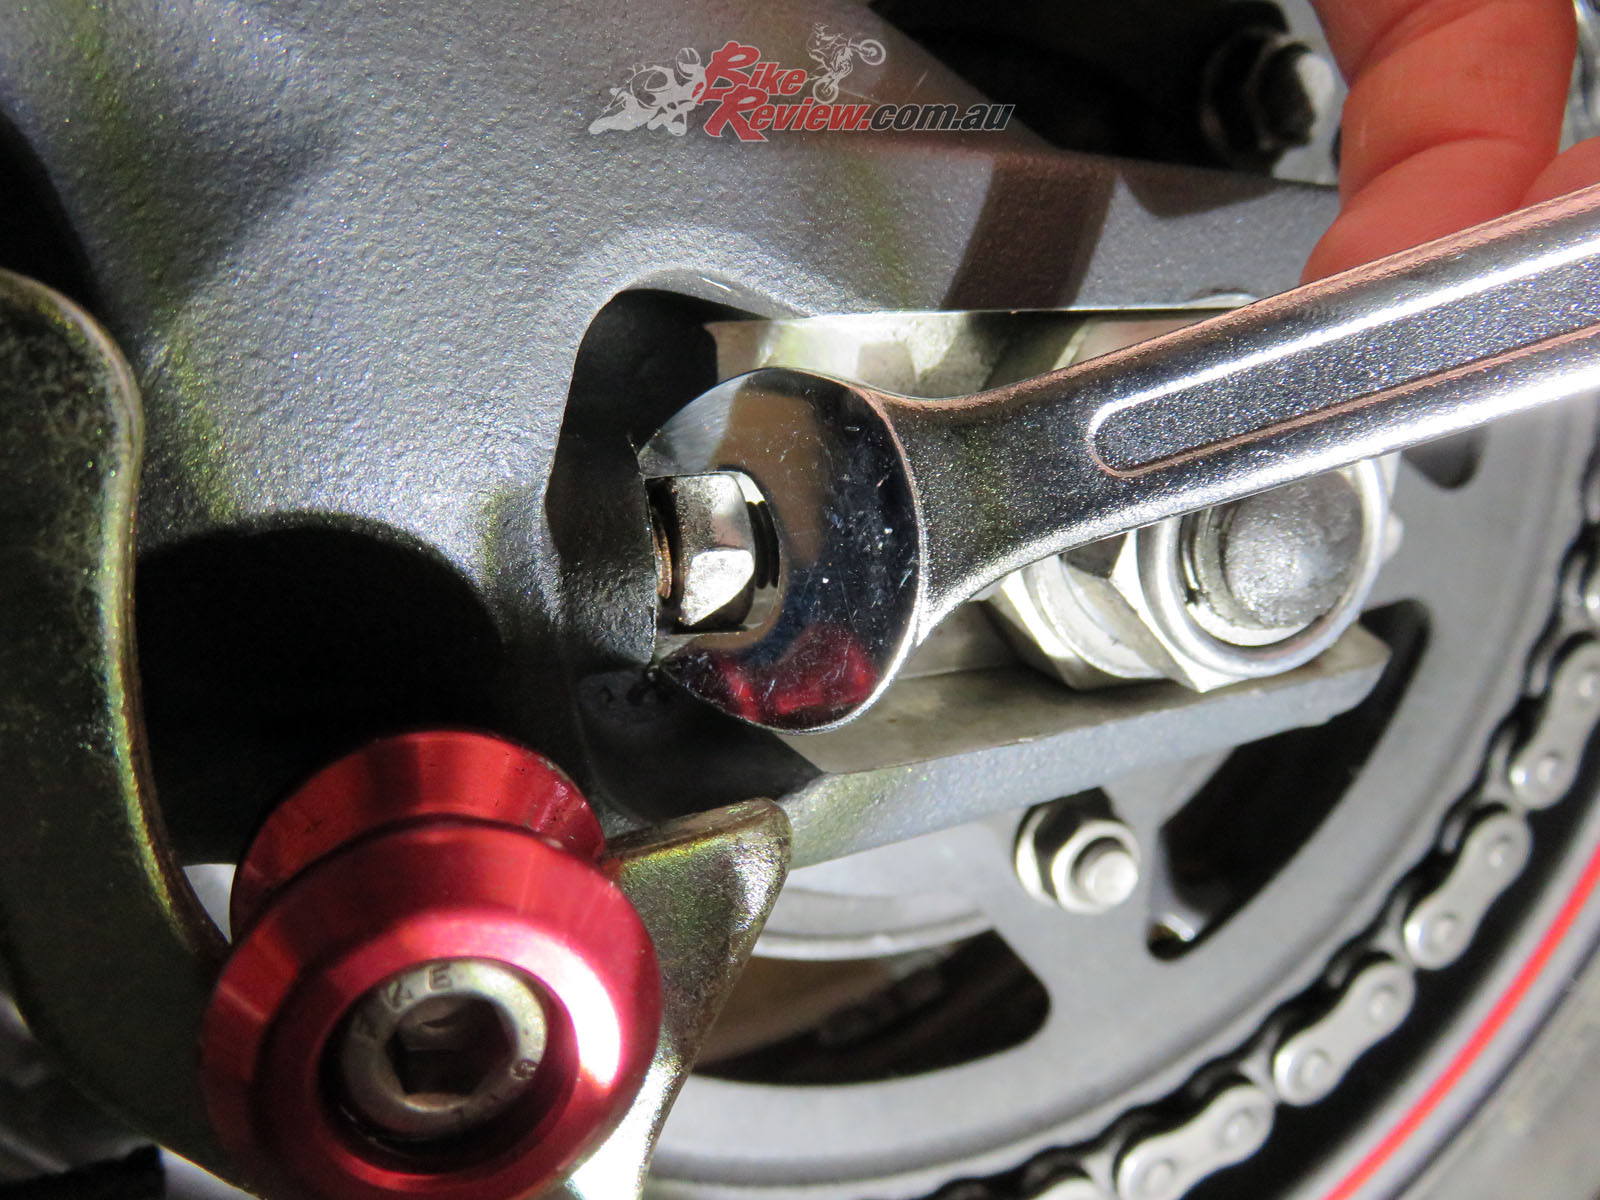
Once this is loosened, also undo the two lock nuts, one on either side of the swingarm, they prevent the tension adjusters from moving freely. The tension adjusters are effectively just two bolts, on each side of the swingarm which are tightened inwards to decrease chain tension, or loosened outwards to increase chain tension. They effectively move the rear wheel forward or back.
Here’s the adjuster bolt, although they do vary by swingarm design. The easiest method is counting the flat side of the bolt head, so both sides are equal. You also need to turn the bolts the same direction, which can be confusing as you’re on different sides of the bike! Take your orientation from the flat of the bolt head, clockwise is ‘tightening’, anti-clockwise is ‘loosening’. Because you’re pushing the axle position however, tightening will move your adjustment bolt in, providing less tension and more slack, loosening the bolt will push the axle backwards, reducing slack.
The easiest way to ensure you’re making any changes equally is to count the flat sides of the bolt head when tightening or loosening the bolt, and do the same on both sides. And you can check against the measurement markers on your swingarm to ensure both sides are equal. Double checking with your ruler isn’t a bad idea either.
It’s most likely you have too much slack, so loosening the adjuster bolts will push the rear wheel back, so it’s easier to see the difference your changes are making. Make minor adjustments and check to make sure you’re heading in the right direction. Often it won’t take much to correct your chain tension, so you don’t want to over do it and have to recorrect your mistake.

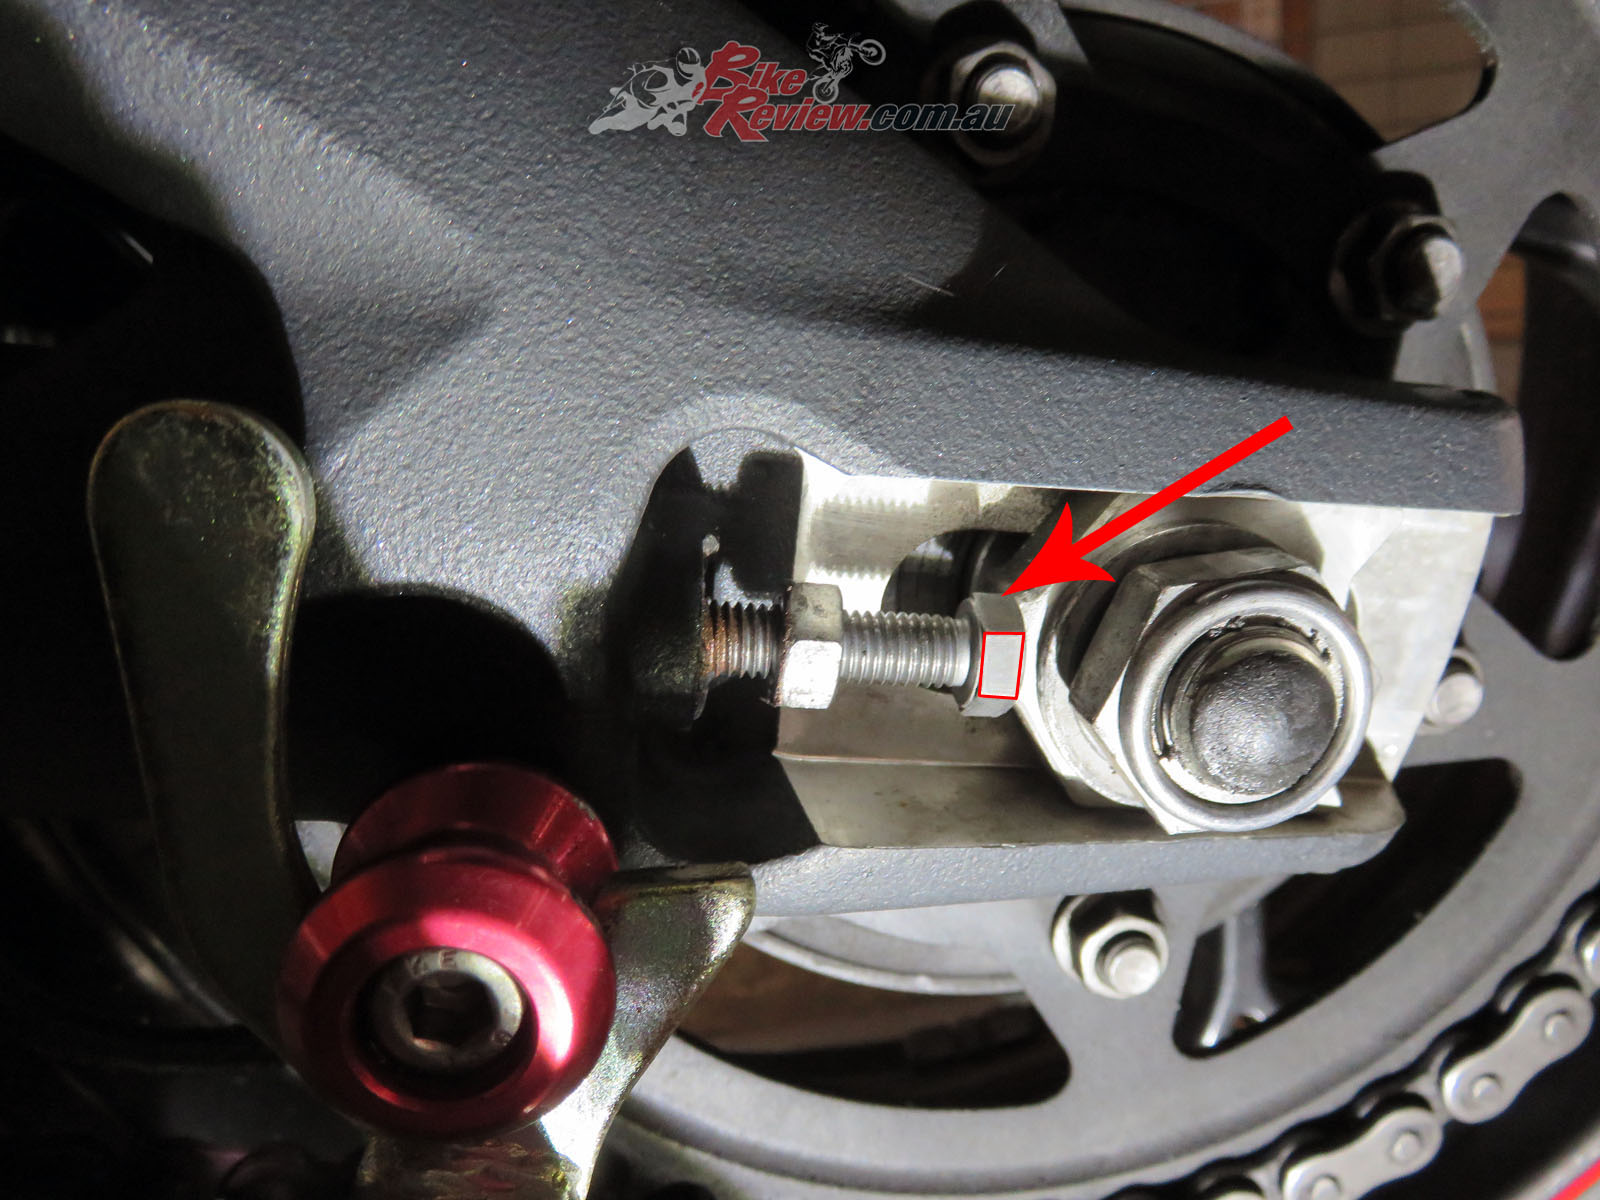
Here you can see the adjustment markers. Keep in mind you need to be really accurate to make sure both sides are equal, so you can also run a ruler in and check the distance between the chain adjuster blocks and the swingarm ends.
Once you’ve got the chain slack within your parameters and checked that the adjusters on each side of the swingarm are equal, it’s time to tighten up the lock nuts on the adjusters, using one open ended wrench to hold the adjuster bolt in place and the other to tighten the locking nut, so you don’t effect the adjustments you’ve just made.
I recommend using an open ended socket to hold the adjuster bolt while you tighten the lock nut to prevent any unwanted movement, but didn’t have a third hand to do that and hold the camera!
Once you’ve done this you can use your torque wrench and set it to the correct pressure to retighten that rear axle nut. It’s important that it’s neither too tight, nor too loose, so check your owners manual!
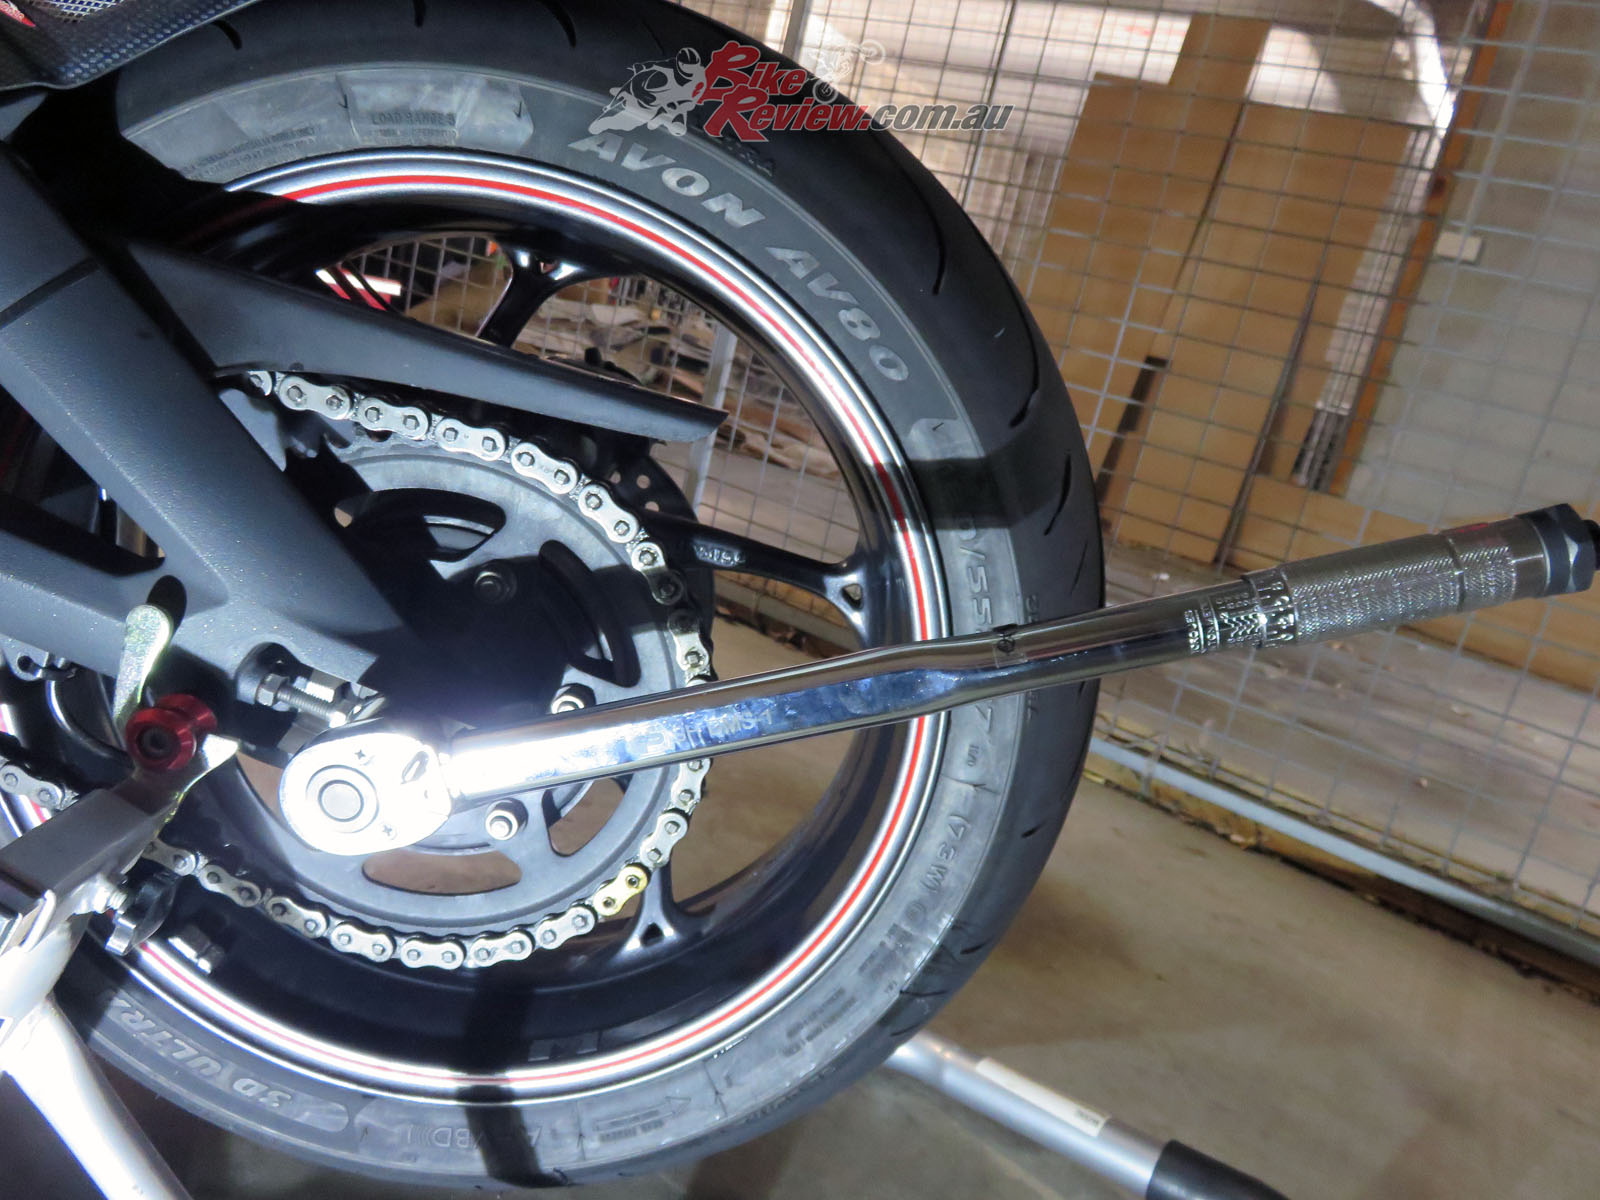
This is quite literally a $30 torque wrench from Aldi. It’s easy to set and use and takes the guess work out of your rear axle tension, which should be set right to avoid unwanted damage. This is also a really important last step. Once you’ve done this double check the adjuster bolts and lock nuts!
With this done, if you want to be extra careful, just turn the rear wheel and make sure the chain’s still at least the minimum slack figure all the way around, it’ll be looser at some points, as remember you’ve adjusted at the tightest point.
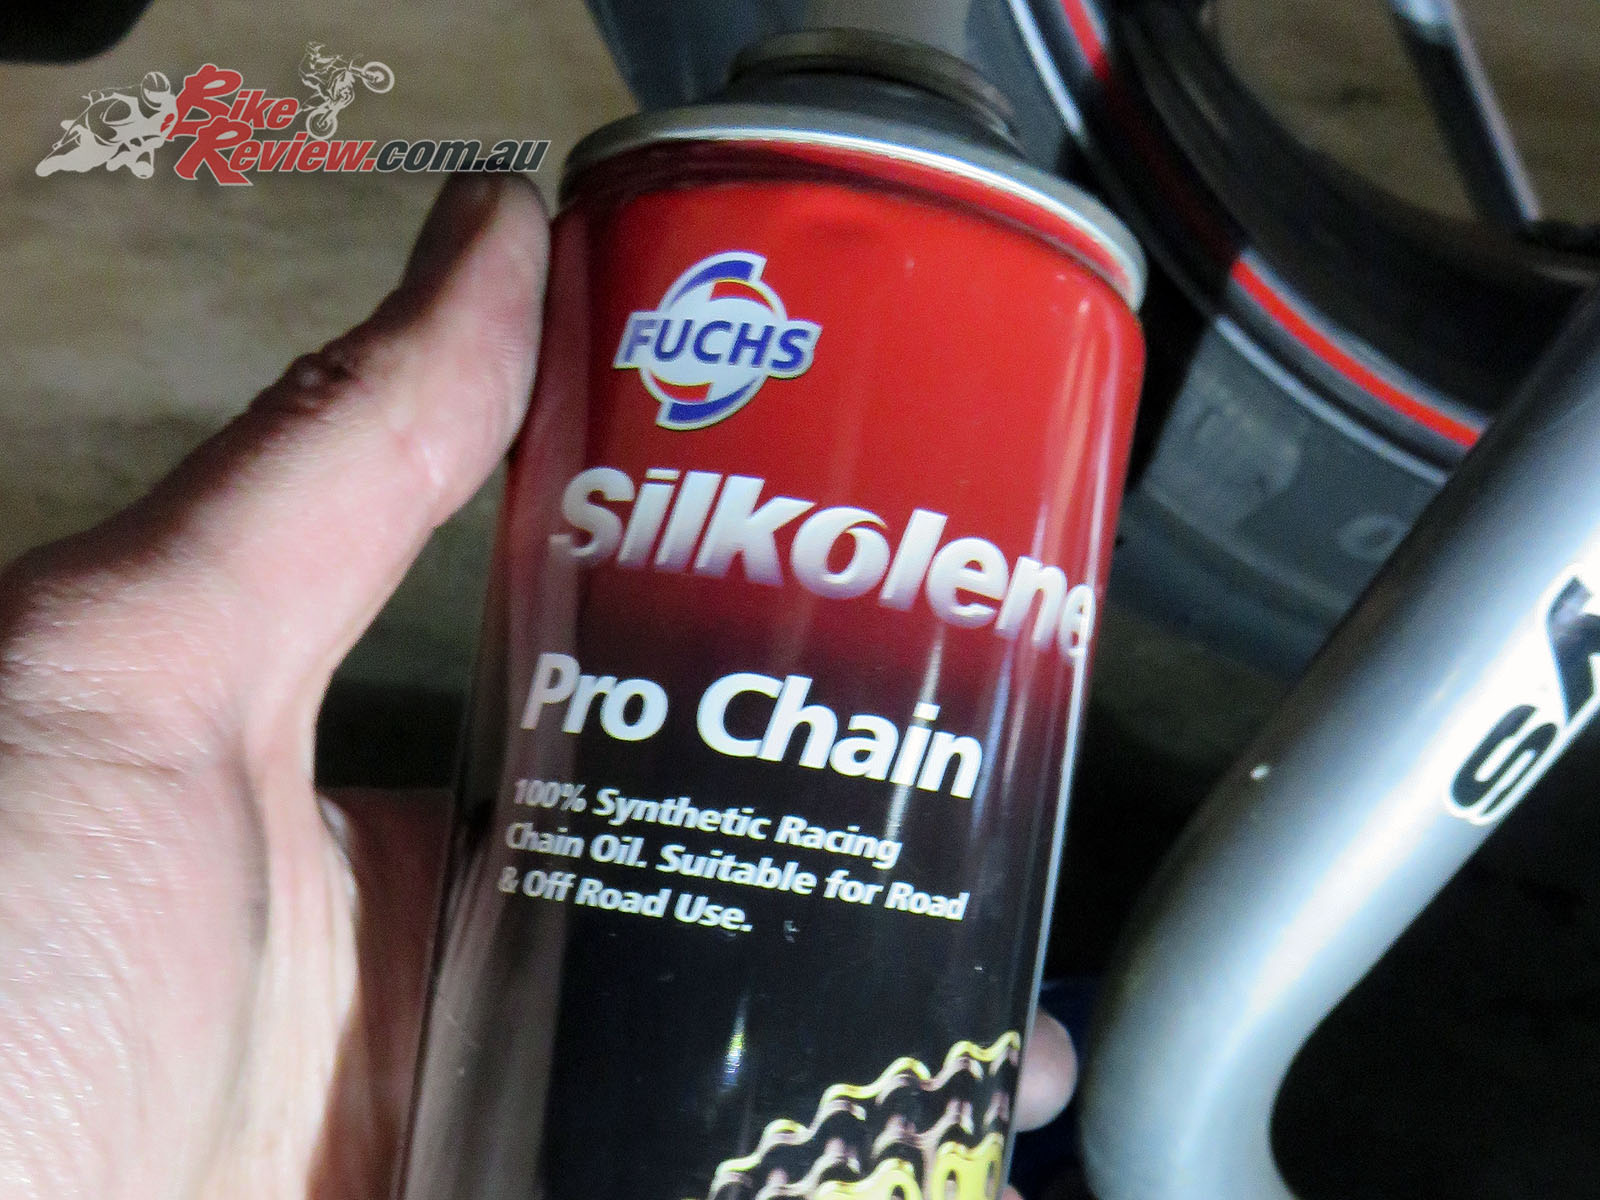
This Silkolene Pro Chain Oil is a great product, it sprays on easily and sets very quickly even on a cold chain, meaning there’s not a heap of excess chain lube dripping all over the place when you’re done.
Once that’s confirmed, now’s a great time to apply a quality chain lube or wax. I just put a piece of cardboard behind the area of chain I’m spraying to catch overspray and turn the wheel with one hand and spray with the other. It is done best on a warm chain, after a ride though.
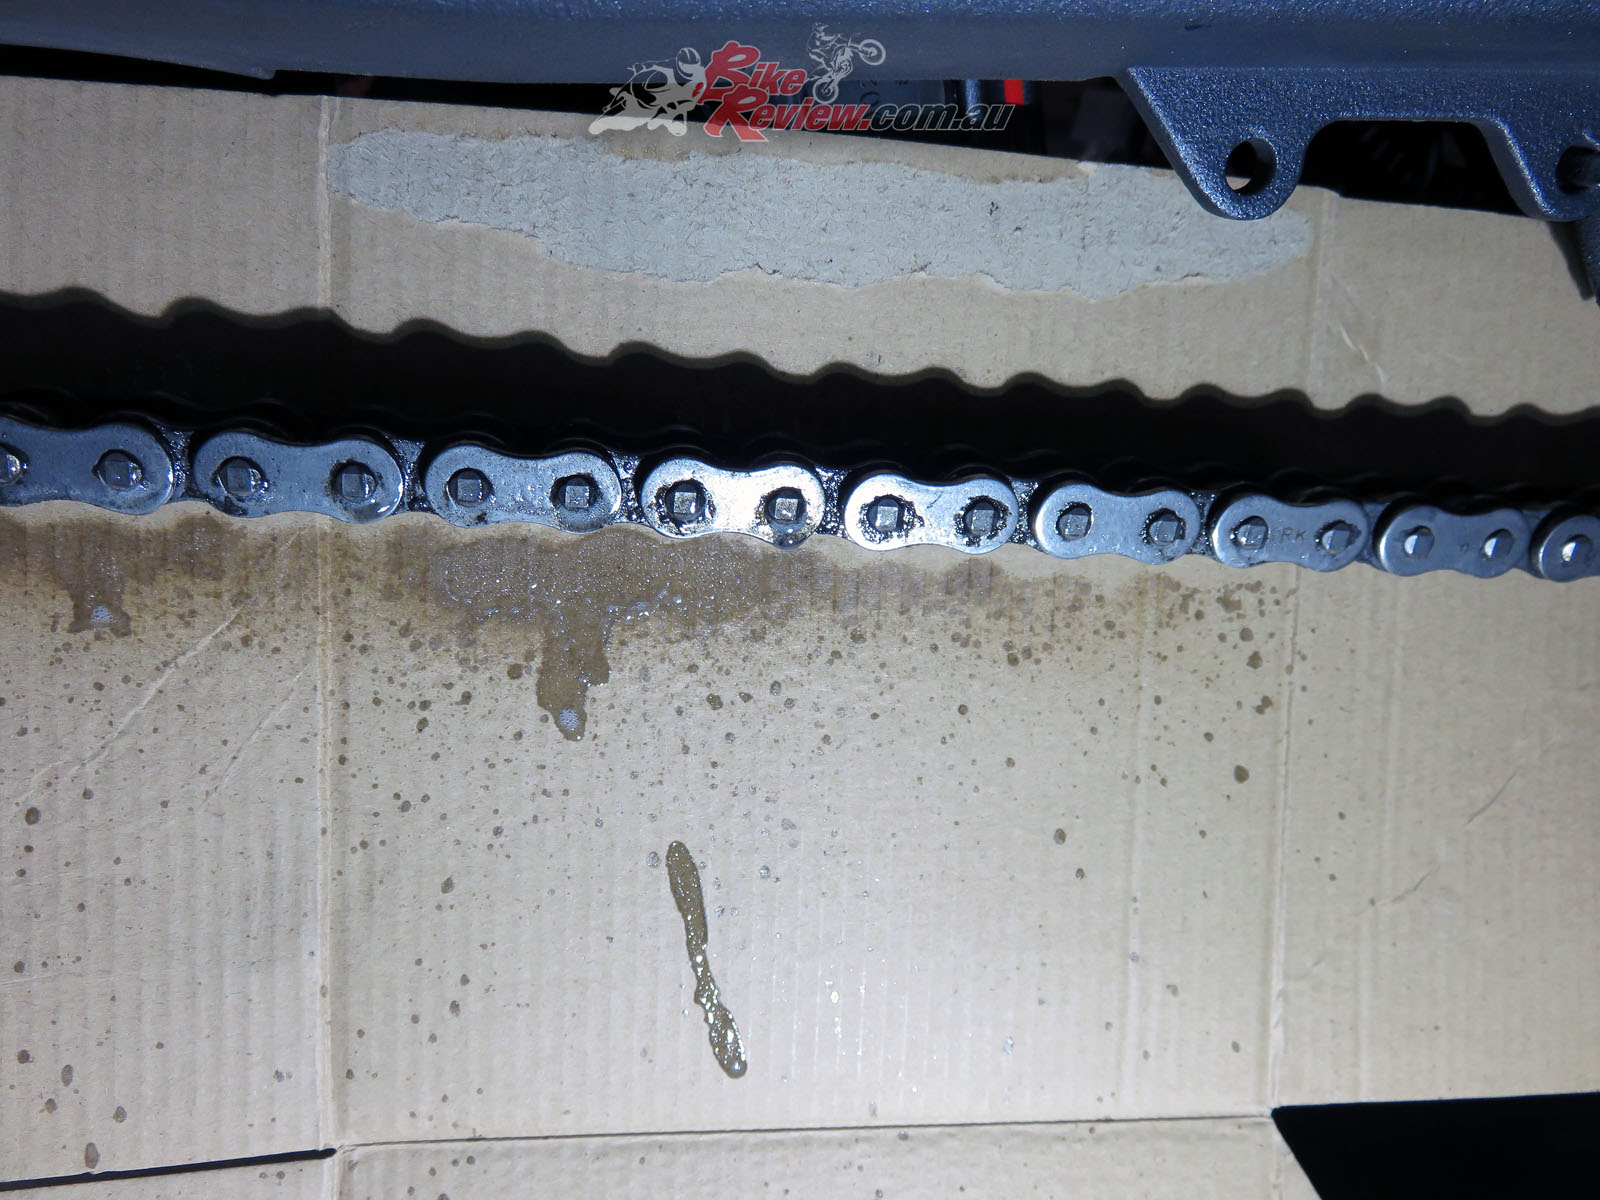
I did a couple of passes to make sure coverage was good and then left the cardboard under the bike. There wasn’t any drips the following day however. Always make sure there’s no over spray when lubing your chain that might go onto your tyre or brakes.
Leave the cardboard under the bike’s chain to catch any excess if you think that’s likely and remember to remove it before next riding your bike. You don’t want chain lube on your wheels!
Special Thanks:
Silkolene Australia, Warrian Enterprises
You Might Also Like