

I recently started testing out the new Shoei Neotec II helmet, a modular option which is ready for a fully integrated Sena SRL Communication System, which in turn offers a huge host of features that would otherwise require a special installation.
You can read my thoughts here: Product Review: Shoei Neotec II Helmet
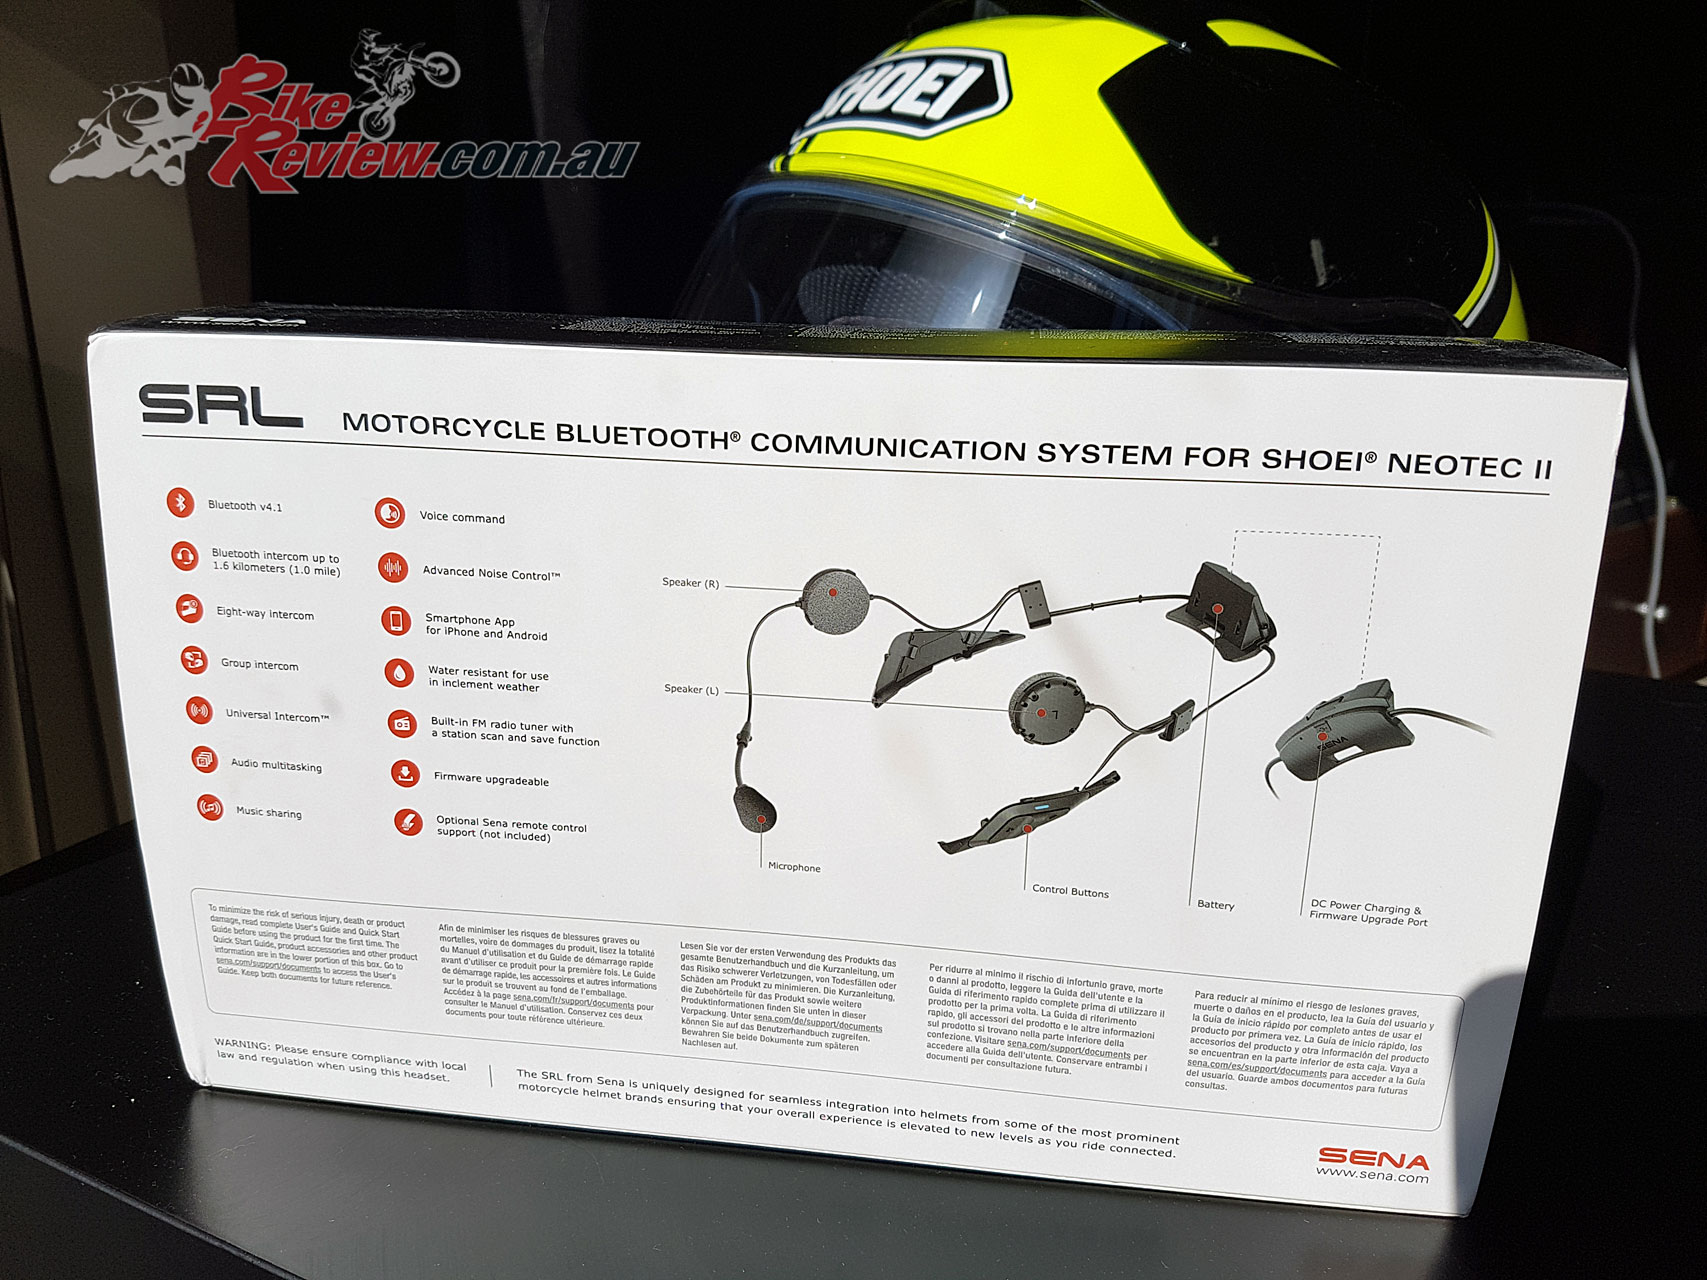
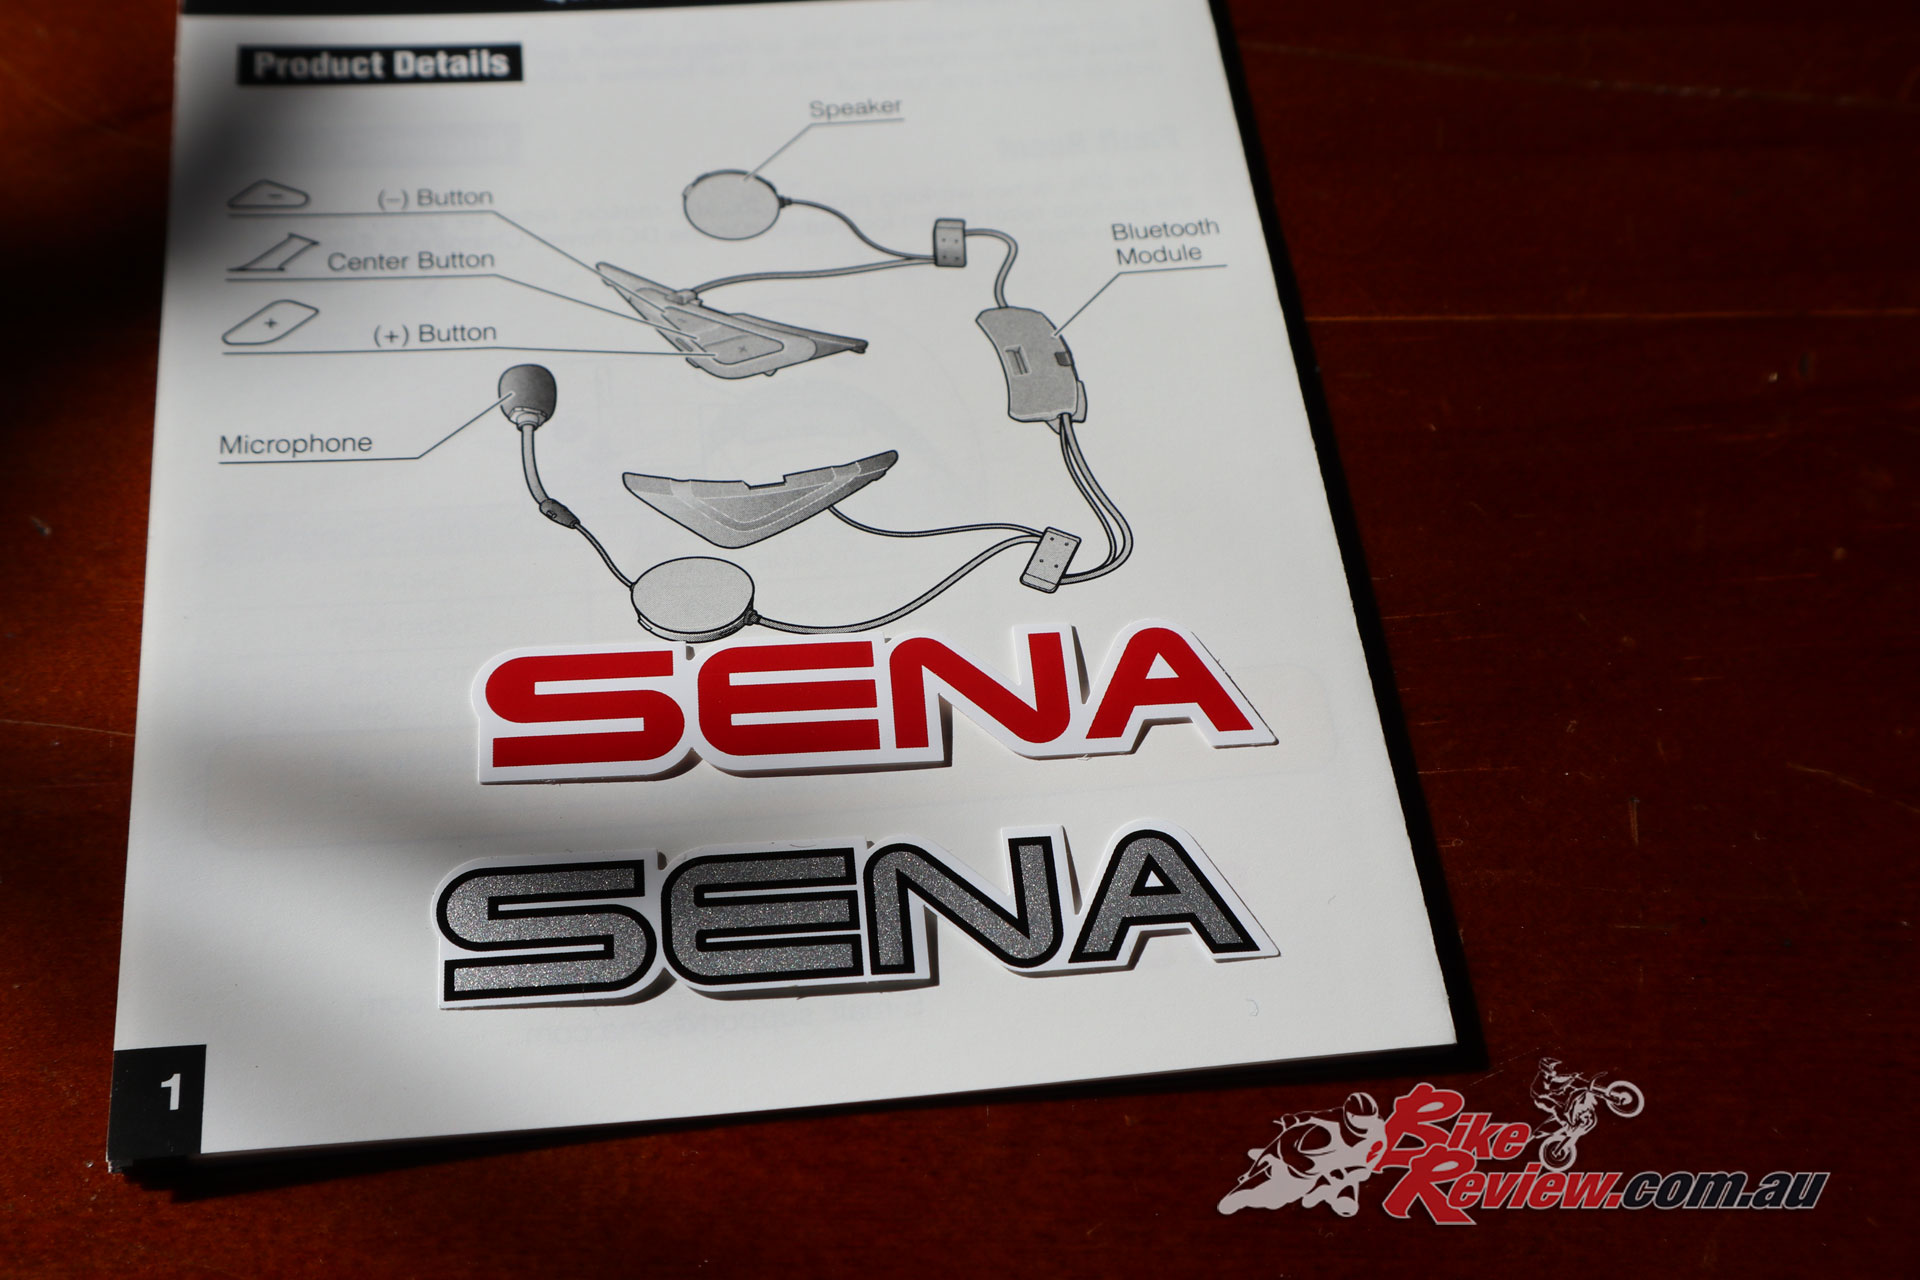
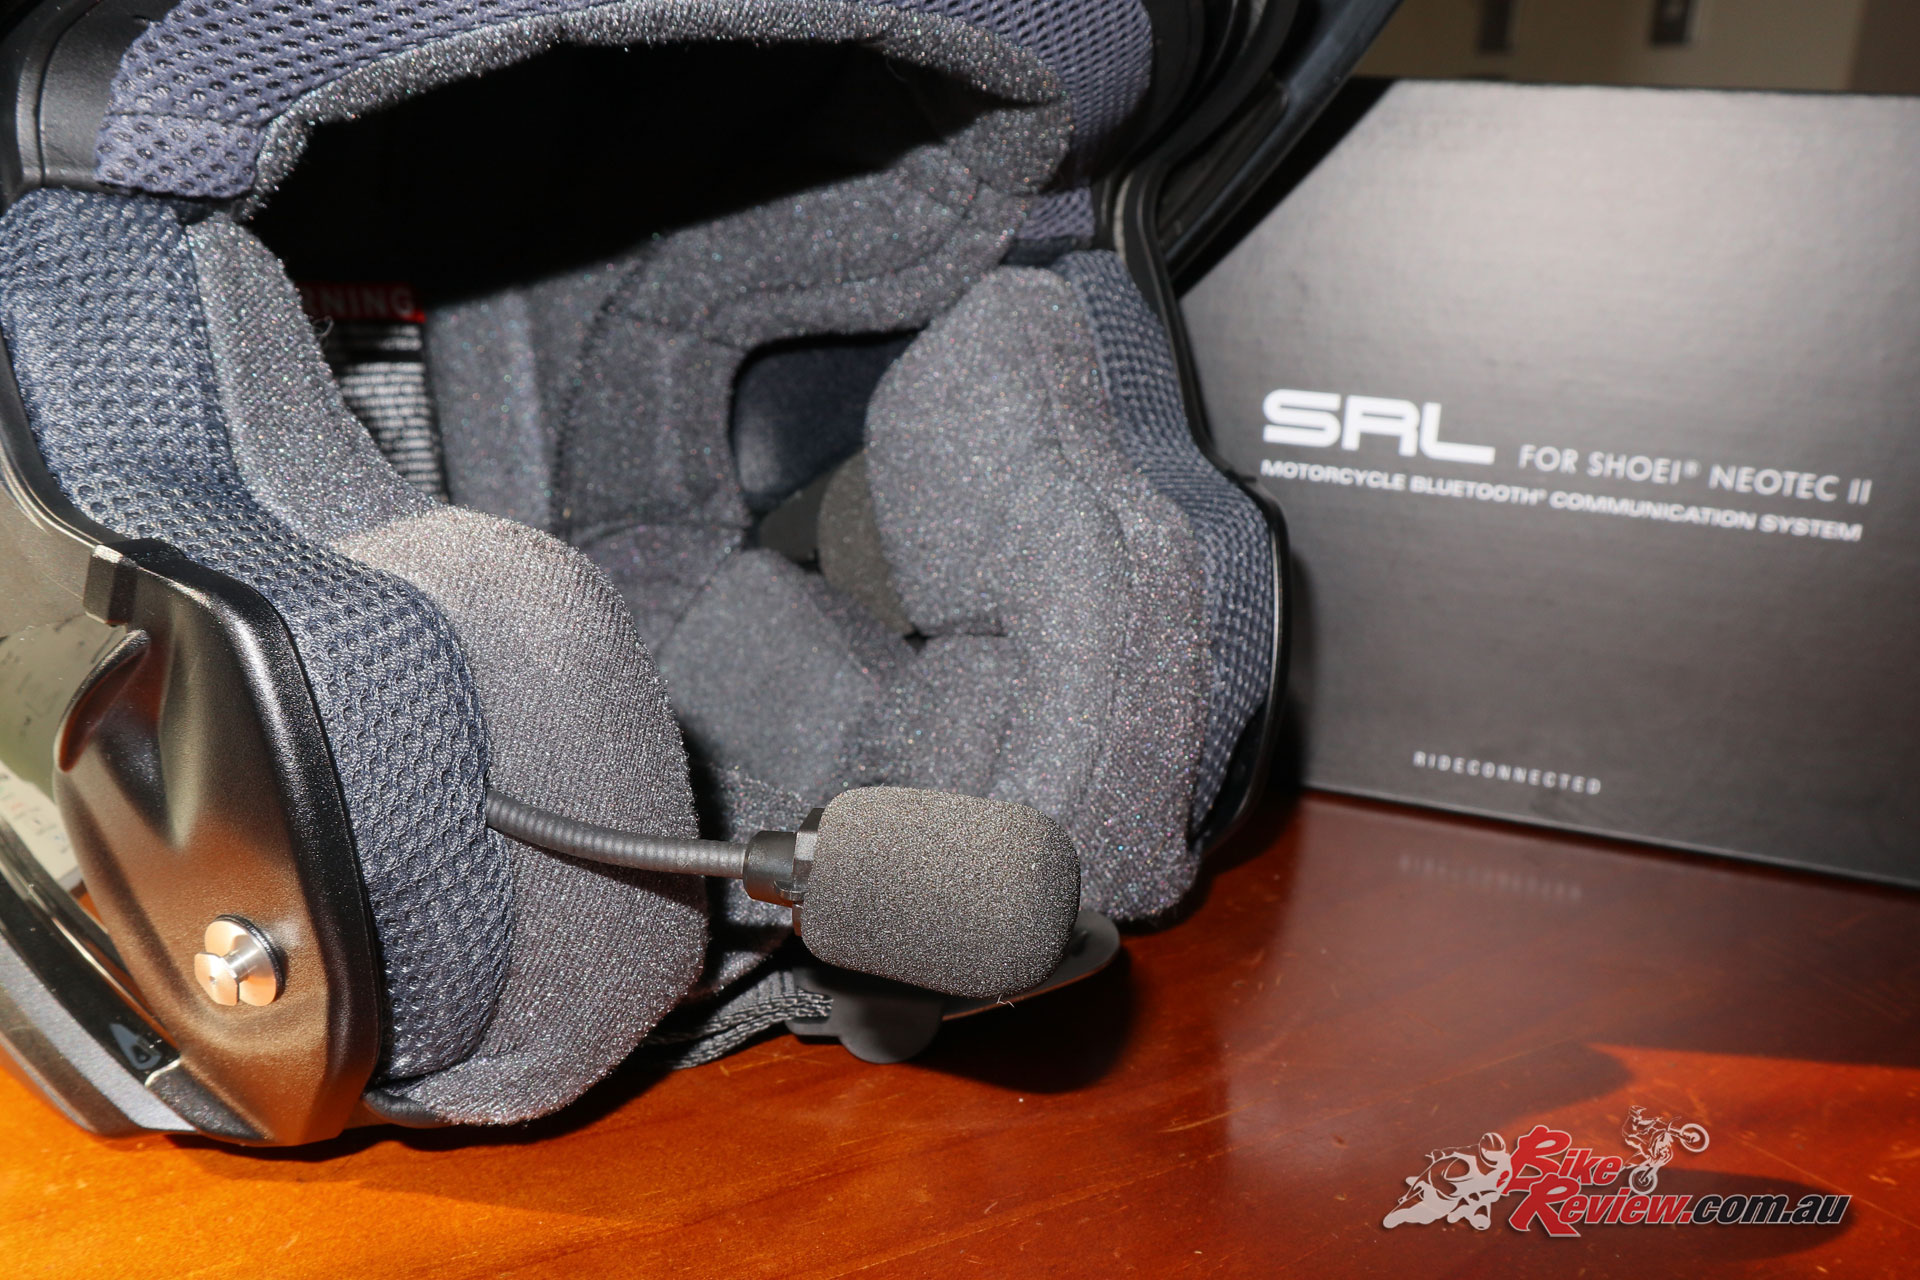
The Sena SRL is a super-light system that is incorporated into the helmet via two side and one rear section, with blanks being removed from the helmet once you’re ready for the install. There’s cut-outs for the speakers/headphones, as well as a channel for the microphone, with all the wiring easily hidden in the helmet.
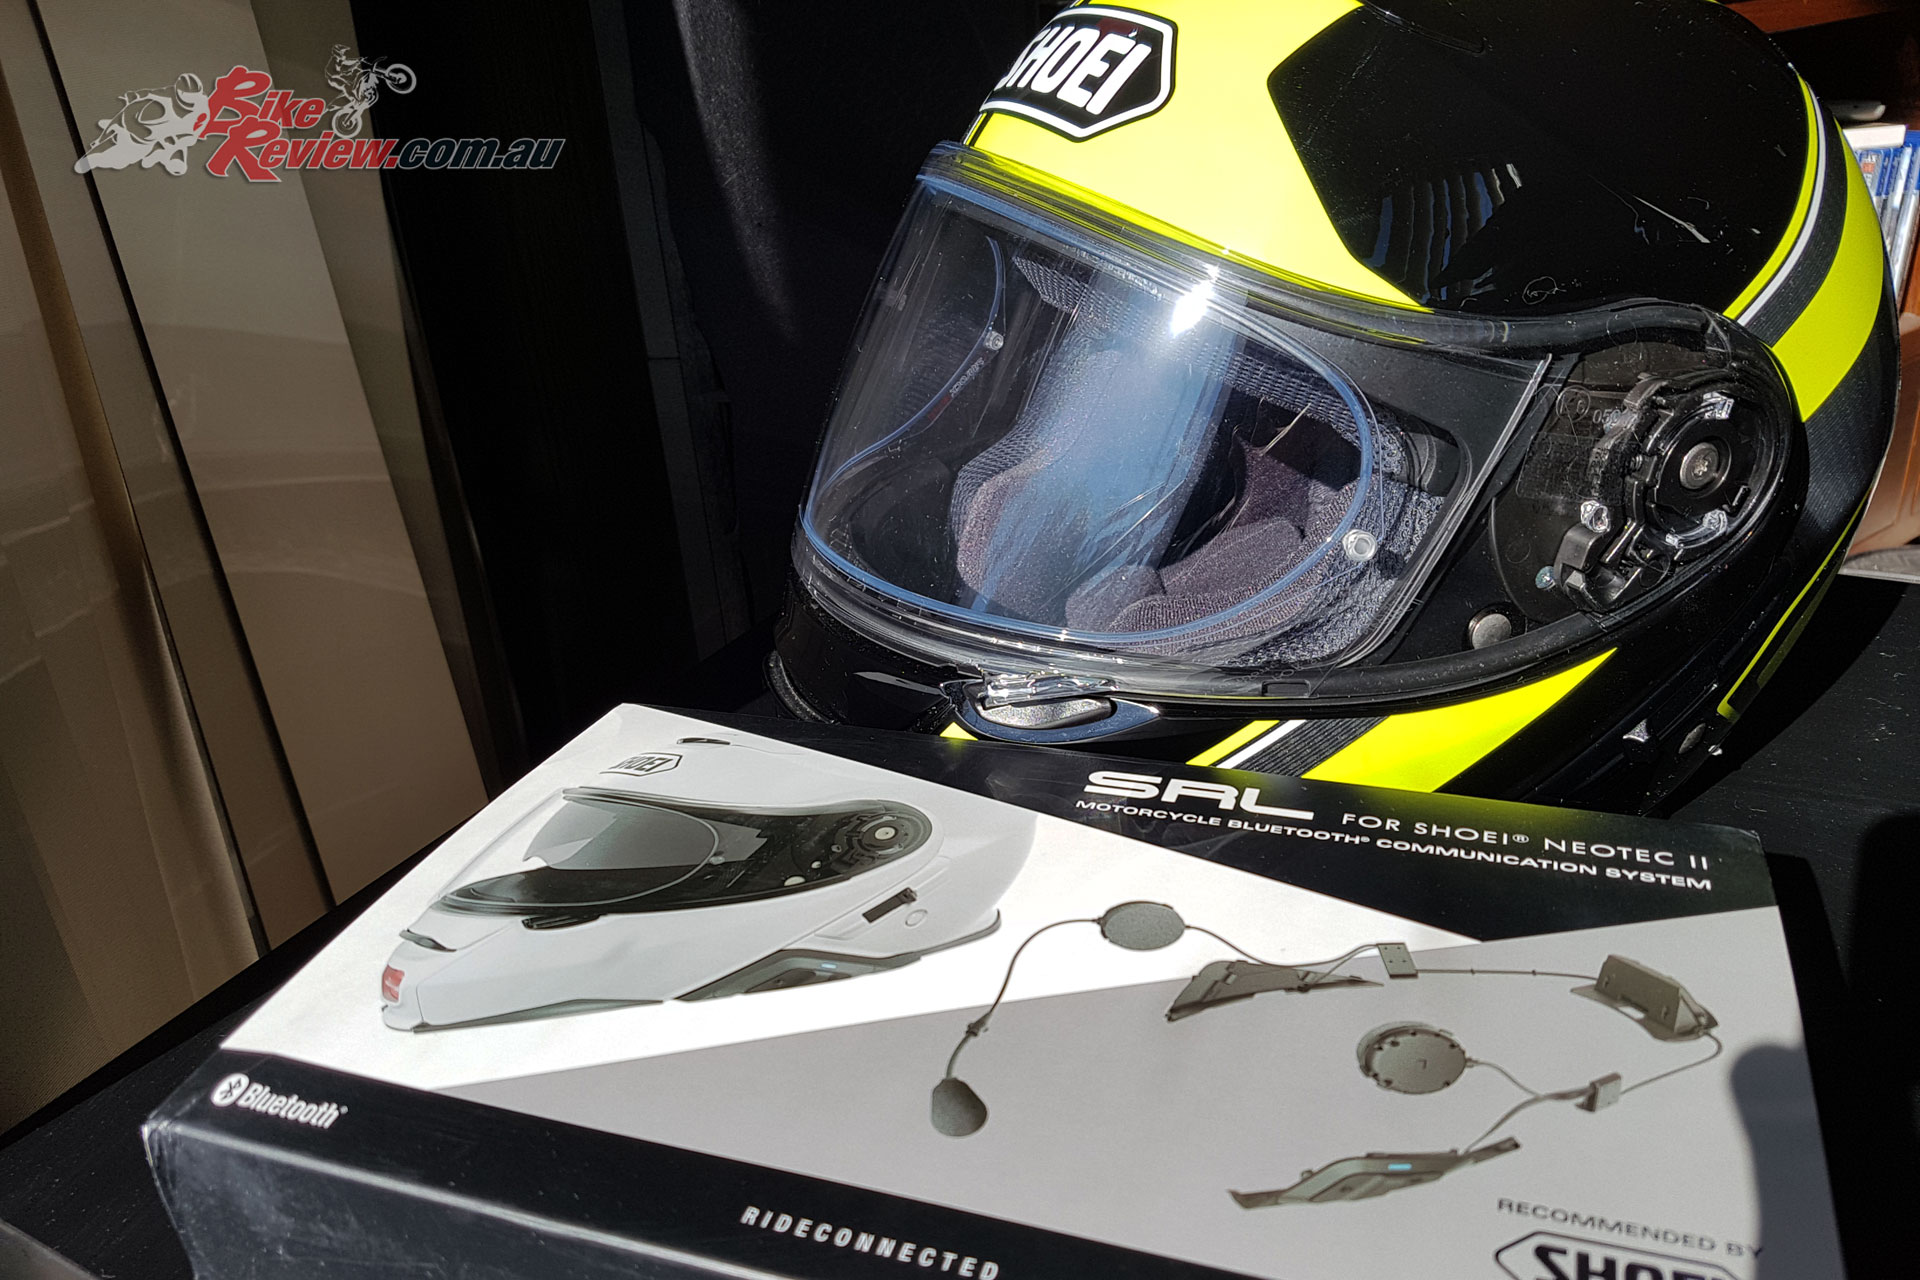
The Sena SRL Communication System arrives to join the Shoei Neotec II helmet
Installation is simply, but a little bit fiddly, as you’ll need to remove those blanks from the helmet, pull out some of the lining, plus run the wiring, and make sure everything is back in place, particularly all the linings, which all clip back in. I’d also recommend charging the SRL before installation, with a MicroUSB cable doing the job, that way once it’s in, you can use it straight away!
All up I think it took me about 45 minutes to fit, but I was taking photos of the process at the same time, so you could probably do it a fair bit quicker. See below my review for a quick fitment guide.
First here are my thoughts on the system so far.
The Sena SRL is designed specifically for the Shoei Neotec II
Sena SRL Communication System Review
For such a compact system, the Sena SRL really packs in the features. Straight up, with no pairing to a phone the system will let you listen to the radio, and while it took me a bit of getting used to the controls, it becomes easier as you use it more.
To really unlock the full potential though you’ll want to sync the system up to your mobile phone, while downloading the Sena Device Manager to your computer to manage the Sena SRL settings is also another option, if you don’t want to use the Sena phone app to do the same thing.
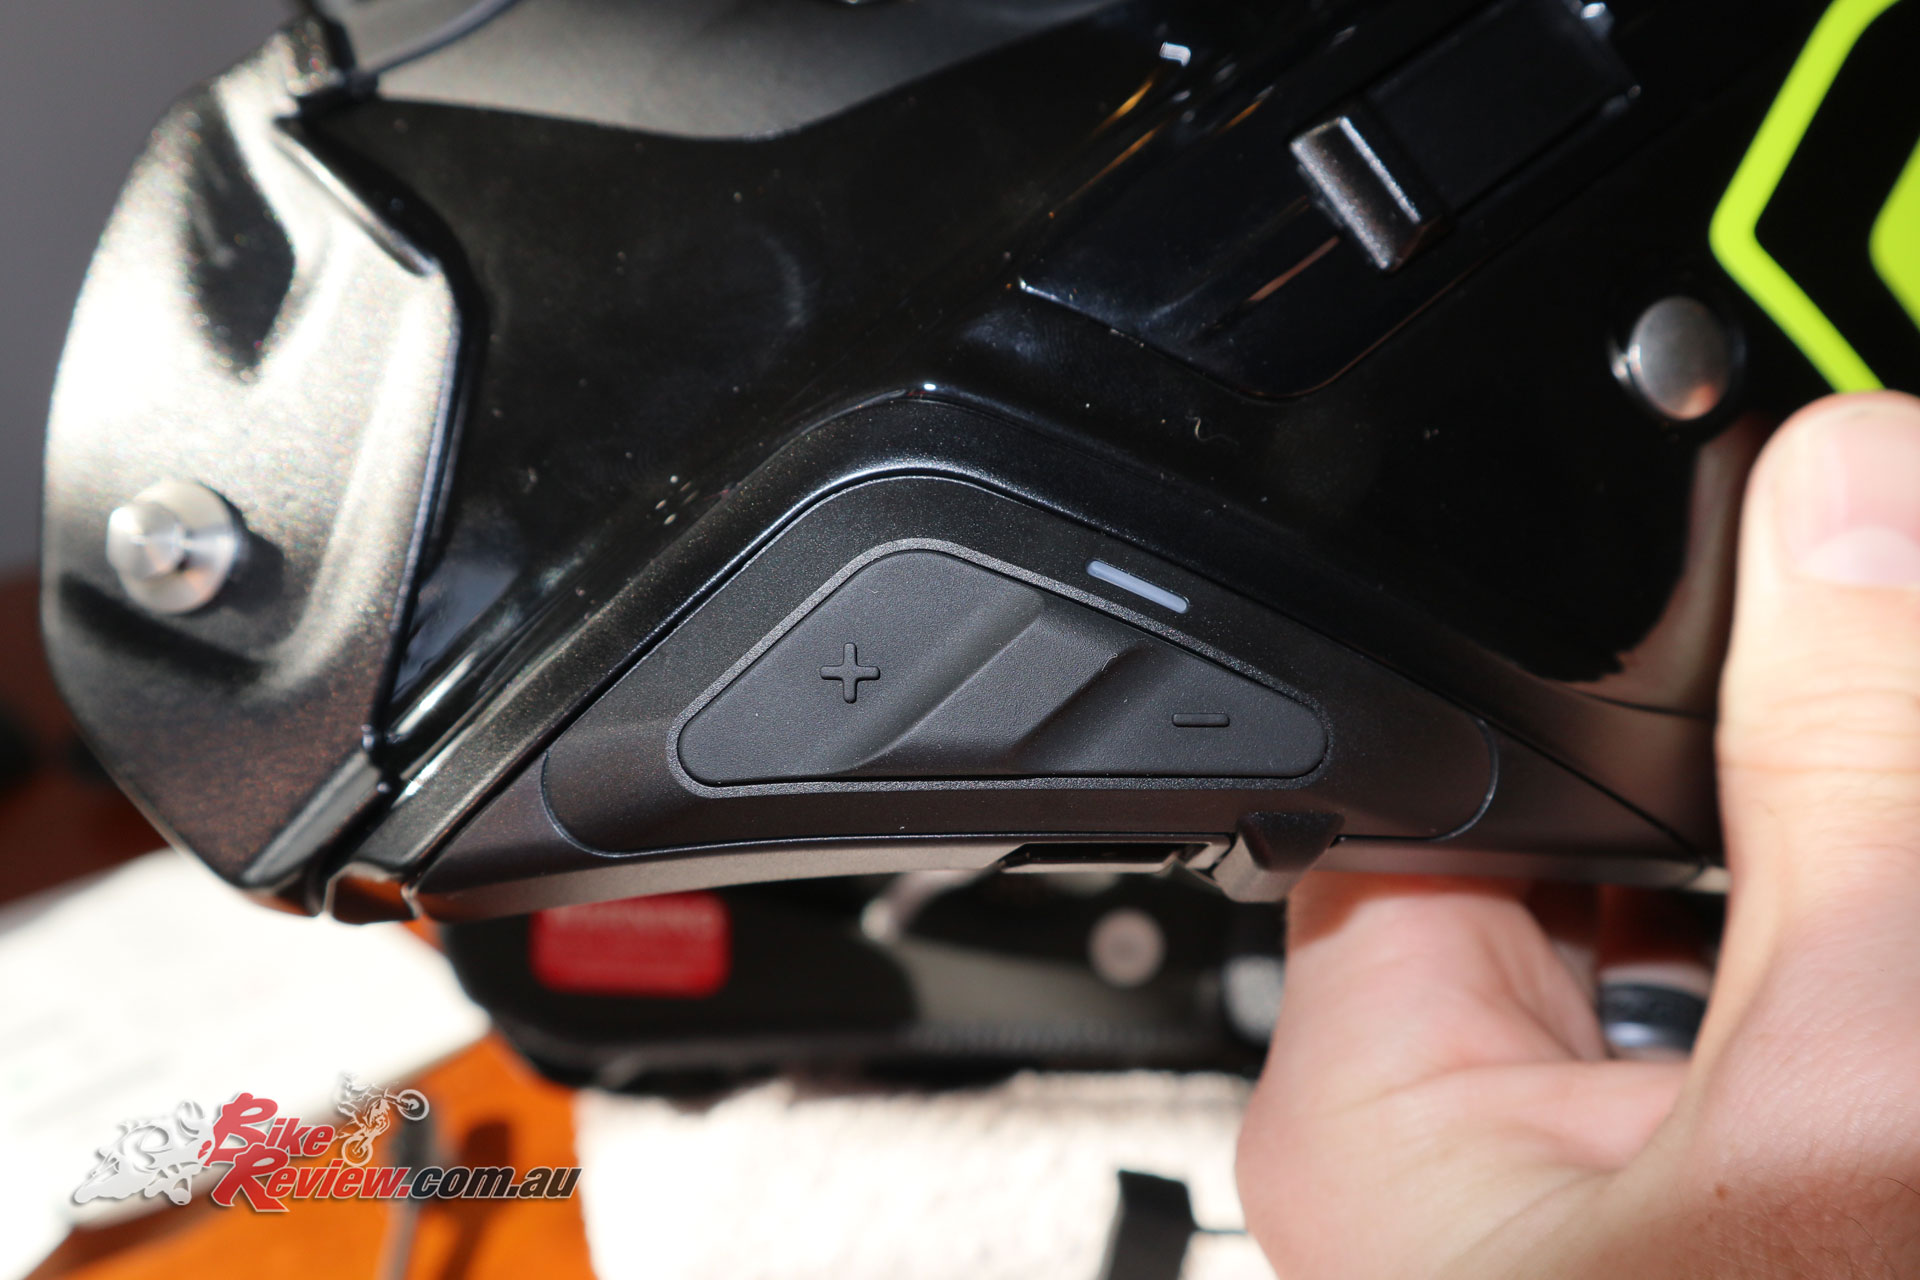
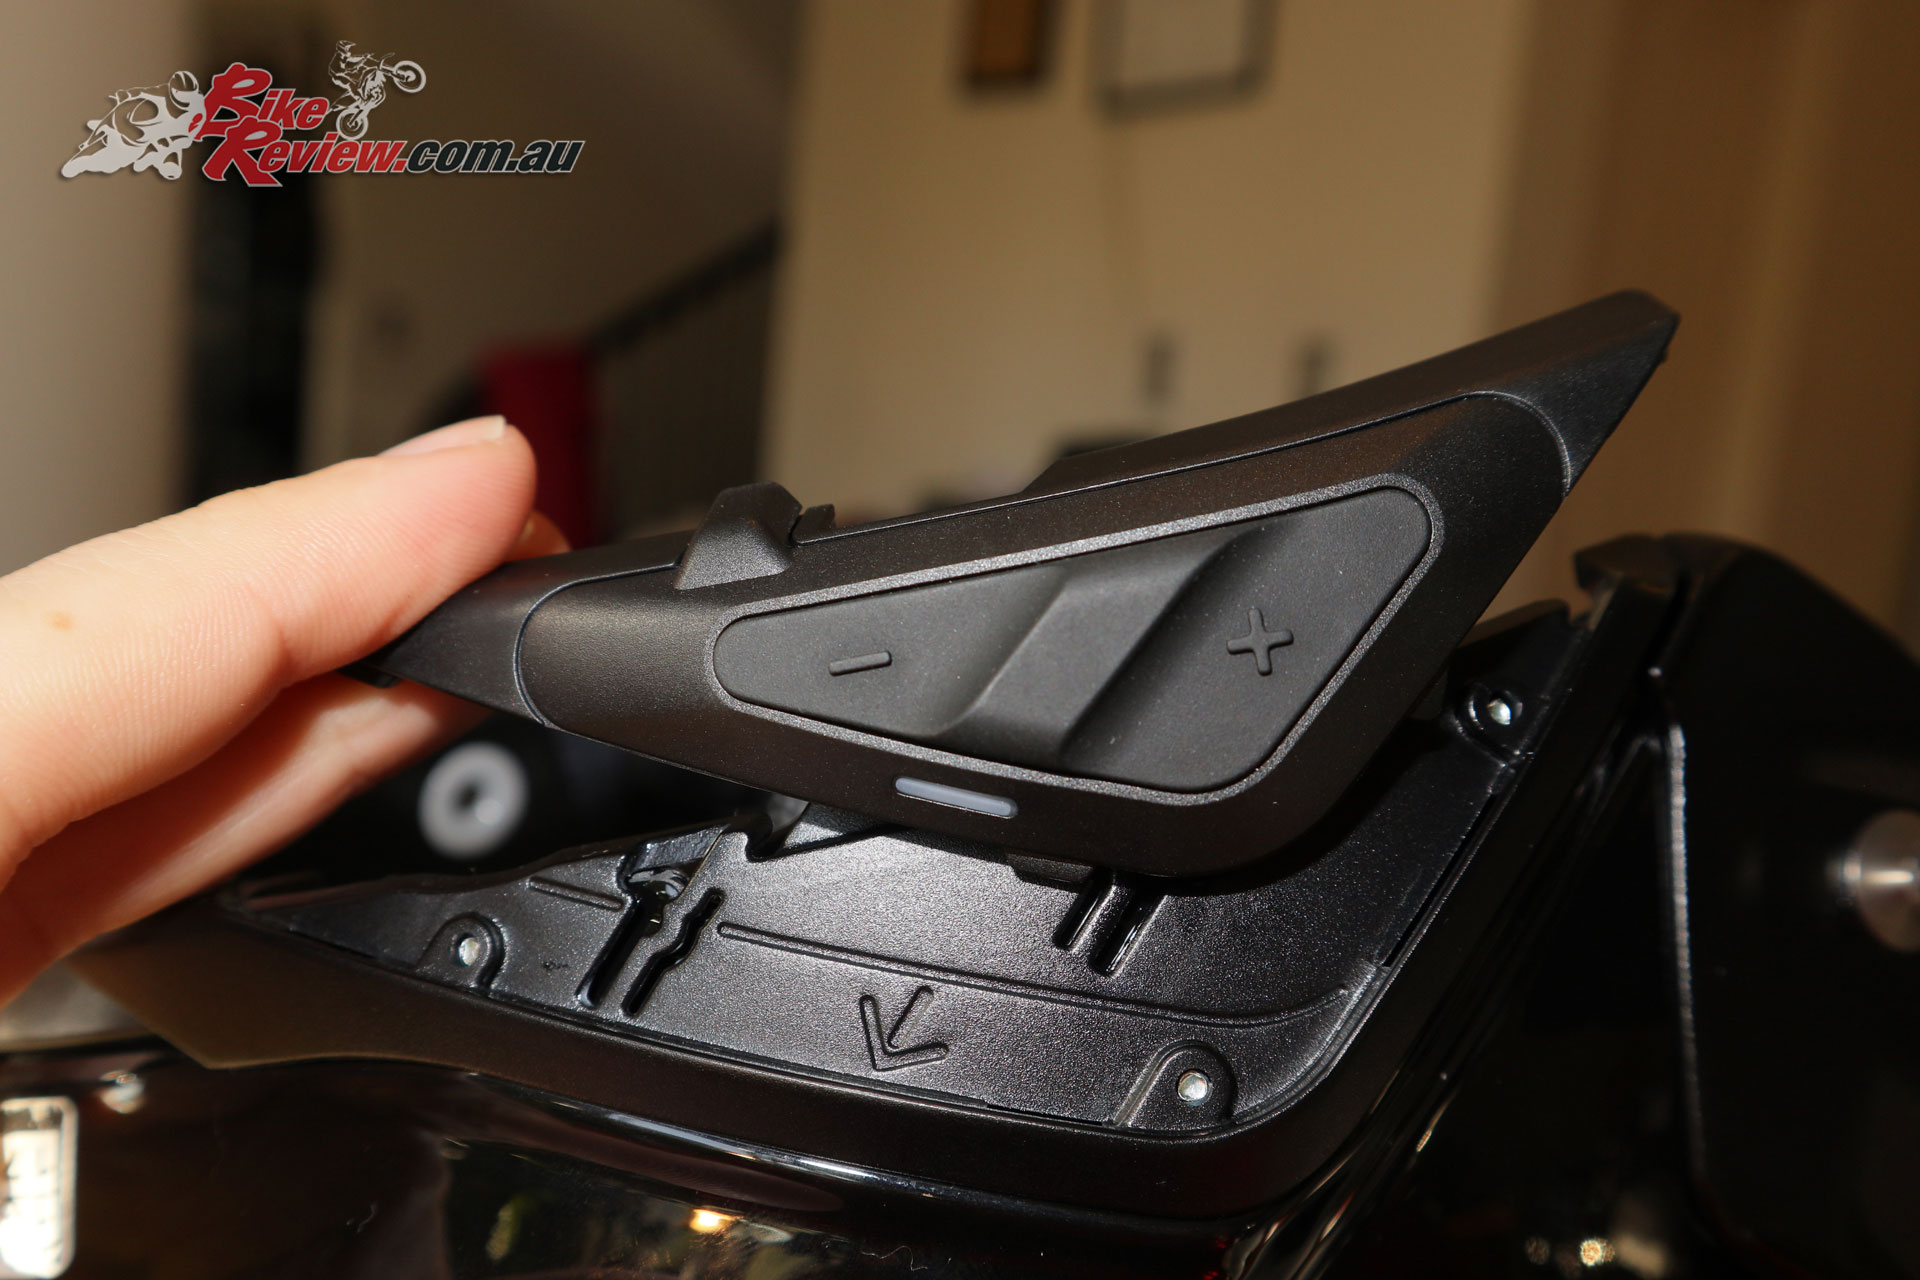
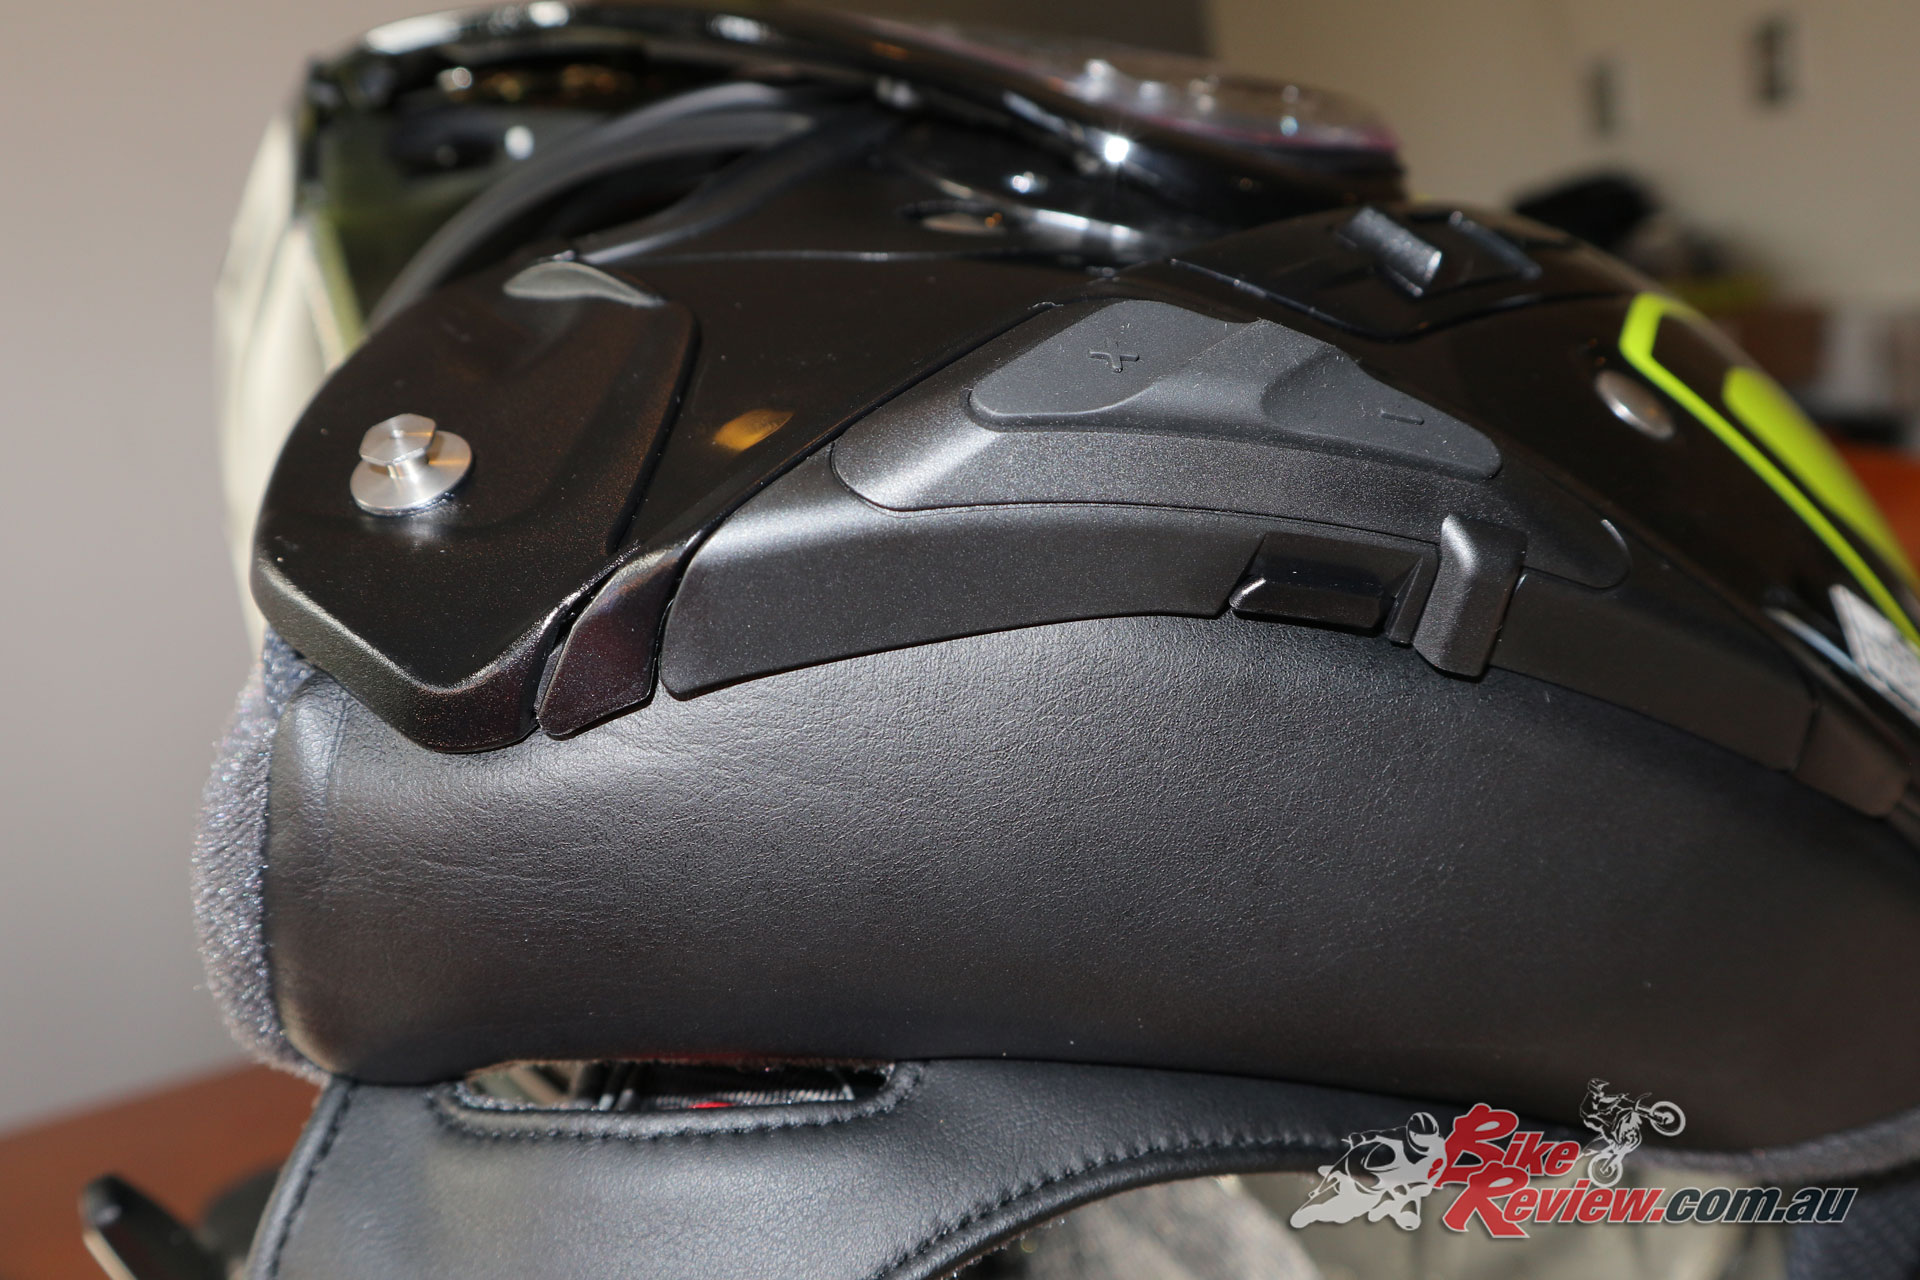
Here are the controls, three buttons on the left side of your helmet. They are pretty easy to use by feel, as you use the unit more.
When it comes to syncing to your phone all you need to do is turn the system on, holding the Centre and + buttons at the same time, then hold the Centre button again until it goes into the settings mode (which activates just after the intercom sync), hit the + for phone sync, and make sure you’ve got your phone Bluetooth on and are ready to rumble. Once synced when the headset is turned on it’ll auto sync with your phone.
There’s a whole host of options in there, including multi-tasking, which means you can be listening to music or the radio, and take a call, and the system will manage the audio levels for you. Otherwise the standard settings will turn off the music or radio while the call comes through.

The Neotec II and Sena SRL are an ideal combo for touring and general riding, offering a huge host of features.
There’s only the three buttons to control the system with, however once you’re used to the inputs its pretty logical and easy to use. In summer gloves I found it easy, however in heavy winter gloves which I rarely wear I was struggling a bit for feel. There’s also the voice commands for the headset, so when you turn on the SRL you can say, ‘Hello Sena’ and then give a command, like ‘FM radio on’, which is the one I most commonly use. You can also enable Vox Phone, which allows you to accept a call with a voice command.
You’ve also got a couple of settings which help you boost audio volume levels, which is great when you’re travelling at high speeds on a motorcycling as the ambient wind noise does ramp up past 100km/h, however if you turn on the Smart Volume Control setting, it will actually measure the ambient sound (like wind noise at high speeds) and ramp up the volume so you can still hear your music, radio or call. There’s different levels you can set this too, which means you can adjust how much it’ll boost the audio or how sensitive it is to the ambient noise.
The Sena SRL offers syncing with your phone for calls, music and GPS, while you can also listen to the radio, or sync with other Sena comms systems.
I’ve accepted phone calls at lower more suburban speeds of around the 60km/h region without issues, however I’ve yet to fully test the system at 110km/h cruising on the freeway, where I’ll be interested to see both how well I can hear the other party, not to mention how well my voice will be heard.
The other big feature is of course using the intercom between Sena headsets, and while we’ve just got the one now I’m going to try and catch up with someone else with one to see how it works. It’s a simple enough system, where you simply put your Sena SRL into intercom pairing, and it will connect to another headset, meaning you can communicate with a pillion or other riders.
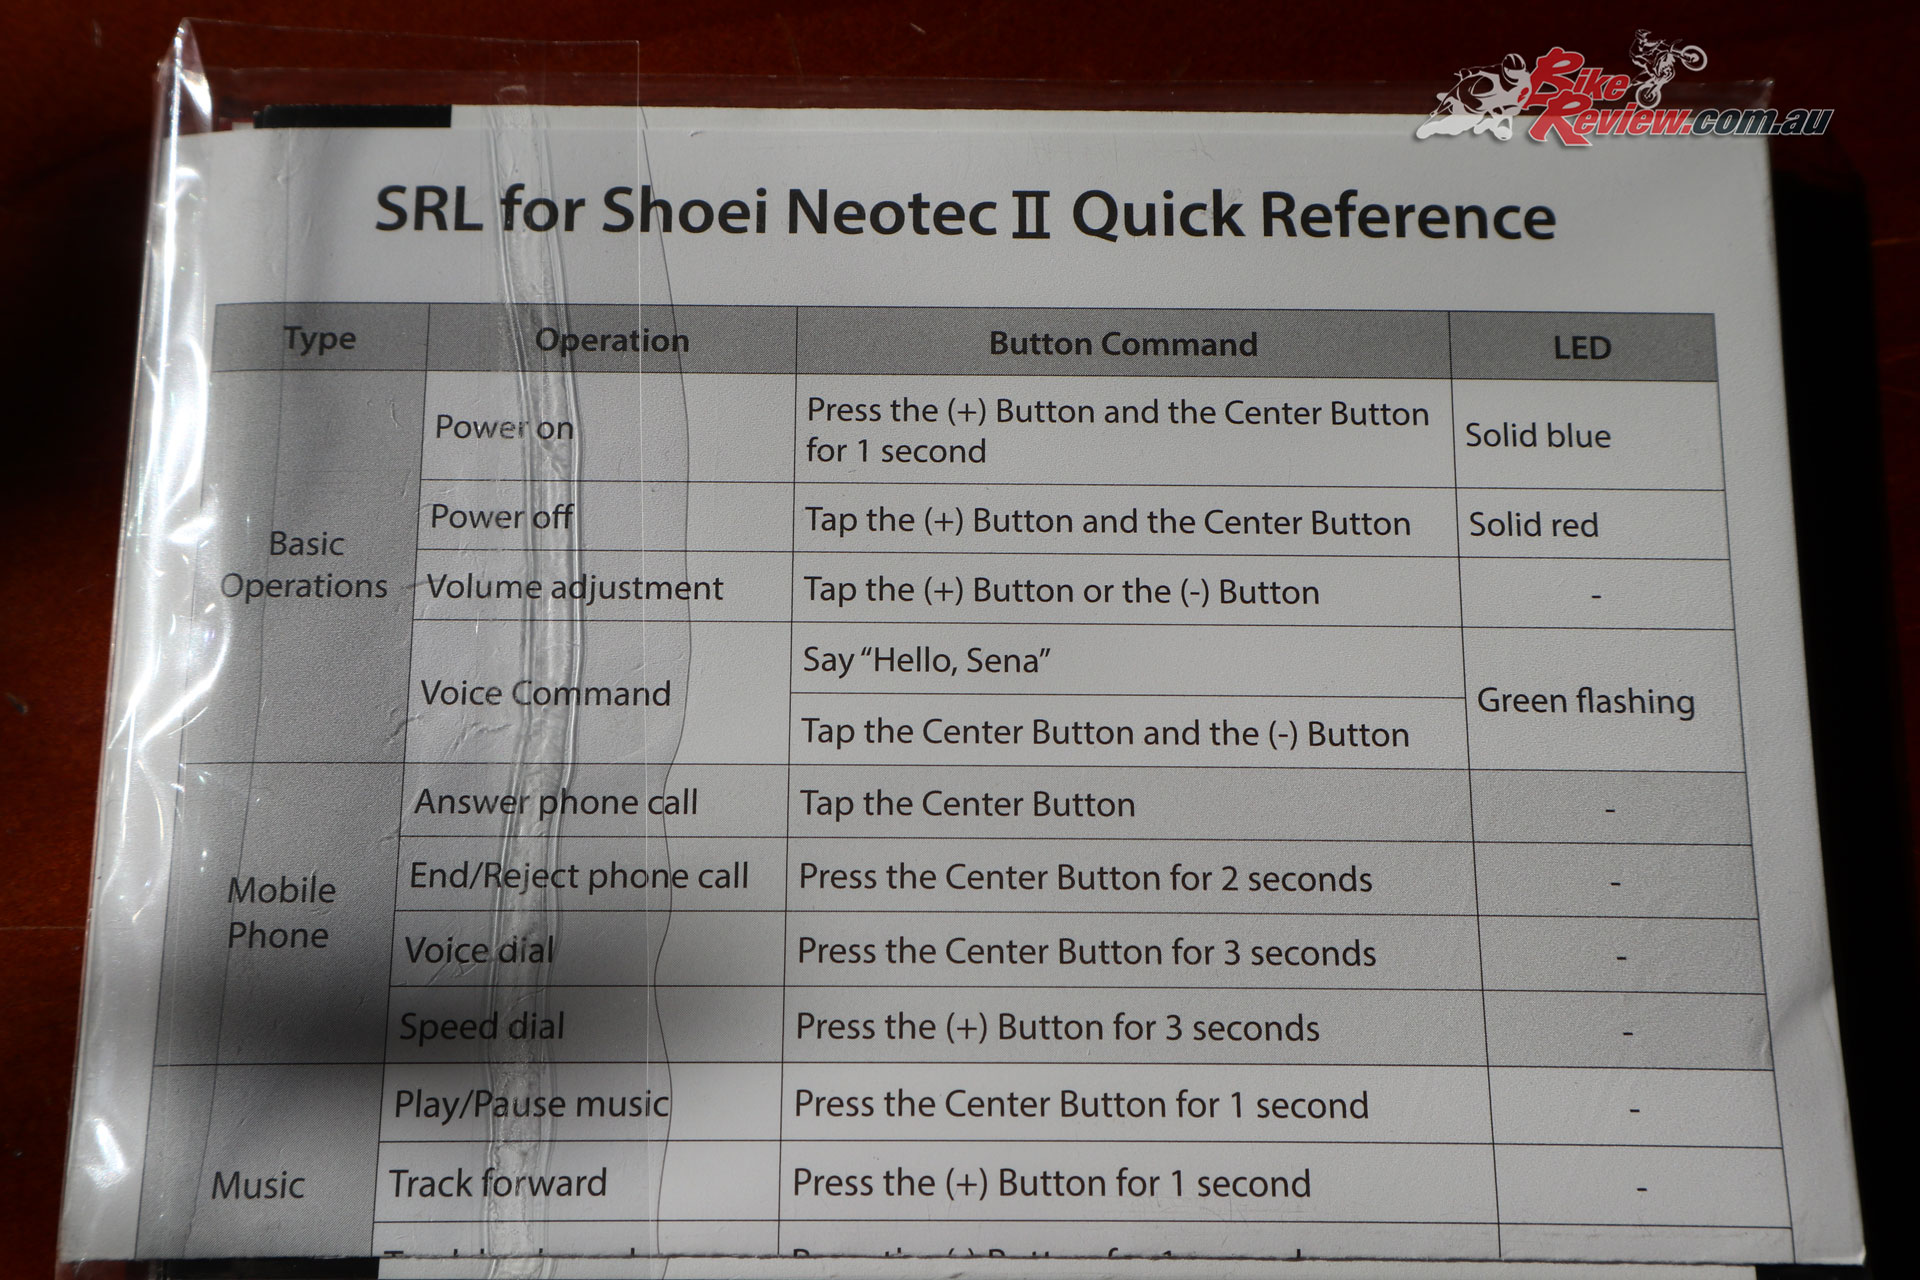
The basic instructions for use are relatively simple, but it can take a little bit of use to remember everything without the manual. The manual is also downloadable for your phone.
There’s also the group intercom system, allowing up to 10 riders to take part, which means if you’re on a big trip with mates, everything should be able to take part!
If I’m totally honest I’m just scratching the surface of what the Sena SRL Comms system is capable of, but for my needs, which is to play a little music or put the radio on when I’m on the freeway section of the commute, or giving me the option to answer a call, or get GPS instructions, without the need to see a screen, it’s a great investment.
The Sena SRL integrates seamlessly into the Shoei Neotec II and is a great system.
It’s also easy to charge between trips, by hooking the helmet up to a USB port on a computer via a MicroUSB, or if you’ve got a battery pack you’d be able to use that too.
In my testing the audio is clear enough at any speeds I’ve traveled, while traveling at regular speeds answering a phone call has also given good results.
I also picked up a Sena Prism action-camera to use with the Sena SRL in the hopes of getting the voice recording to video working, however this feature on the Prism doesn’t currently work between these two devices. Sena Australia were great when it came to support for the Sena Prism, while McLeod Accessories are supplying the SRL Comms system here in Oz, alongside Shoei helmets.

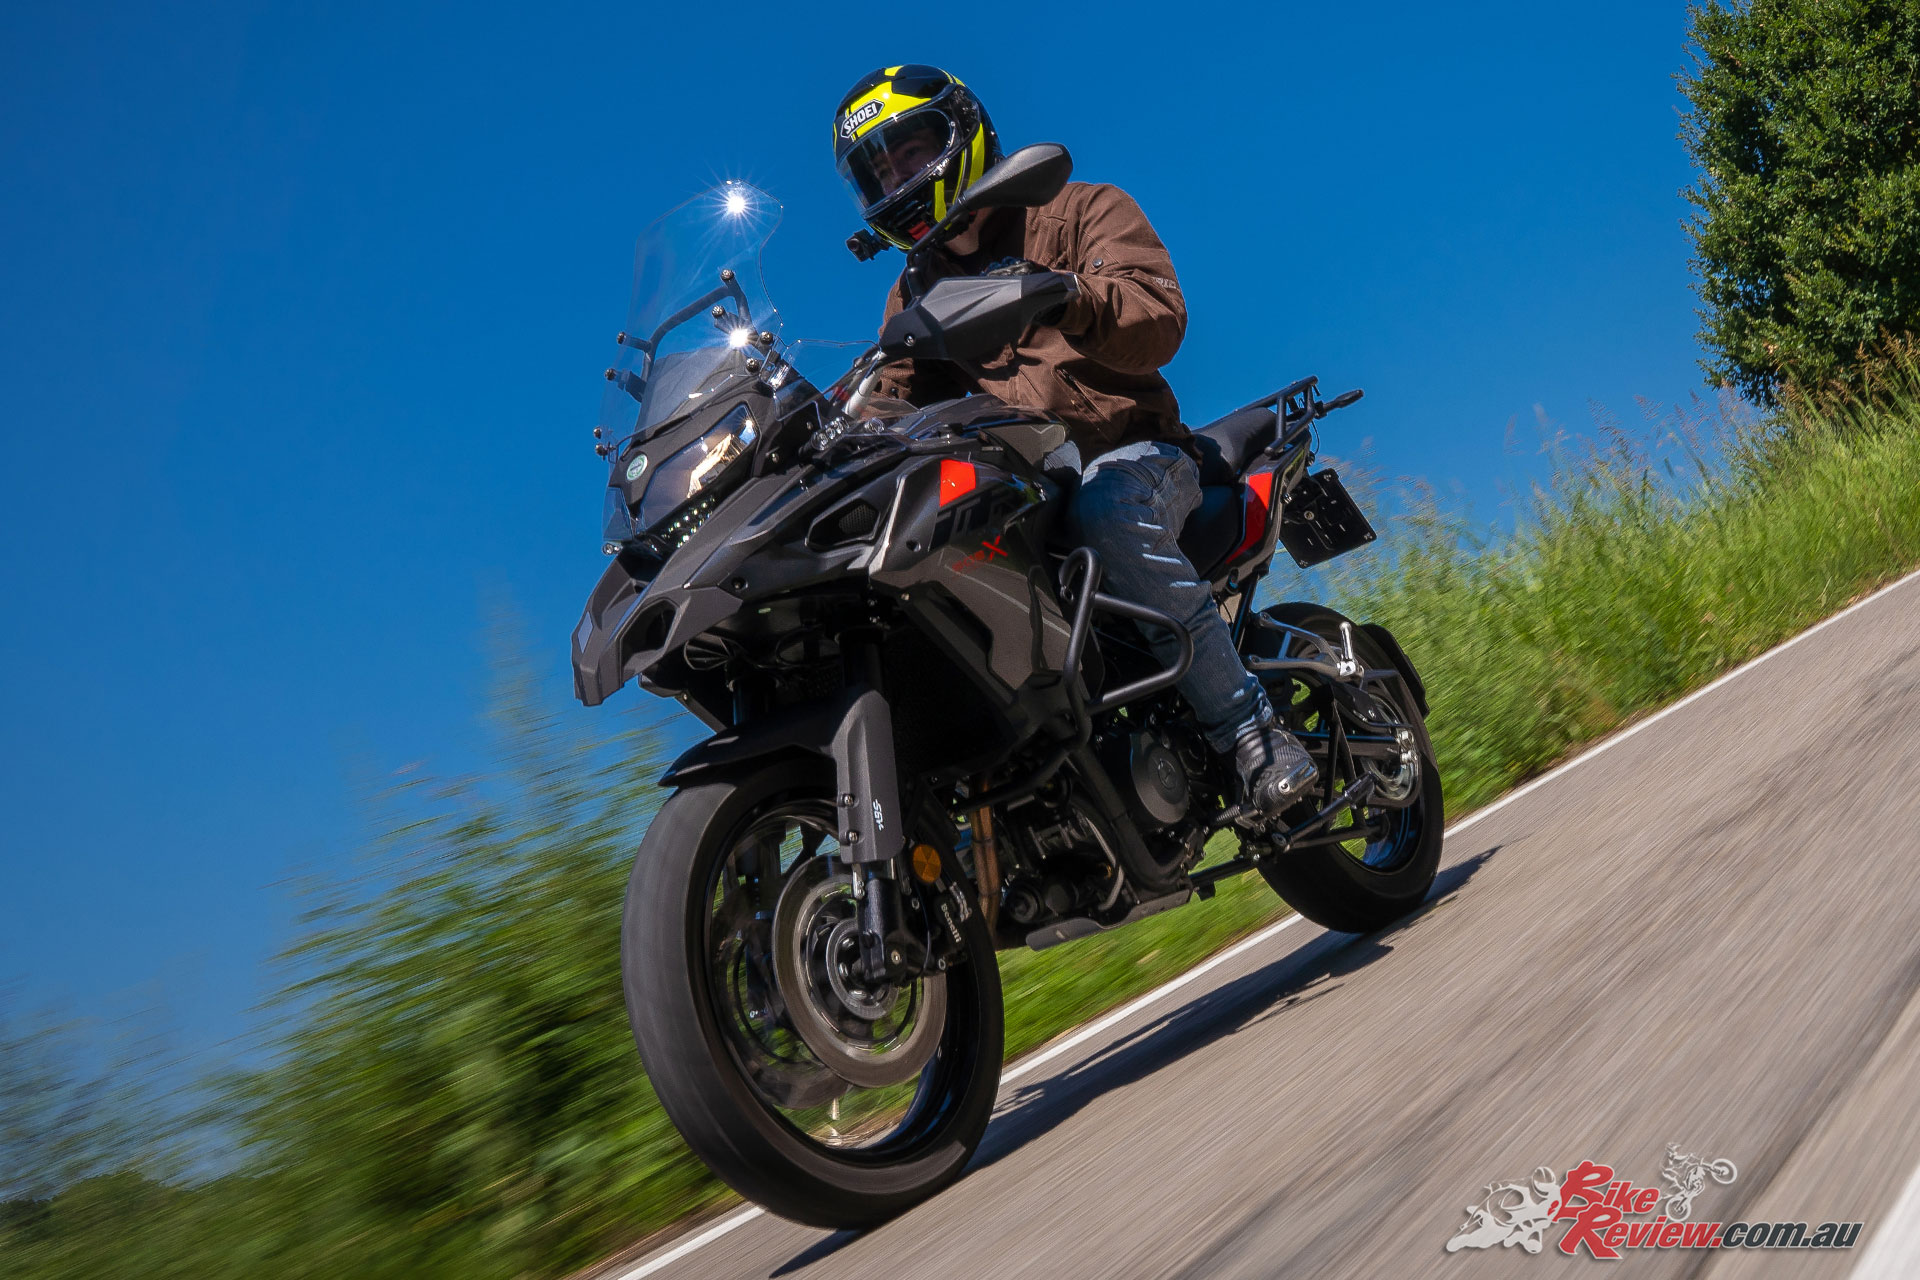
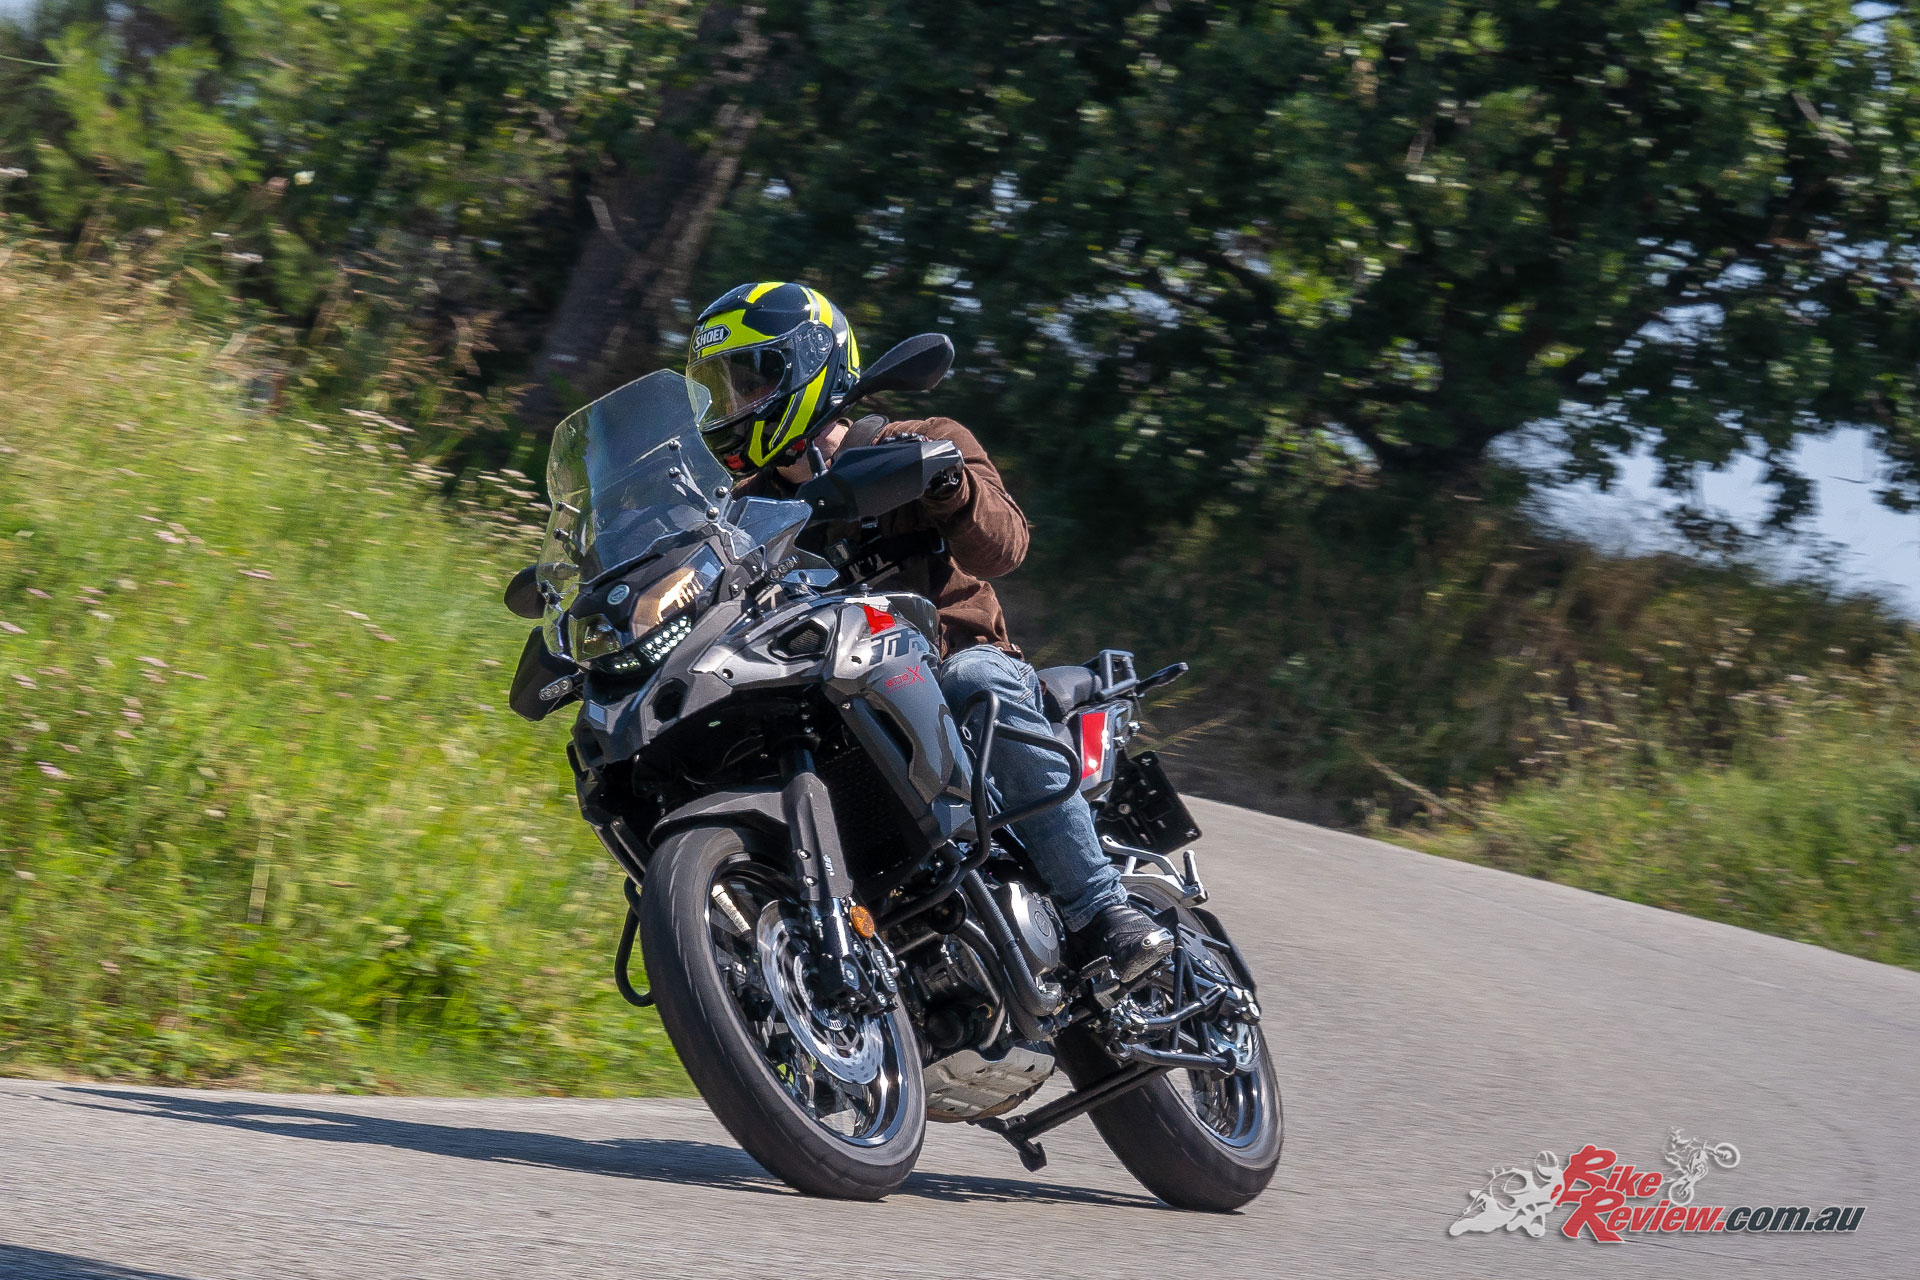
I took my Shoei Neotec II over to Italy for the Benelli TRK 502X launch and used it along with the Sena Prism, with the Sena SRL allowing for easy control of the camera, as I didn’t need music or radio, or the comms system at the time.
Overall it’s a great investment by my reckoning. Being able to get clear GPS instructions from your phone is great, as is playing your own music, since out in regional areas you’ll run out of radio coverage pretty quick. I’ve never been hugely into hands free systems in cars or on the bike, but you can setup a speed dial with the headset and take calls. Of course you can also leave the system off when you want peace and quiet on the bike too.
It’s a super clean install, and the battery lasts well, and is easy to charge, while the phone and computer Apps make for easy management of the settings. Add that to the Shoei Neotec II being a great modular helmet that does everything I want, and it’s a great combination.
You read my thoughts on the helmet here: Product Review: Shoei Neotec II Helmet
Sena SRL Communication System Fitment Guide
There’s good instructions included with the Sena SRL, but here’s a bit of a quick guide with pictures. I put a towel down on the table I was working on to ensure I wasn’t scratching my brand new helmet, and used a blunt butter knife to push the wiring into the channels, in a few places.

The Sena SRL Communication System new in the box
As you can see it’s a very neat system, with the rear battery unit, two side units with controls on the left, two speakers and the microphone.
Instructions are clear and easy to follow.
The included instructions are good, for the install and basic operation, as well as for the full abilities of the Sena SRL.
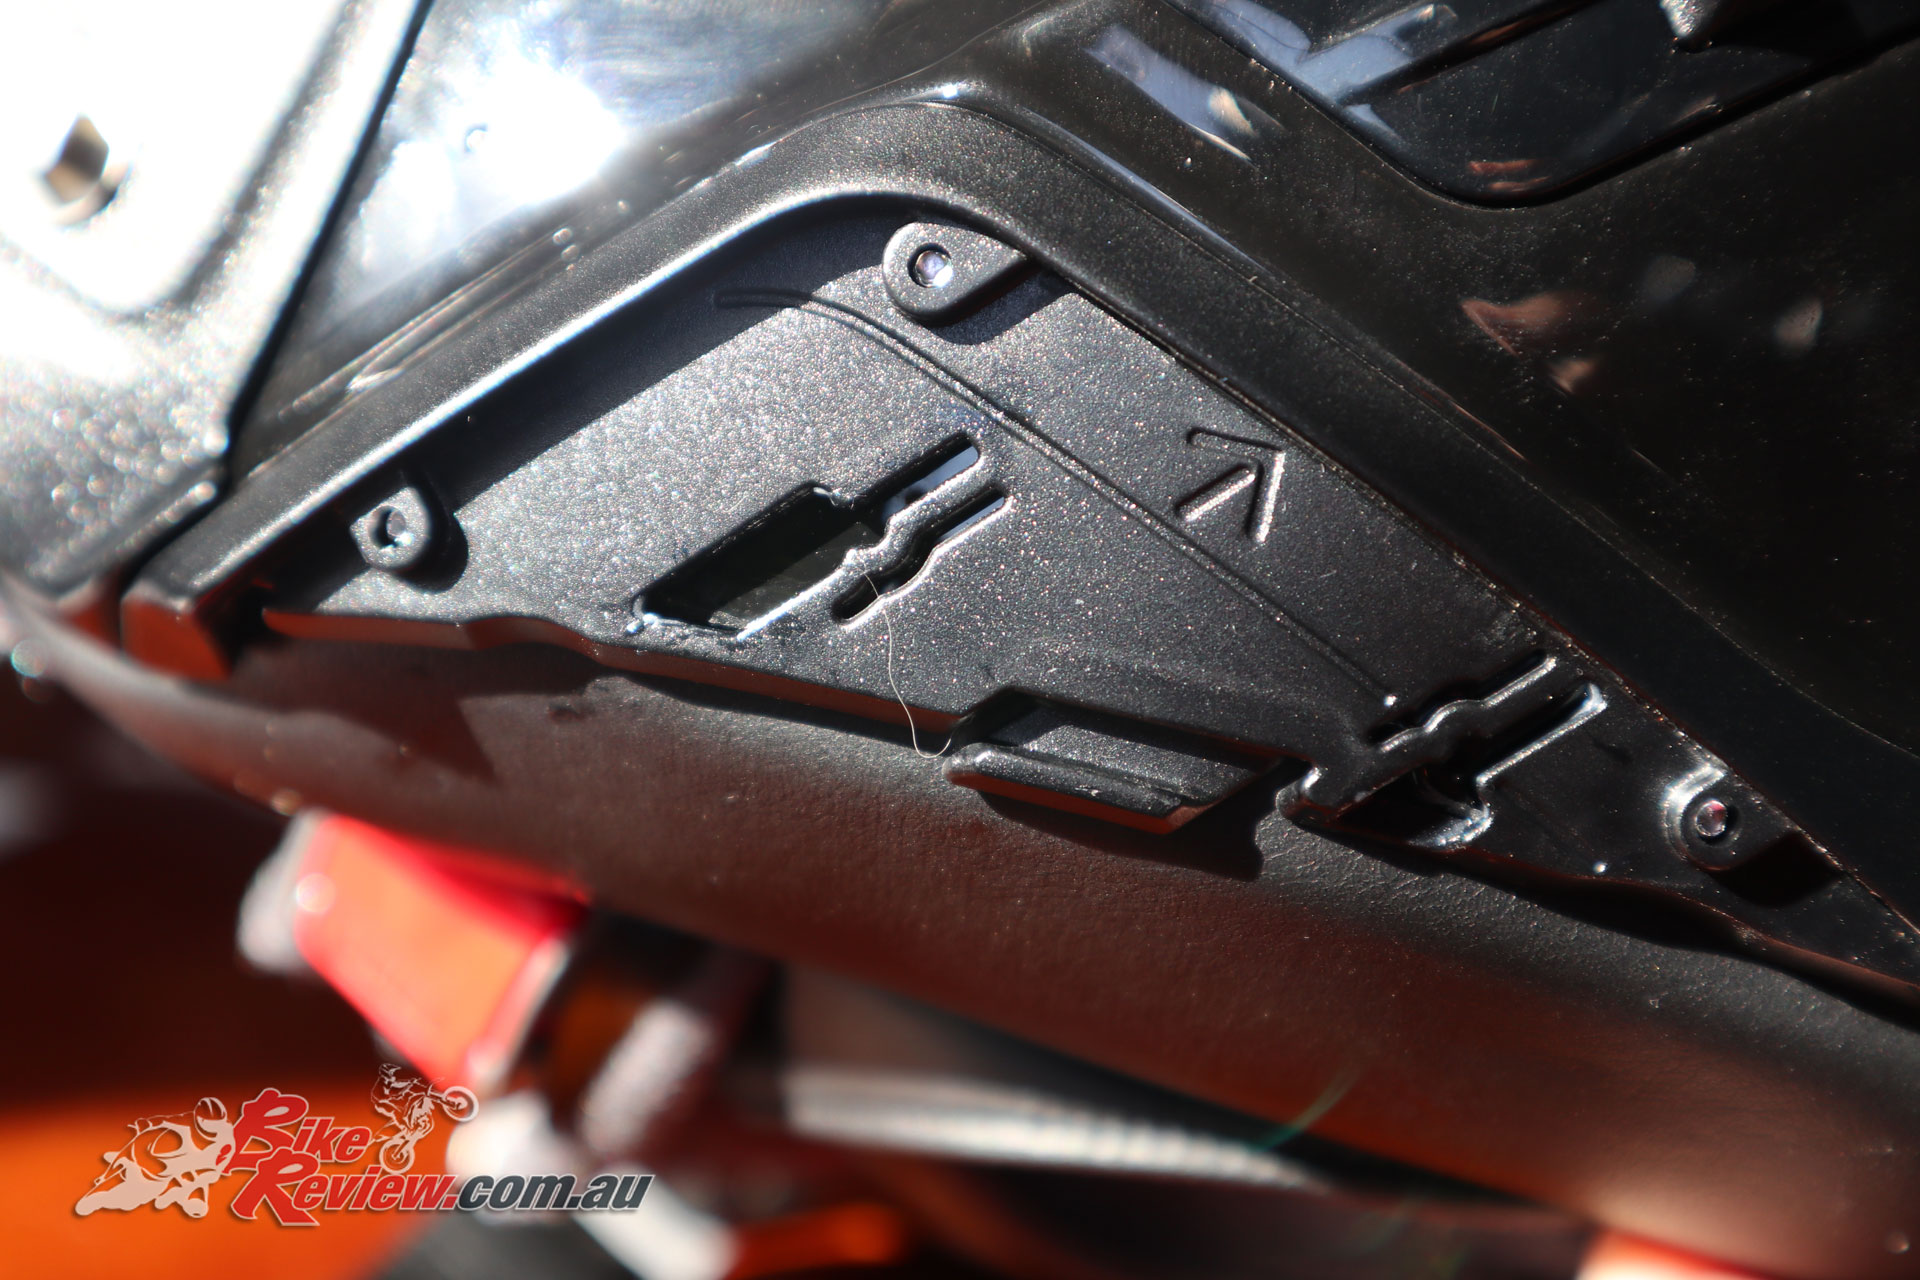
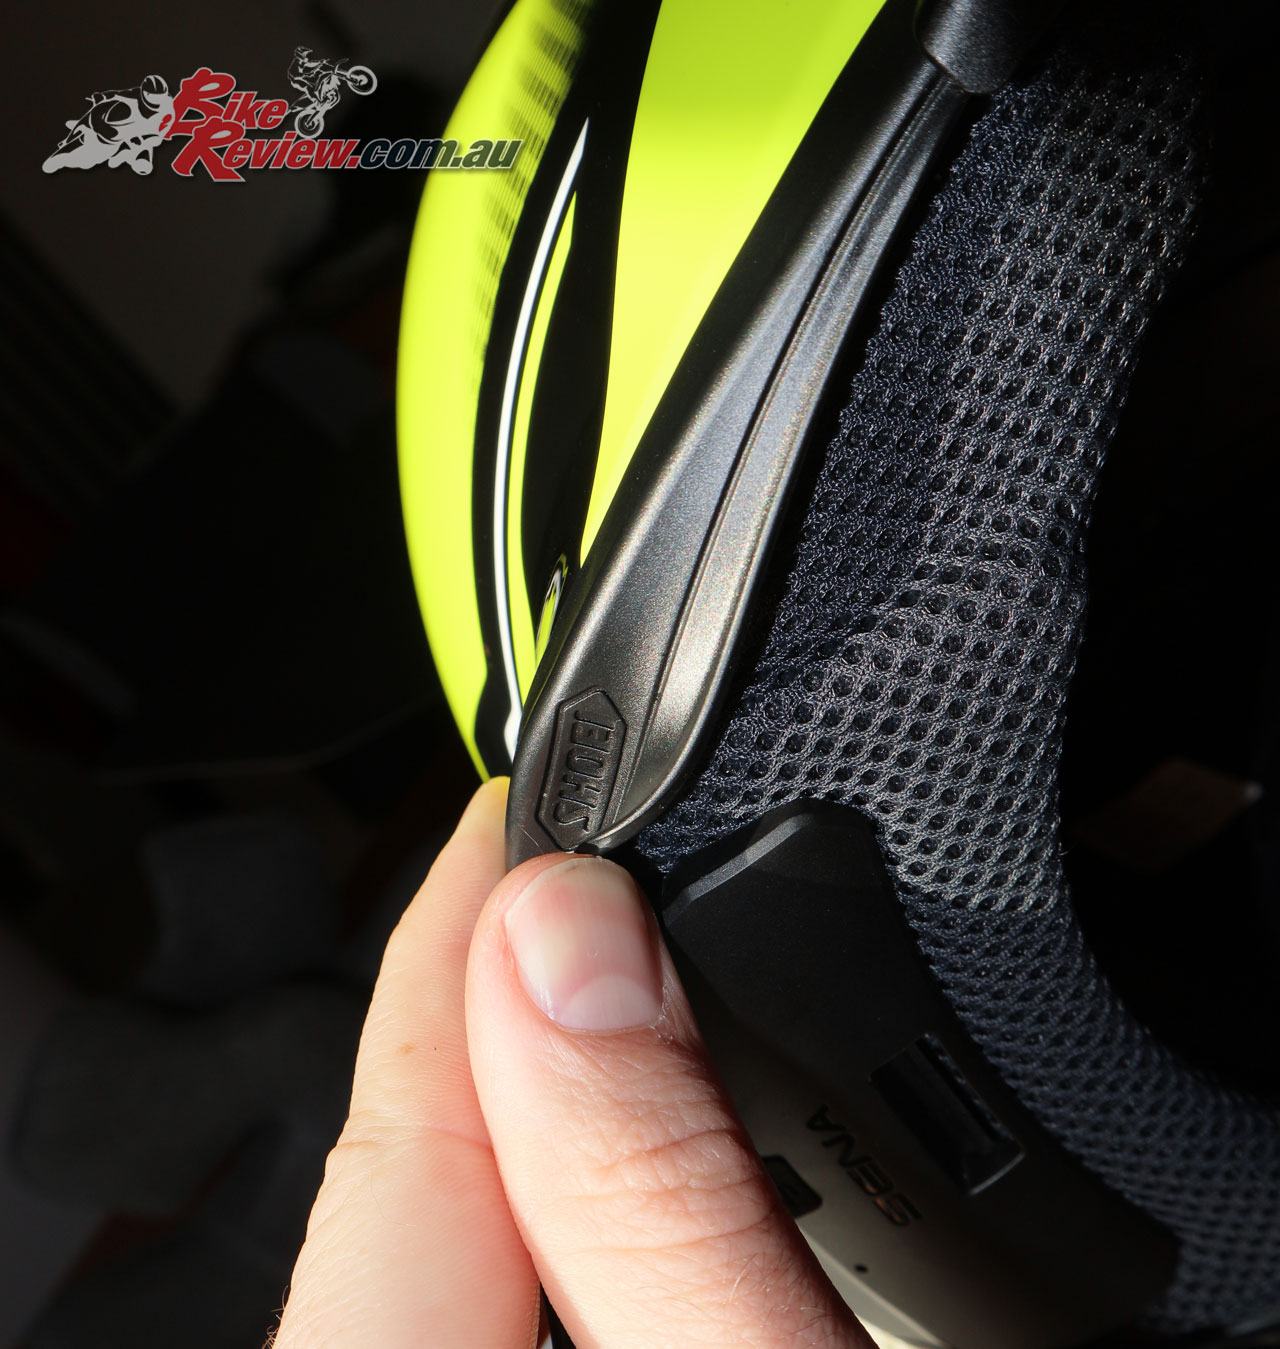
First up remove the stock plastic blanks from your Neotec II
You’ll need to remove the three plastic blanks that are placeholders for the Sena unit first up. The cheek pieces slide down at an angle as you can see from the arrow which points the direction for installation.
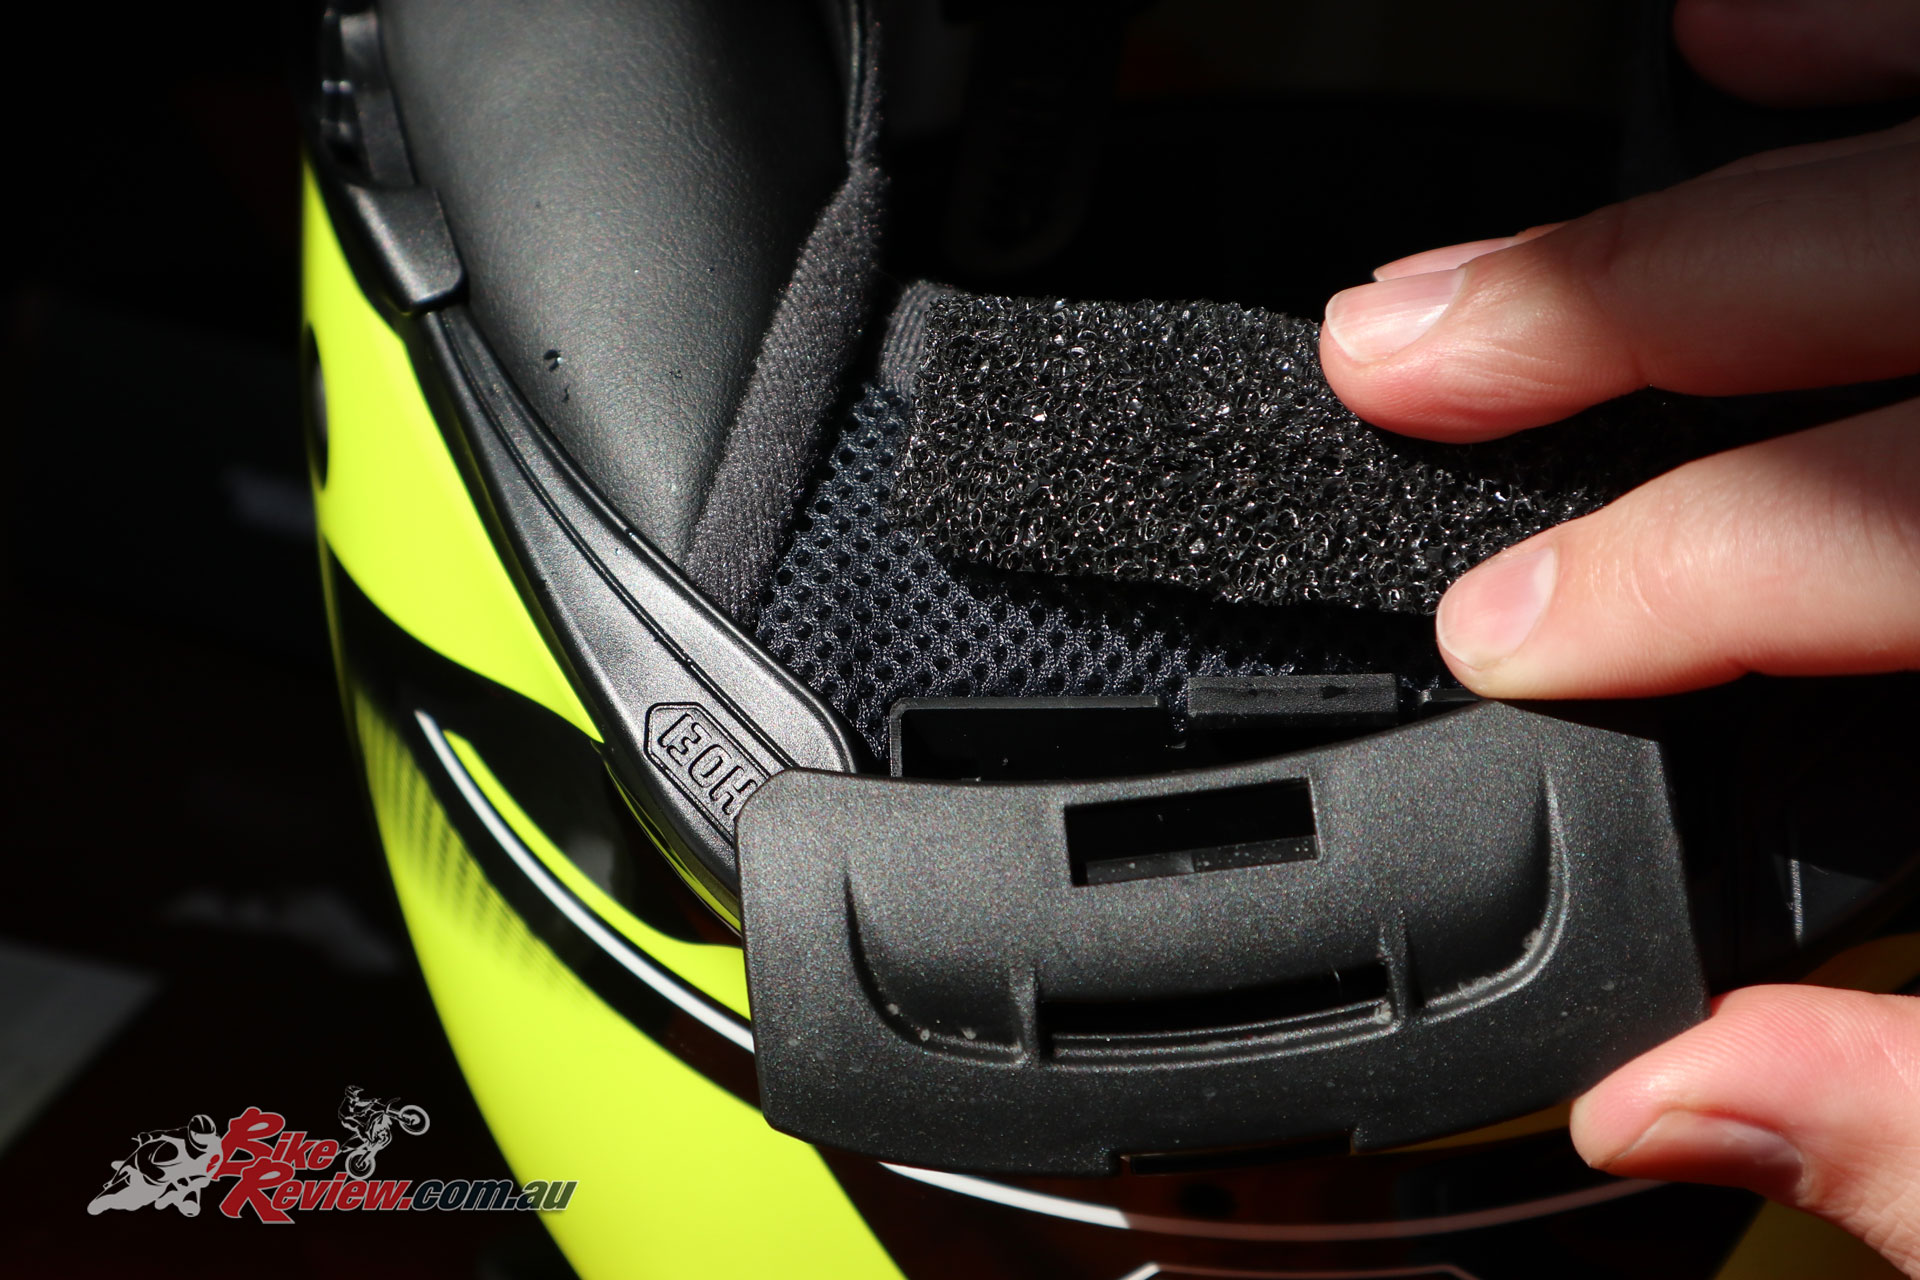
Remove the rear section as well.
The a flat head screw driver to release the rear piece, which has a foam placeholder under it. This may require a bit of work to get loose.
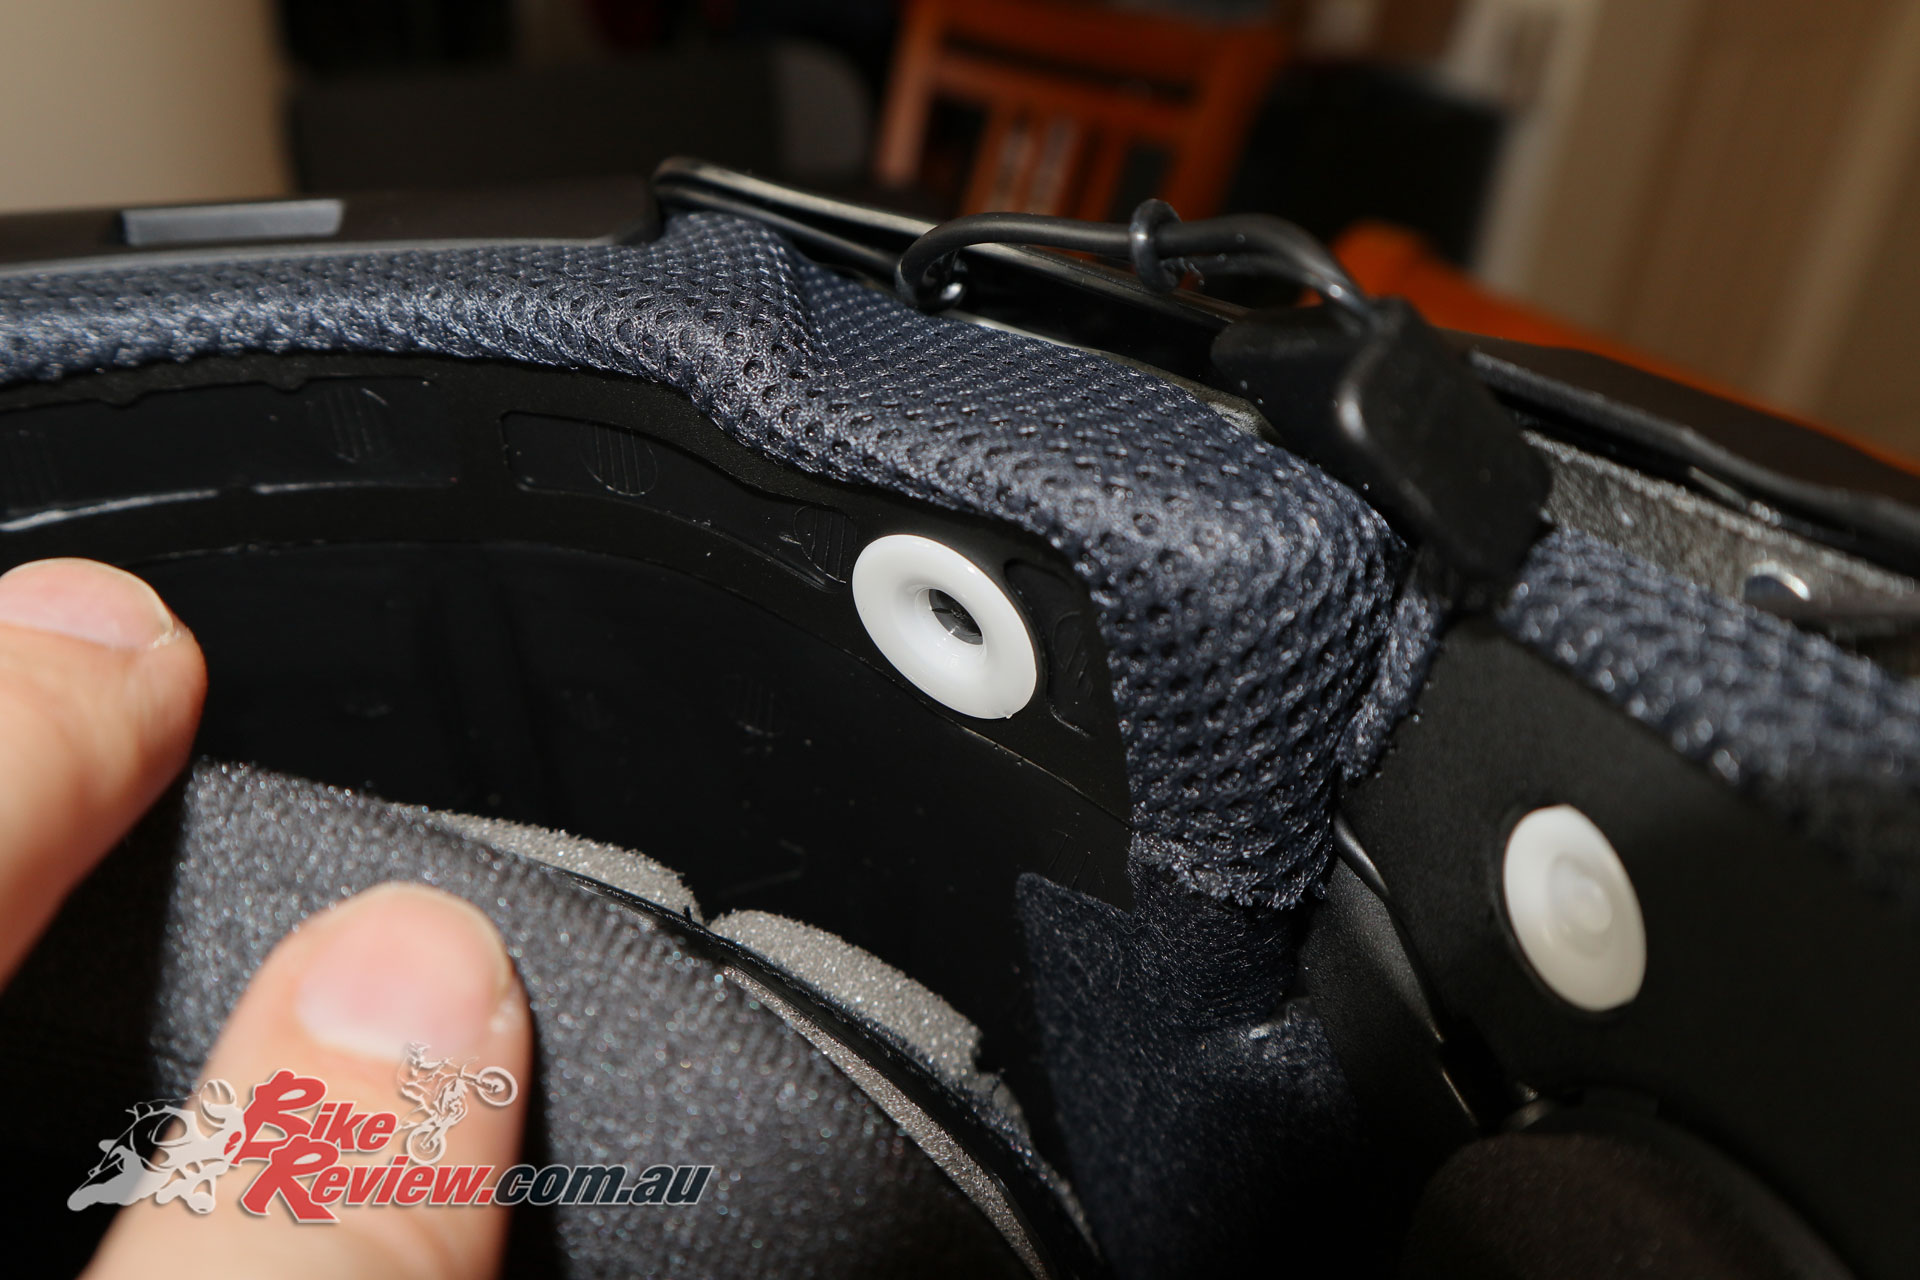
Remove the Neotec II cheek pads and lining.
I pulled out the lining to make the job a little easier as well as the cheek pads. The cheek pads are a tight fit, make sure you’ve disconnected the white clips, and there’s a plastic section which runs along the edge and clips down into the helmet lining. Getting this out was easier, getting it all back in was a little more fiddly.
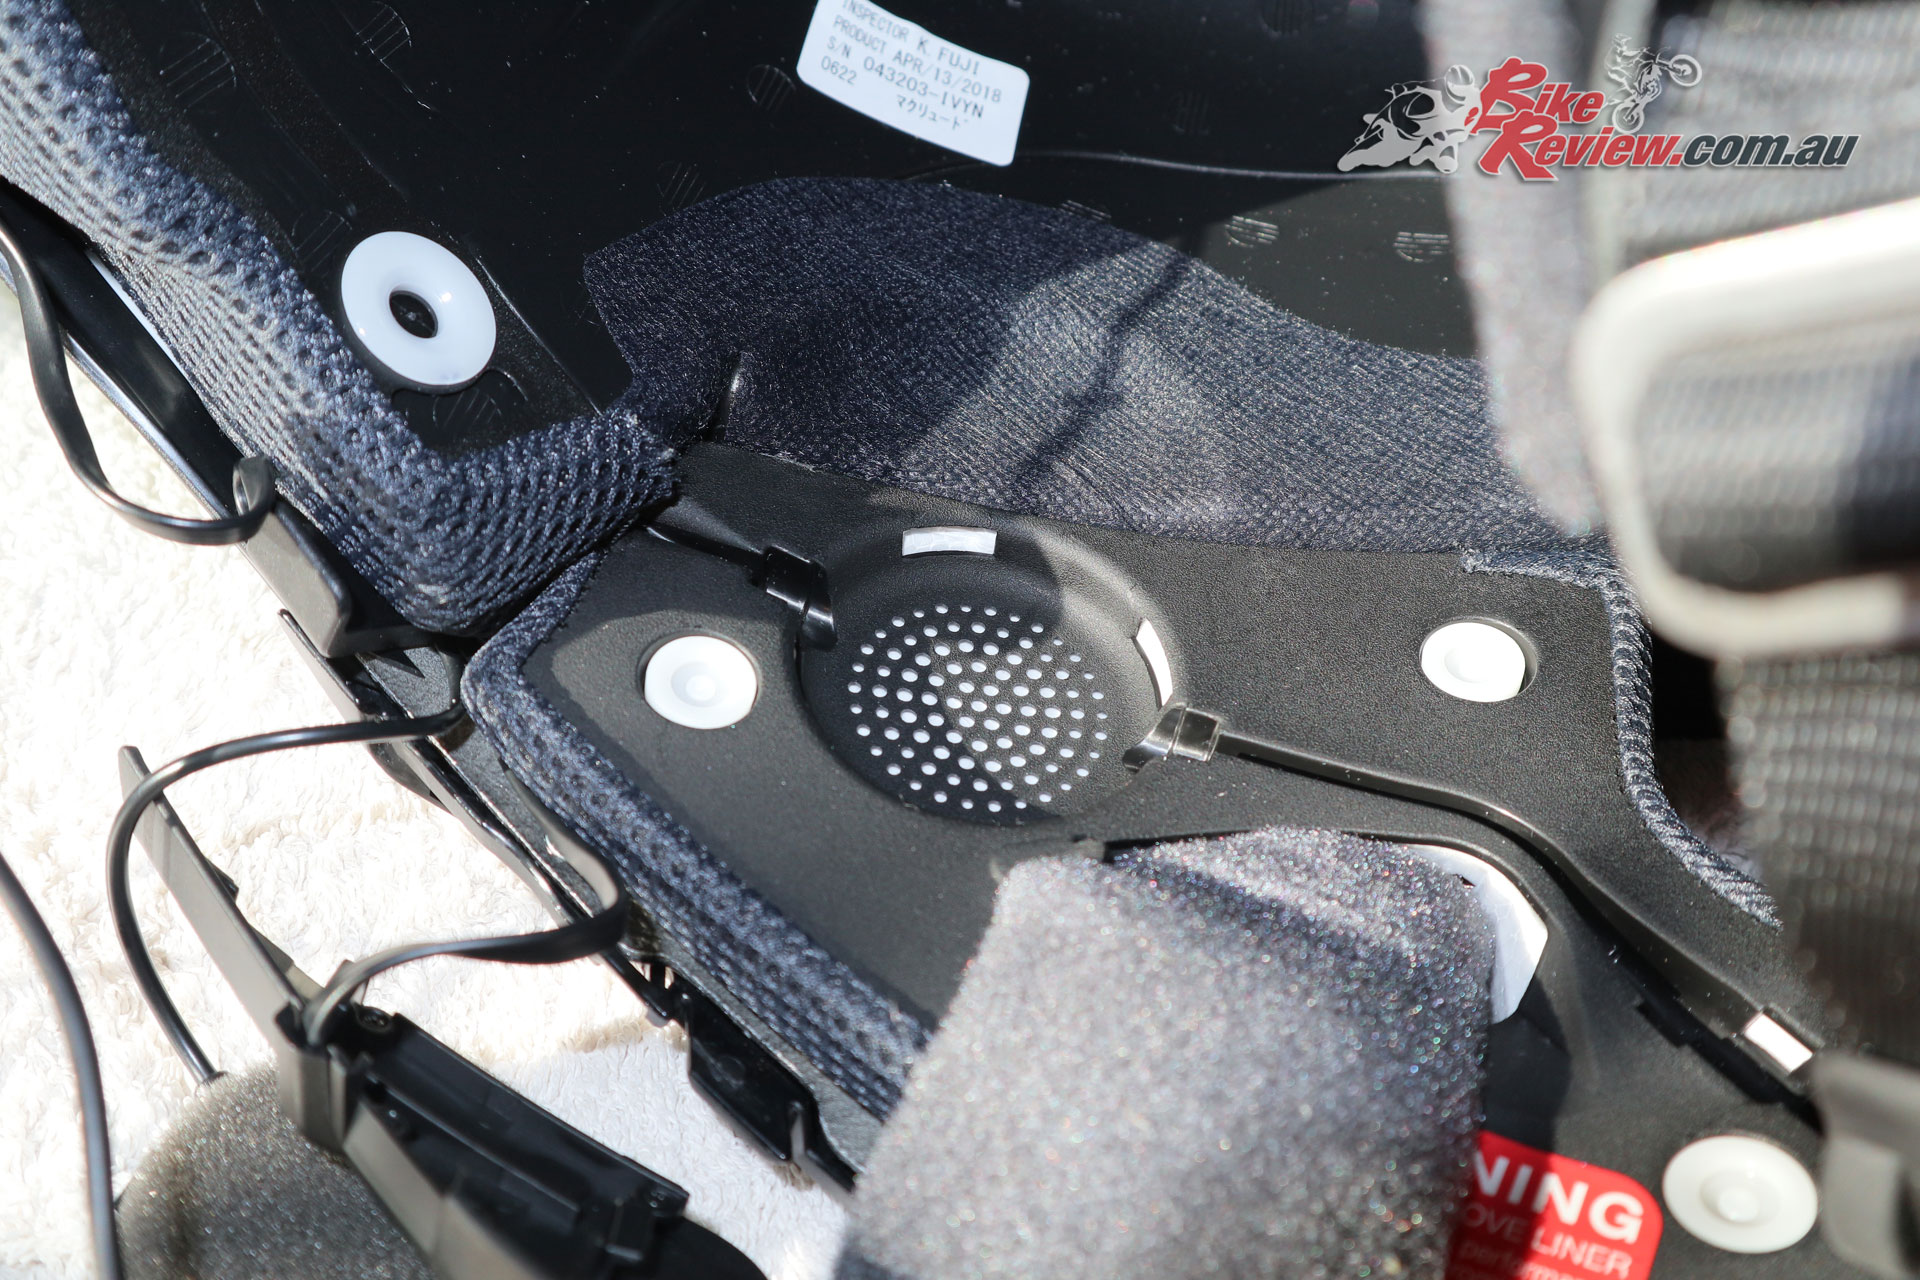
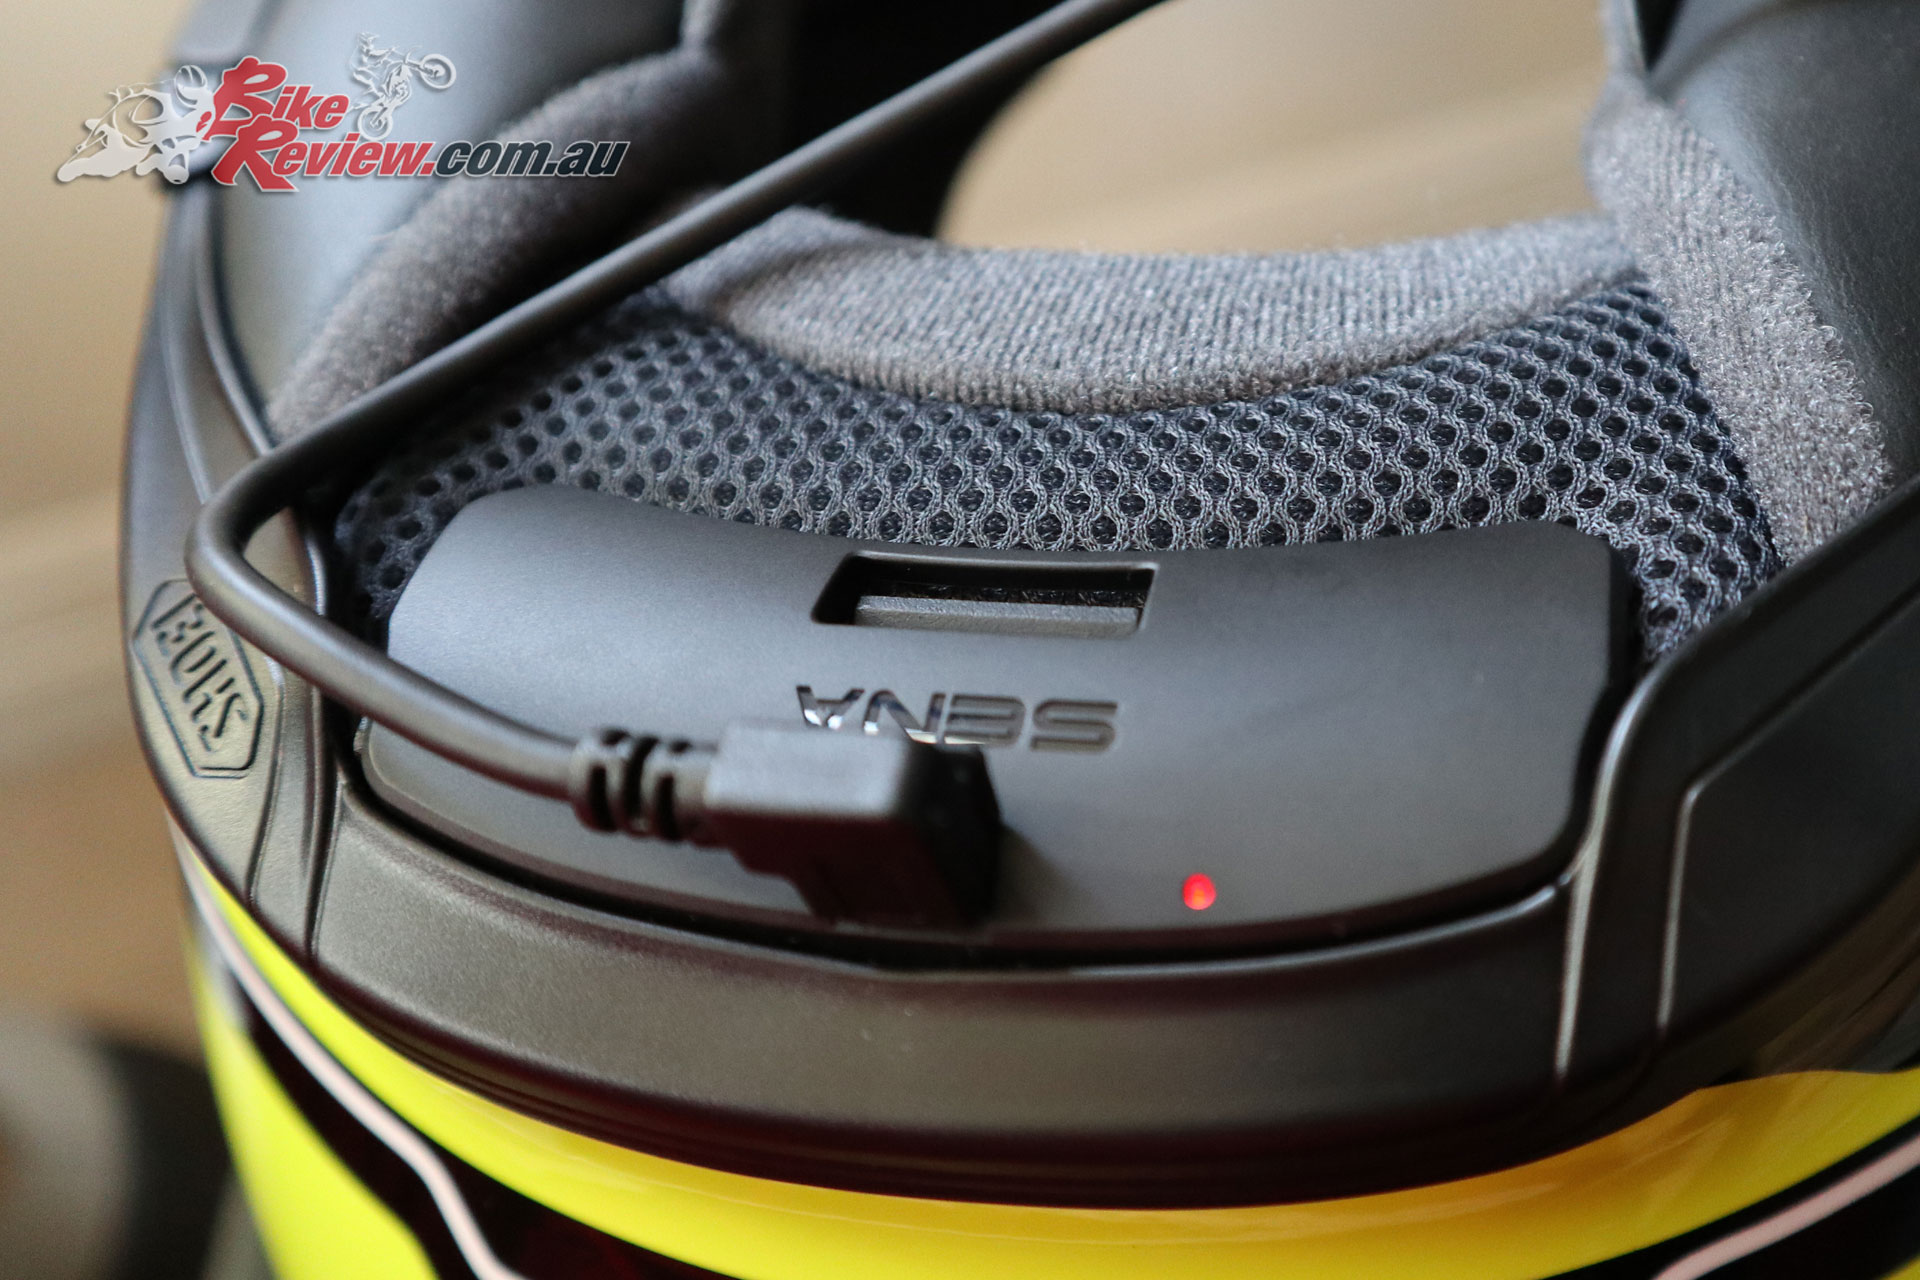
Fit the rear power unit of the Sena SRL.
The rear unit is a good place to start. Put this in first and press down firmly, it should click into place.
Note the soft rubber edging.
You may need to lift the rubber edging to get the Sena SRL unit properly seated.
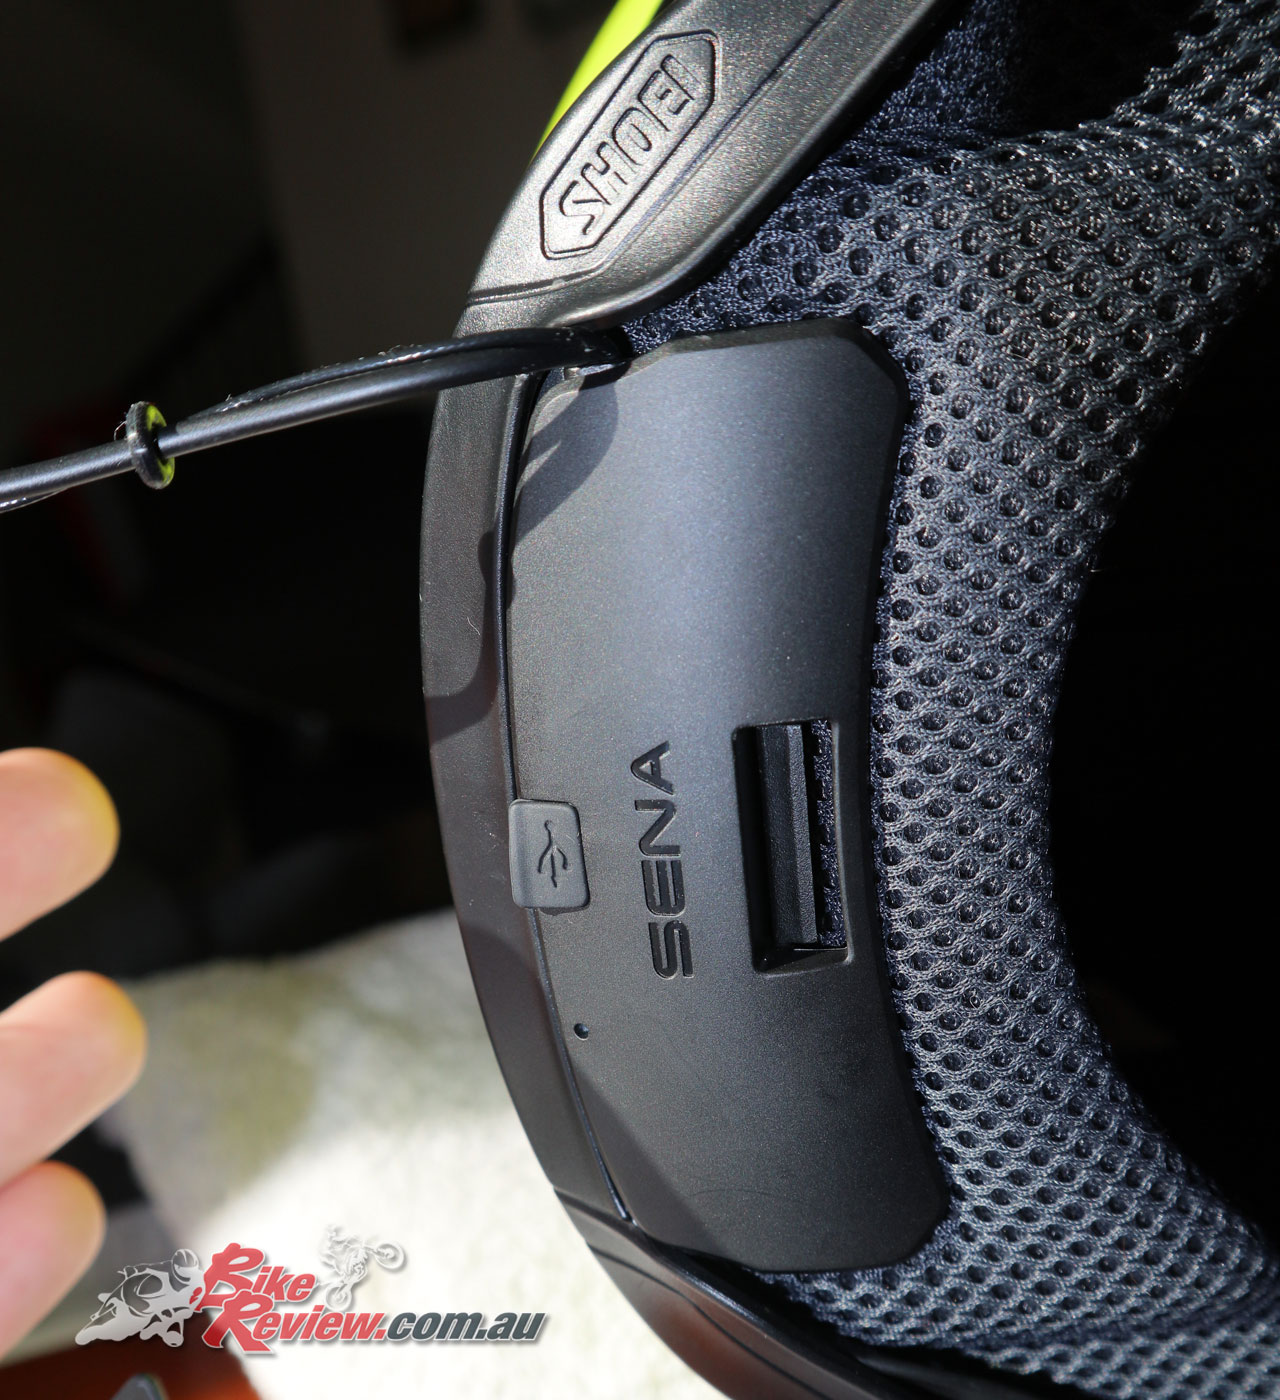
Slide the Sena SRL control unit into place.
Slide the control unit into place, it should go in easily and again clip into place, just note the angle it slides in on.
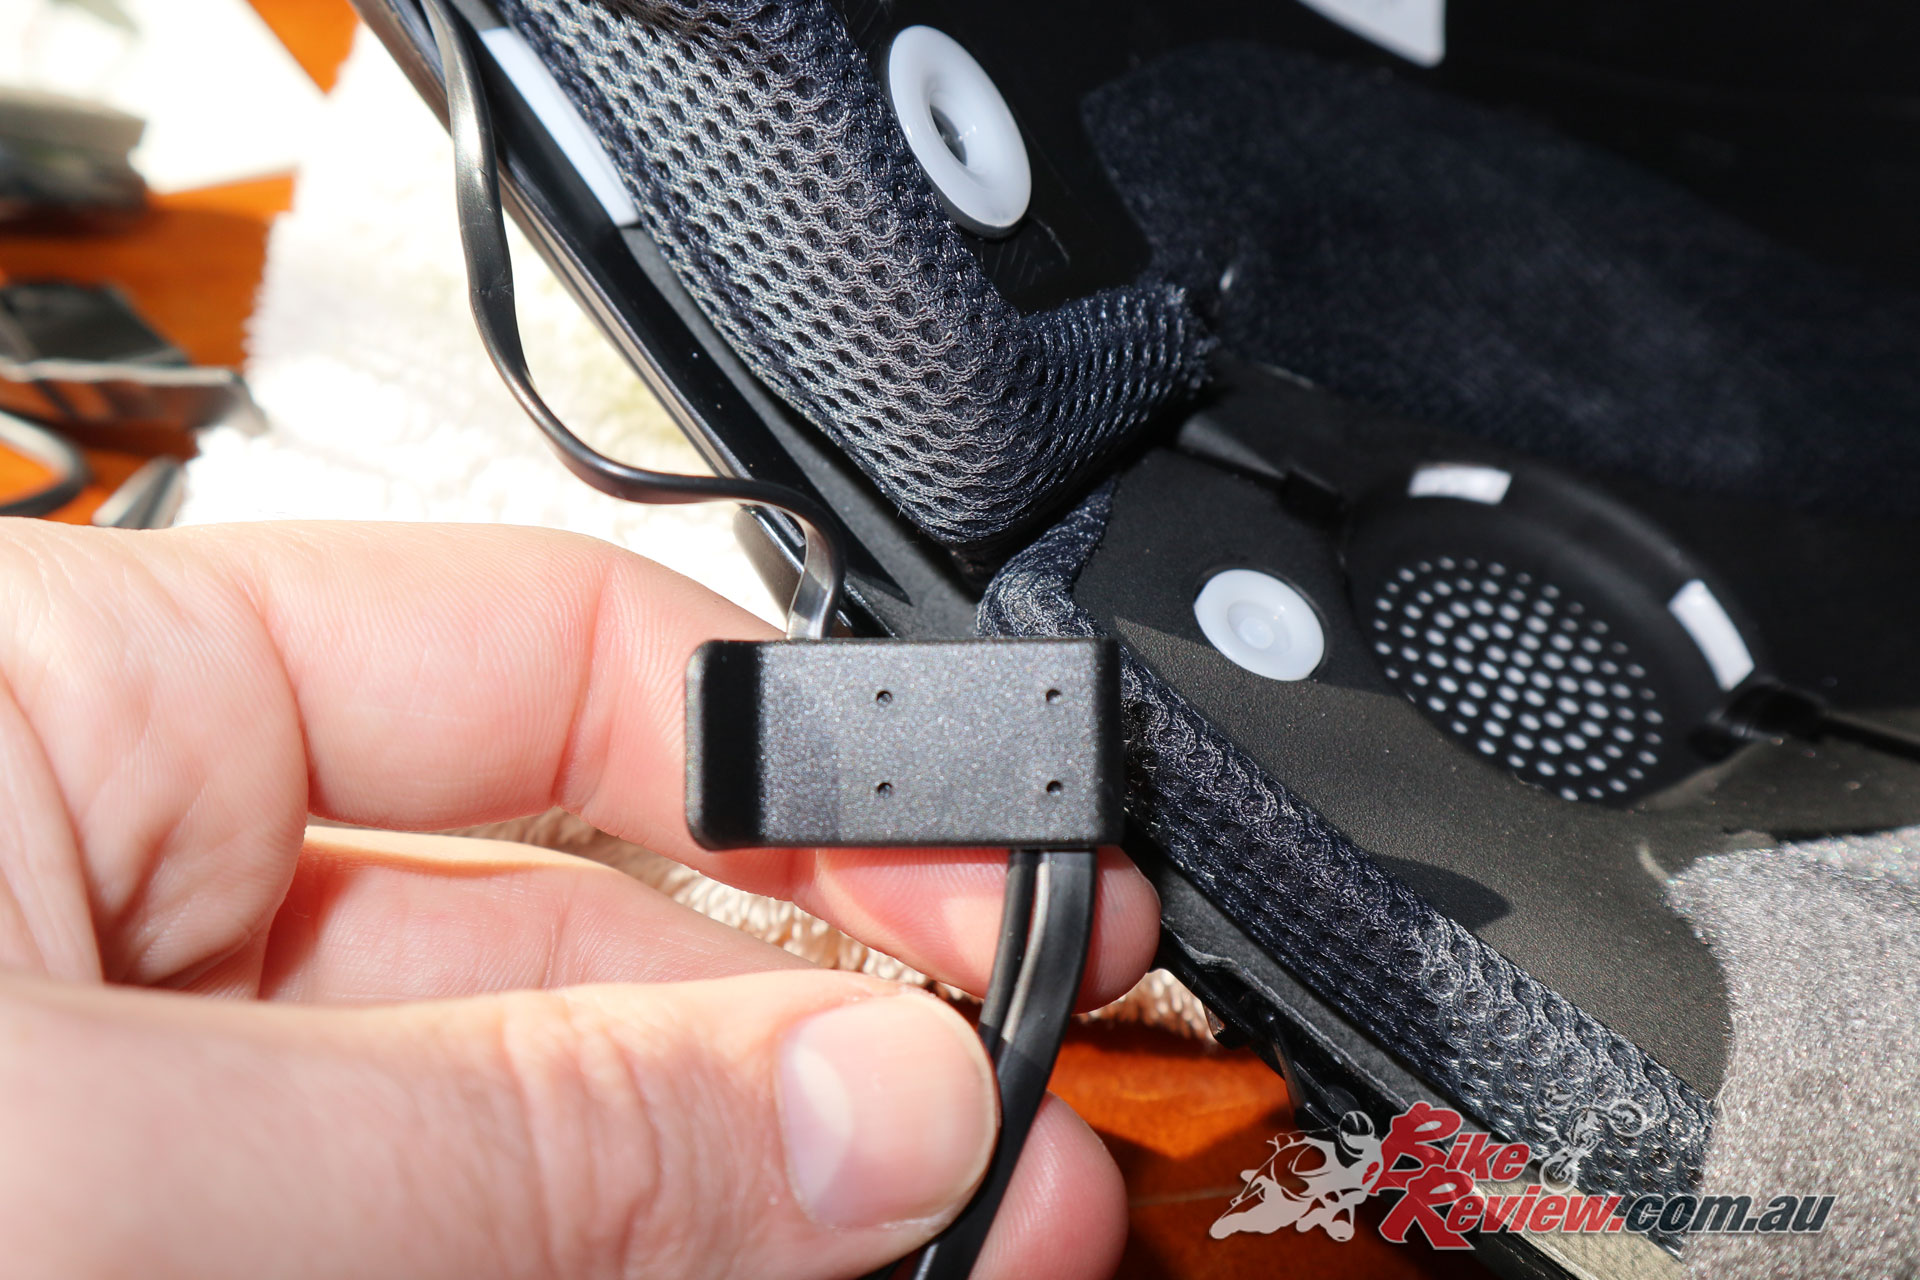
The wiring from the rear central unit includes these tabs which you push into place.
These tabs help keep the wiring in place and make for clean routing. Slide them in between the shell and lining. They should easily fit, and it wasn’t really snug for my helmet, so you’re not bending or damaging the helmet in any way.
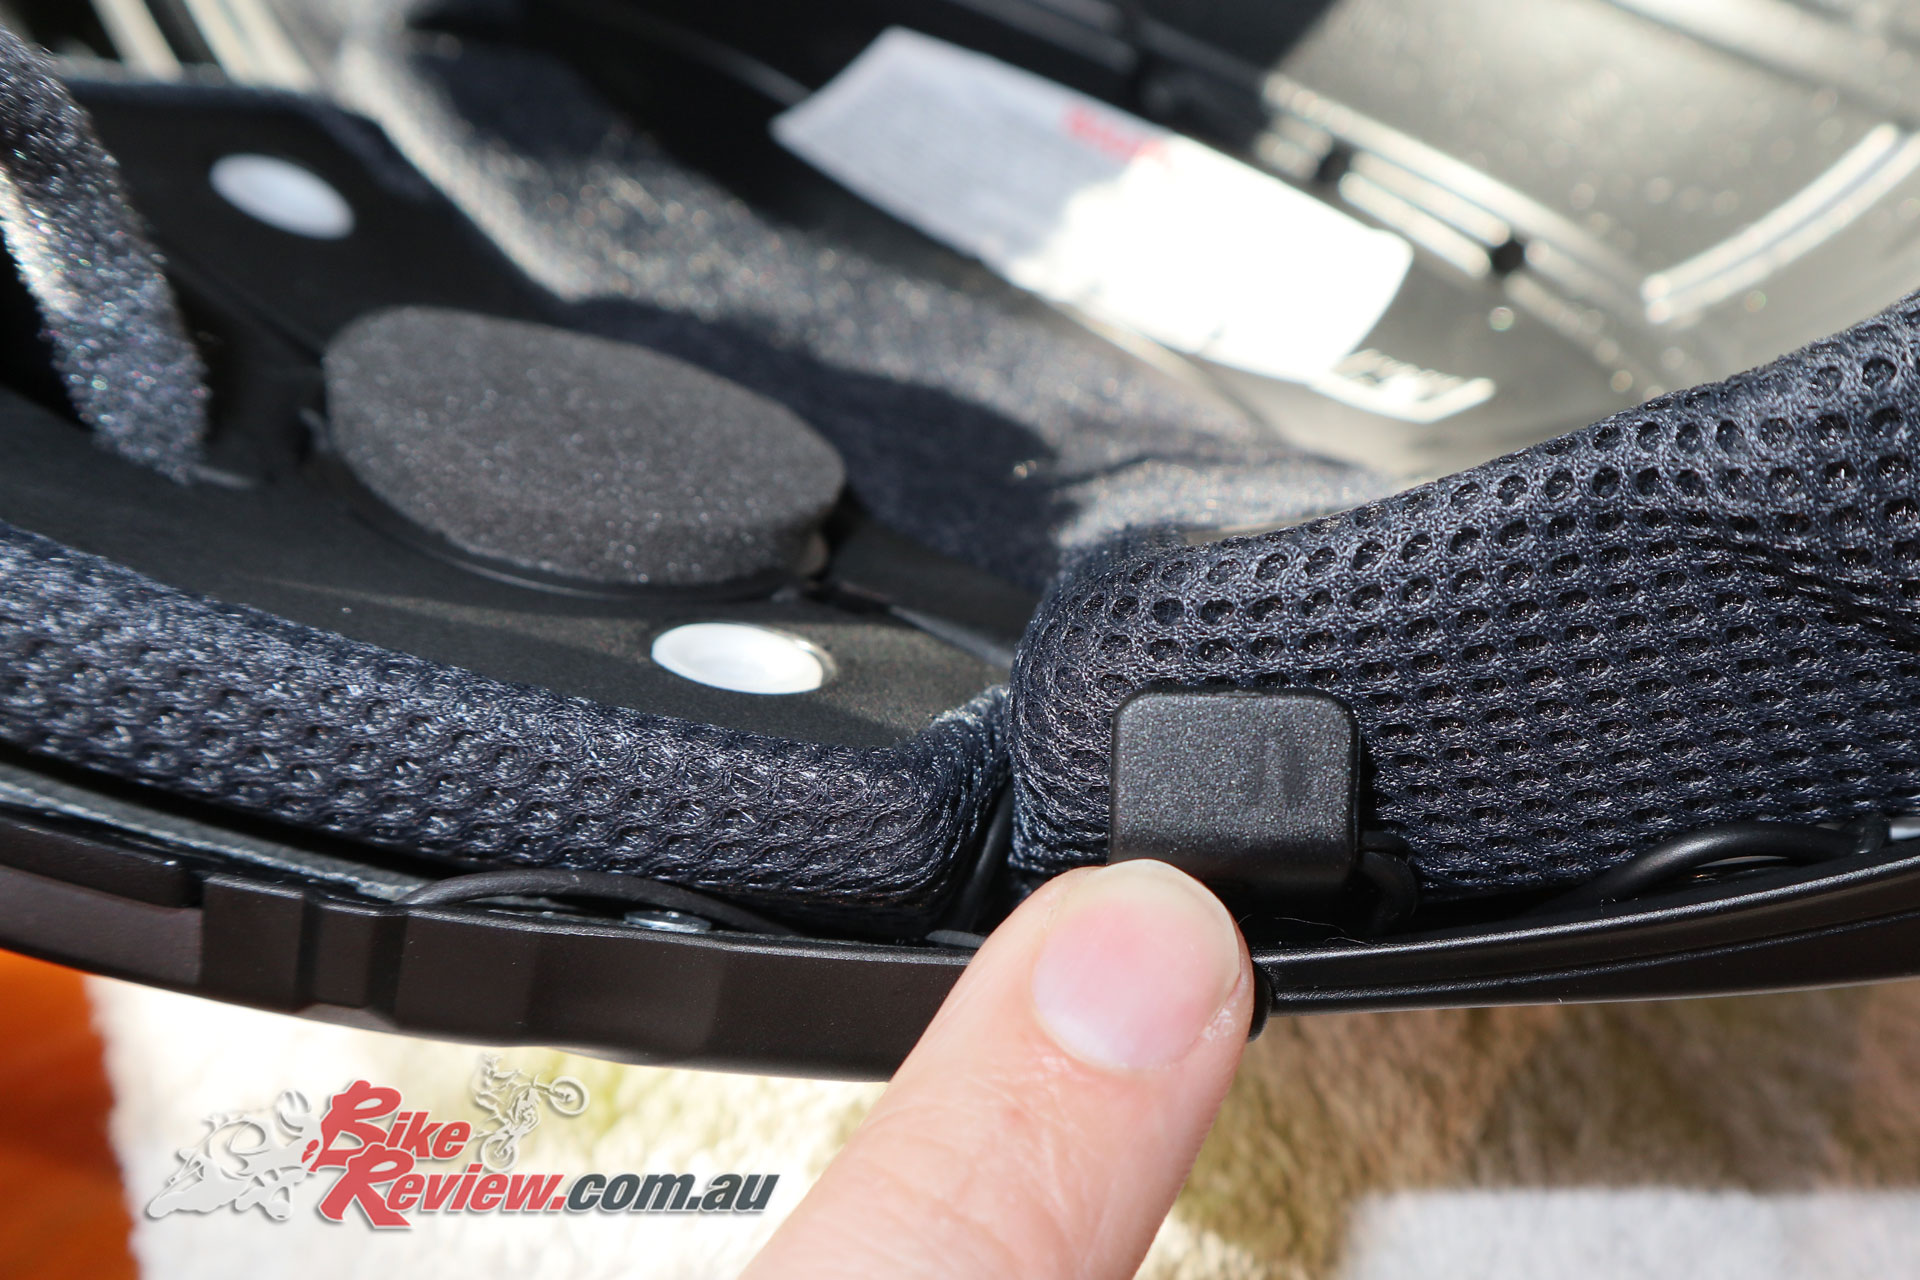
Run the Sena SRL speakers into place.
Note how the speaker wires sit in the channels. I needed to use the blunt end of a butter knife to push them into place, although a screw driver would also do the job. Just be careful not to damage the wiring. The speaker clicks into place.
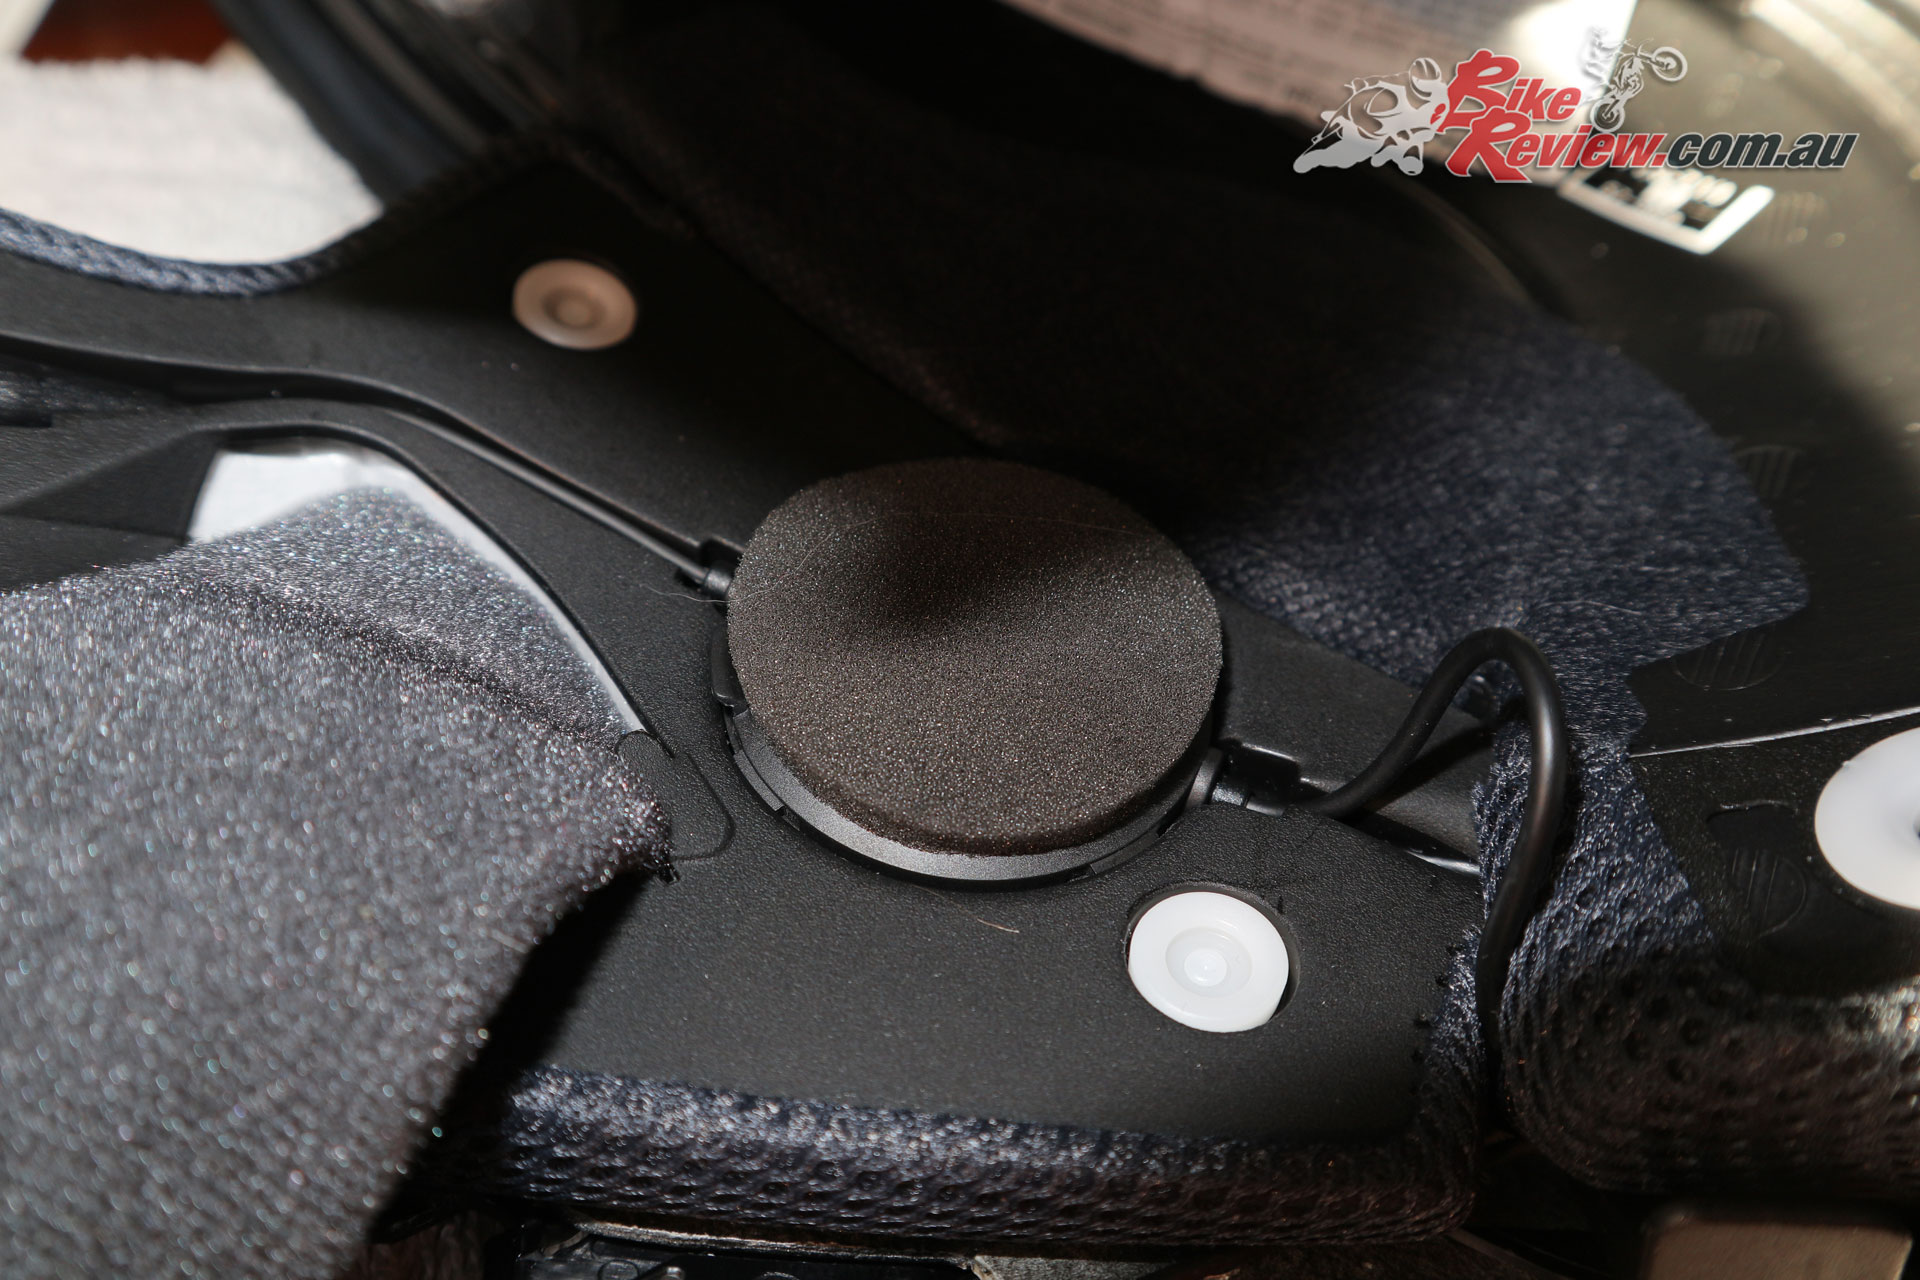
The right side of the helmet includes the channel for the microphone.
The microphone in the Sena SRL only will fit into the Neotec II one way, then add the foam wind sock over the end of the microphone when you’re ready.
Check all the wiring is hidden away and the tabs in place before replacing cheek pads and lining.
Do a double check that everything is securely in place and the wiring is hidden away.
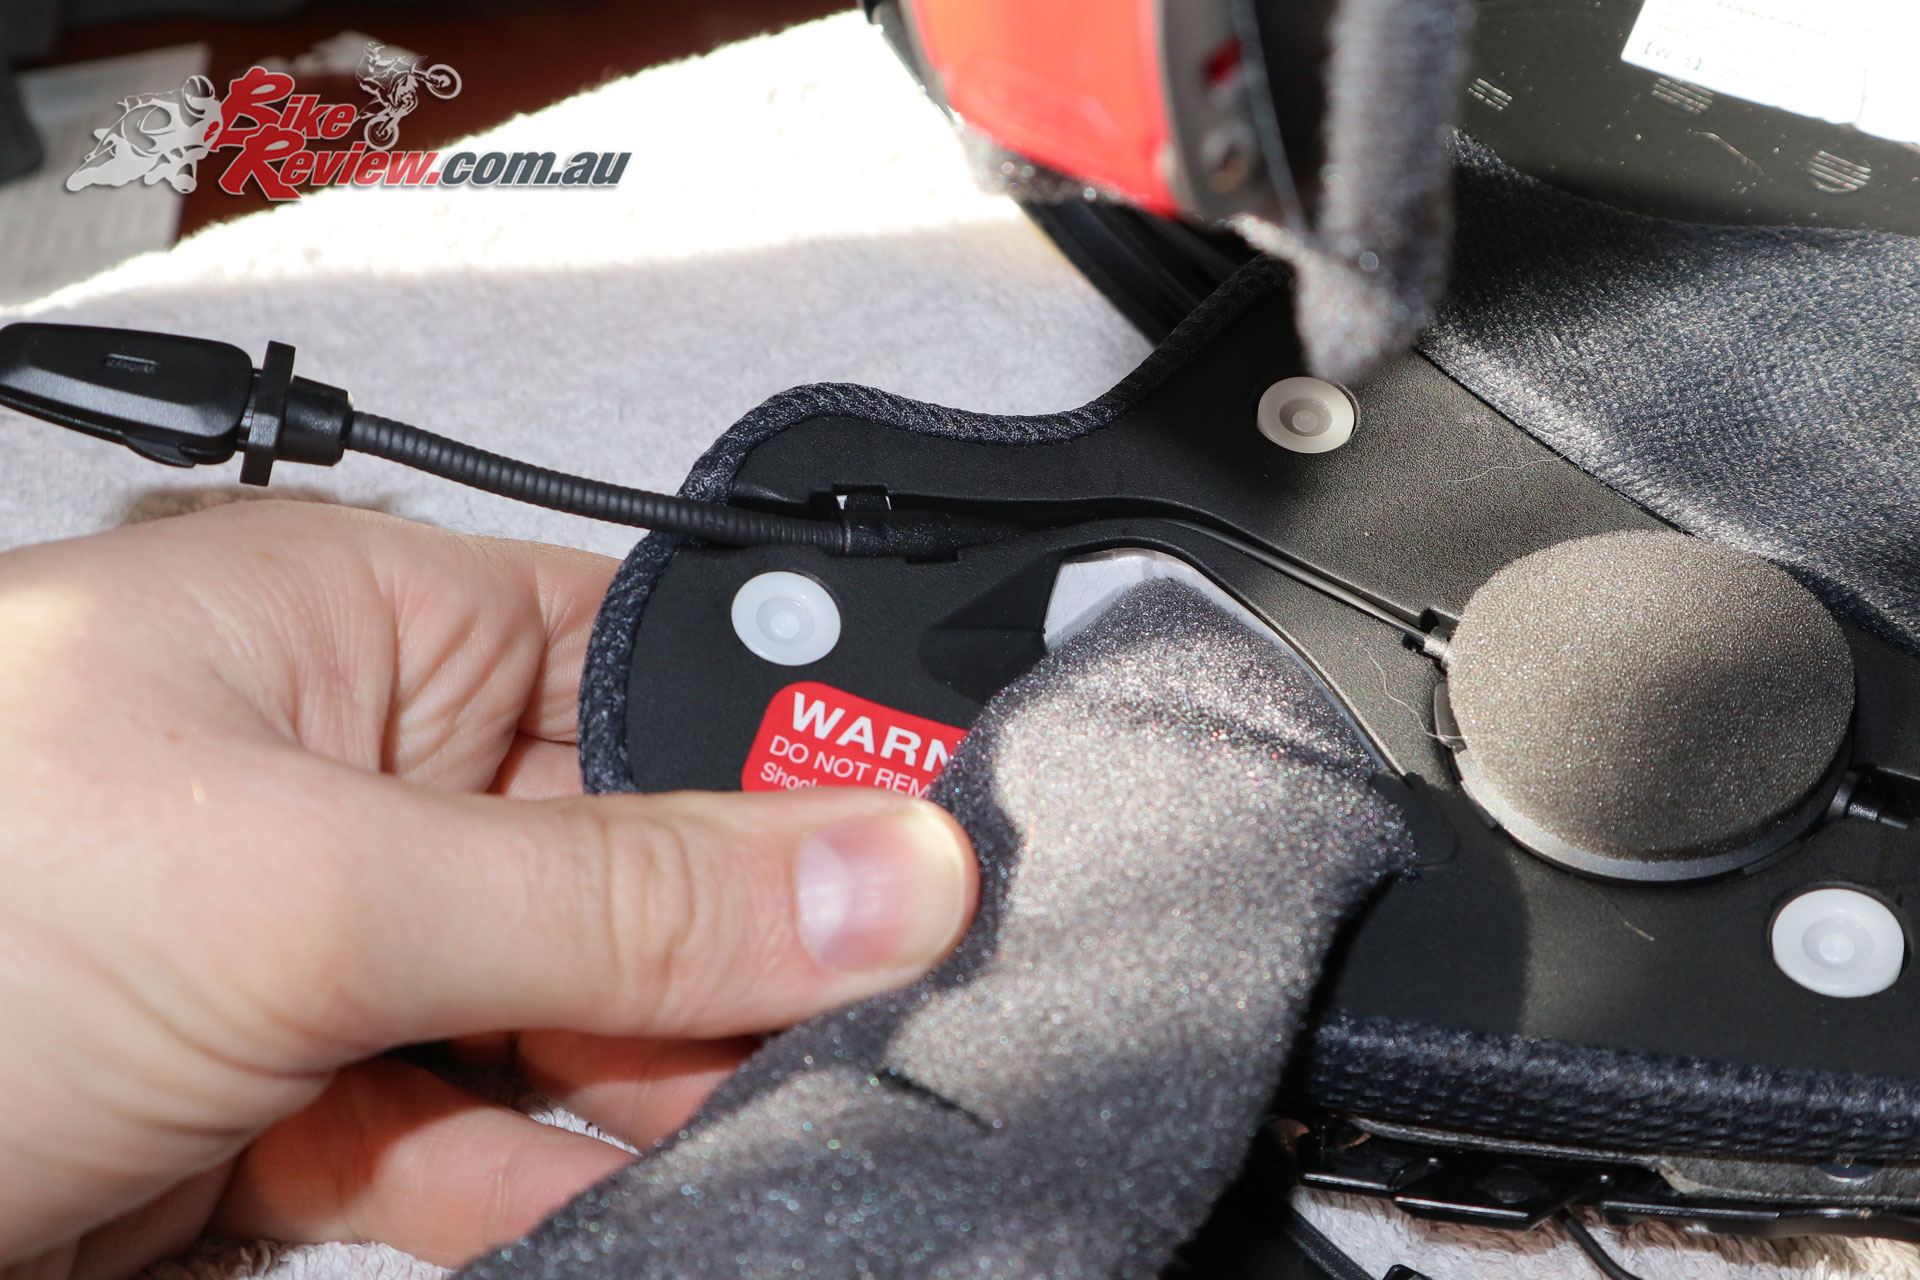
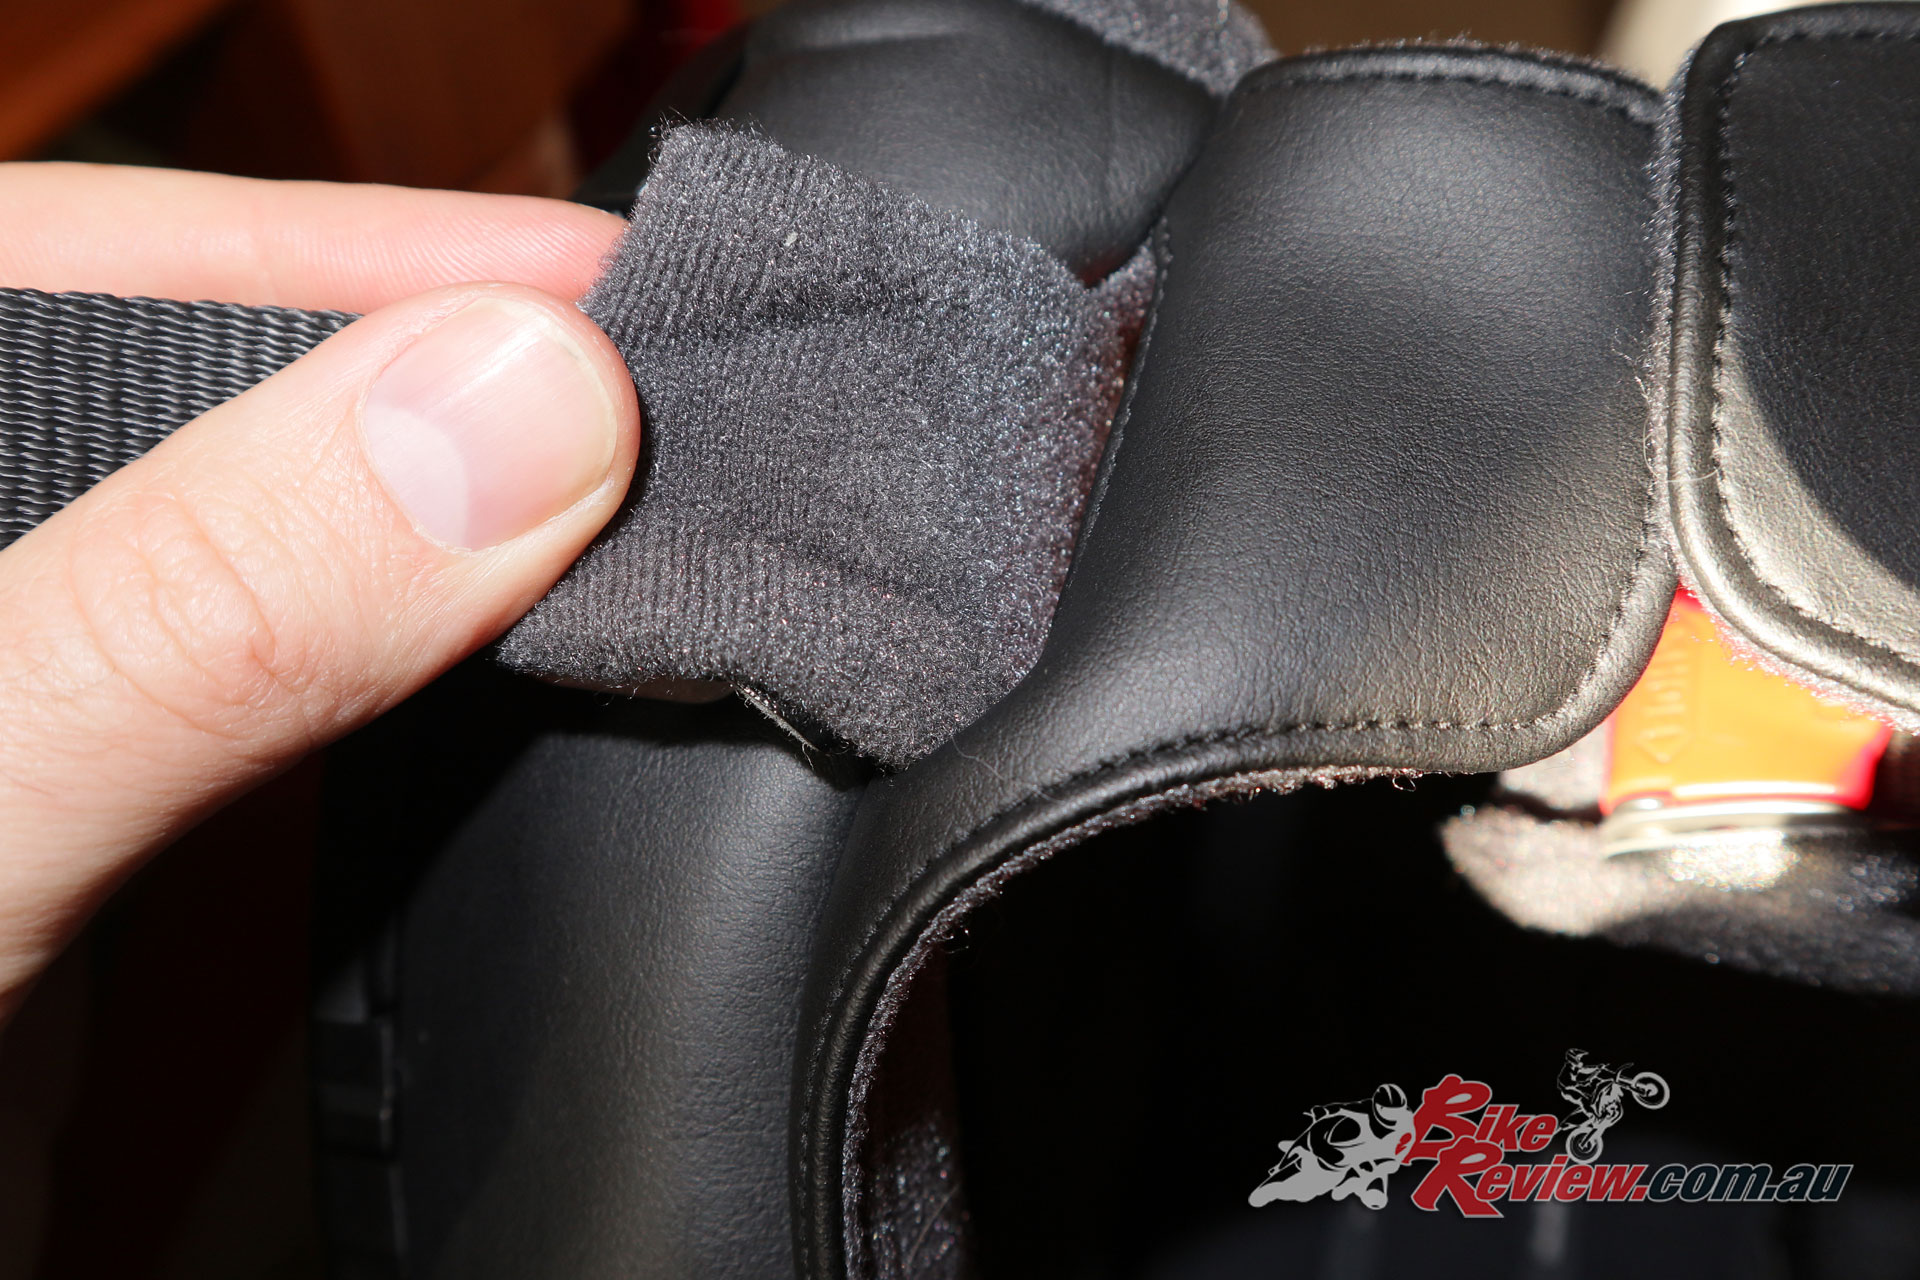
Now replace the Neotec II cheek pads.
Replacing the cheek pads can be a fiddly job, so stay patient, push the plastic tab into place towards the rear of the helmet first, then at the chin last. Then connect up the white clips on the inside of the helmet. The cheek pads are quite deeply mounted, and should be flush like this.
See the white clips that hold the Neotec II cheek pads into place.
See the white clips here. This give an audible click when fitted properly together.
Also pull the chin strap back through the cheek pad flaps.
Pull the chin strap and ratchet back through the Neotec II skirt flaps, these help reduce air incursion to keep still air around the mic.
The Sena SRL Communication System fitted to the Shoei Neotec II modular helmet
And you’re all sorted. It’s a pretty easy job, but there’s some finer points where the wiring needs to be pushed through. Just ensure the microphone is well placed for your needs.
Charge the Sena SRL!
If like me you didn’t charge prior to fitment, now’s the time to do so. The flat based charging cable (MicroUSB) means you can plug the Sena SRL/helmet in and then sit it normally on a desk.
If you’re interested in the Shoei Neotec II modular helmet and Sena SRL Communication System, see your local Shoei stockist, or visit the McLeod Accessories website.


March 23, 2019
I believe it should microusb instead of microsd
March 23, 2019
Thanks Harold, good catch. We’ve just corrected that now!
January 27, 2020
Great article. Simple instructions to follow and informative.
January 28, 2020
Thanks for the feedback!
April 30, 2020
Santa bought me a Shoei Neotec II for Xmas and I love it. I purchased the Sena SRL2 not long after and find it works well. The only real issue has been the microphone. The boom mike catches on the chin curtain every time I close the helmet. This was irritating enough that I ended up swapping over to the spare mike that is actually for a normal full face helmet. I was a bit concerned as to how well it would pick up my voice considering it’s attached to the cheek pad and facing towards the front of the helmet. It works fine though, the only issue I have (and I can live with it) is a slight echo when talking to my pillion in a million. Considering I also ride probably 90% of the time with my visor open, I’m actually quite surprised it picks up my voice as well as it does. Mind you, I do ride an ST1300 so the bike screen does direct most of the wind over my helmet.
I find the buttons quite hard to operate so pretty much just use the “Sena Voice Command”, leaving the buttons basically just for “volume & on/off”.
Cheers 🙂
September 8, 2021
Does it work with the Prism or not?
The text says no but the picture images yes.