Product Review: Shoei NXR Lining & Visor Replacement
Kris gives his Shoei NXR helmet a full overhaul, with a wash, new cheek and centre pads, plus a new visor and Pinlock. Here's how it is done!
Today I’m basically giving my Shoei NXR helmet a major overhaul, with this being my second NXR helmet with Marquez graphics after the first was stolen. This includes new cheek and centre pads, as well as a new clear visor and Pinlock, and a ‘Lower Air Spoiler’.
It’s been used almost daily for the two years since and was in need of a good wash, with my clear visor, which gets night time use starting to develop enough scratches to effect vision at night.
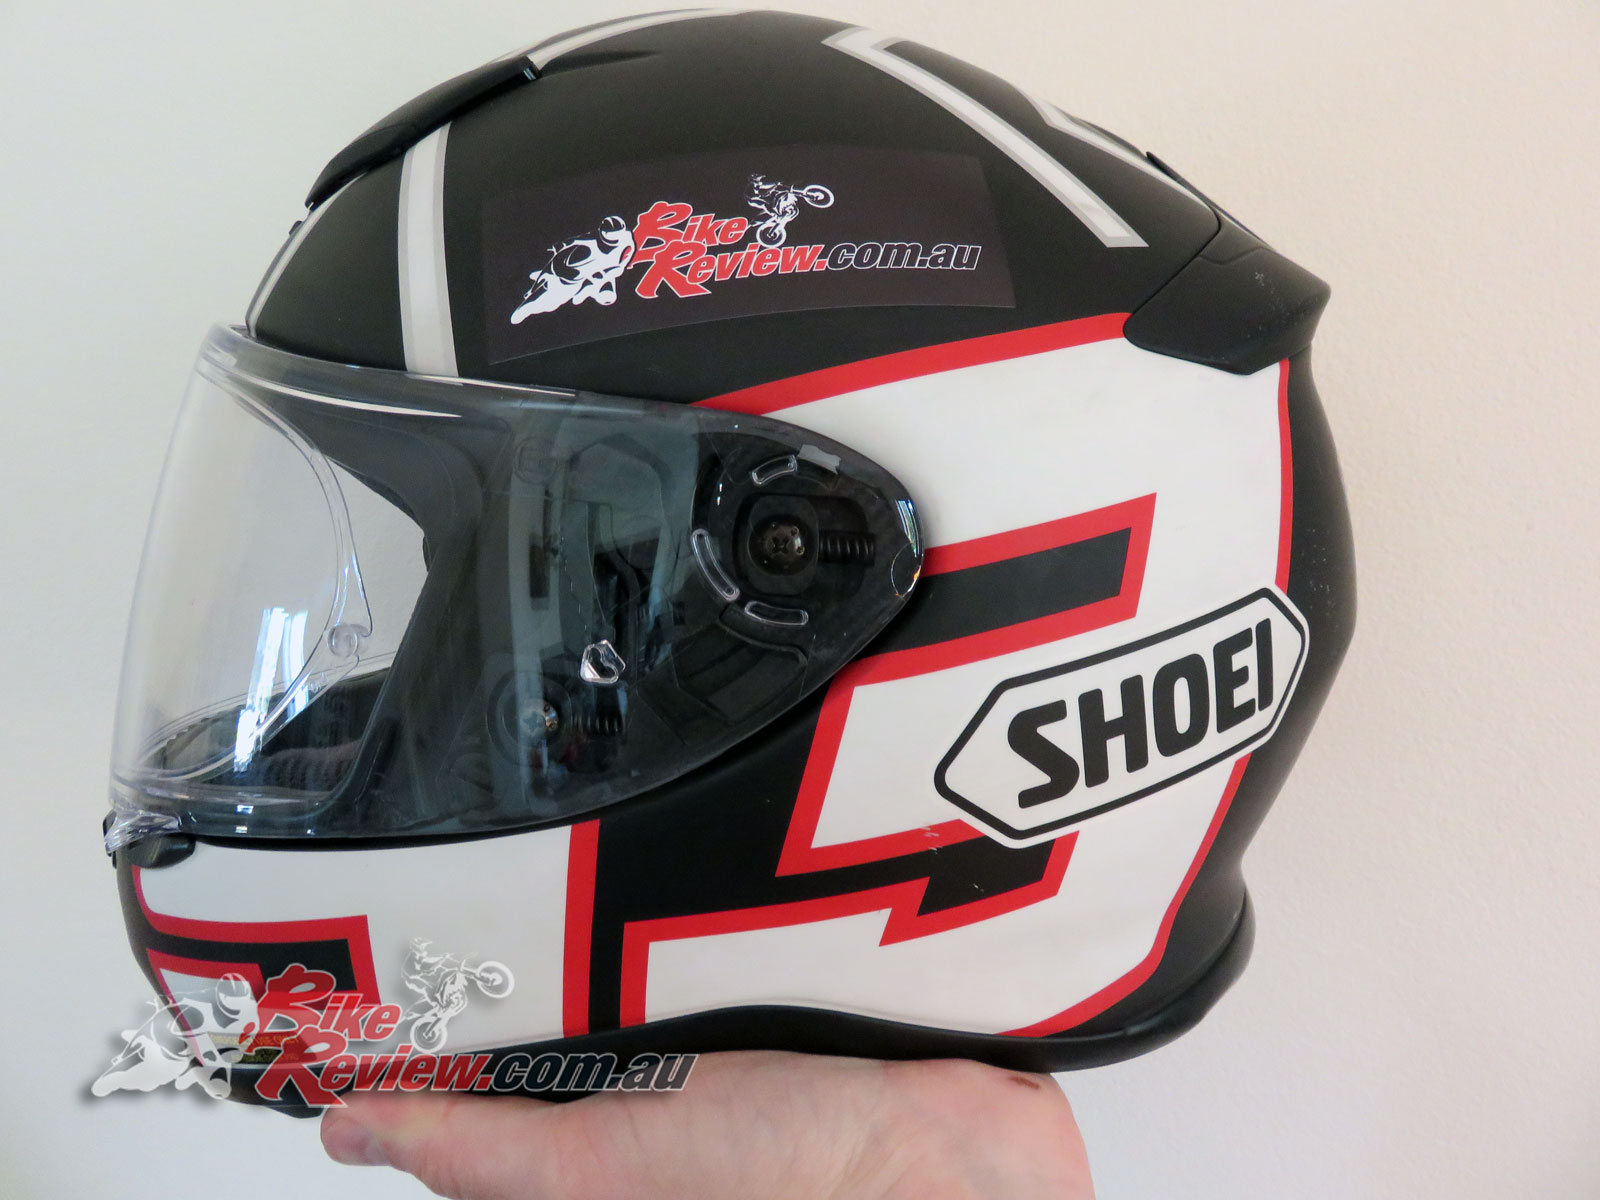
Shoei NXR helmet, freshly washed
You can read my full review on the Shoei NXR helmet here.
First up was the basics, giving the helmet a really good wash, just with some warm soapy water and a microfibre cloth. Normally a quick wipe down and rinse will do the job, but this NXR helmet has a matt finish. What’s really great is with a little elbow grease all the dirt and grime the helmet had picked up was removed, with the #93 now showing up very clean and white.
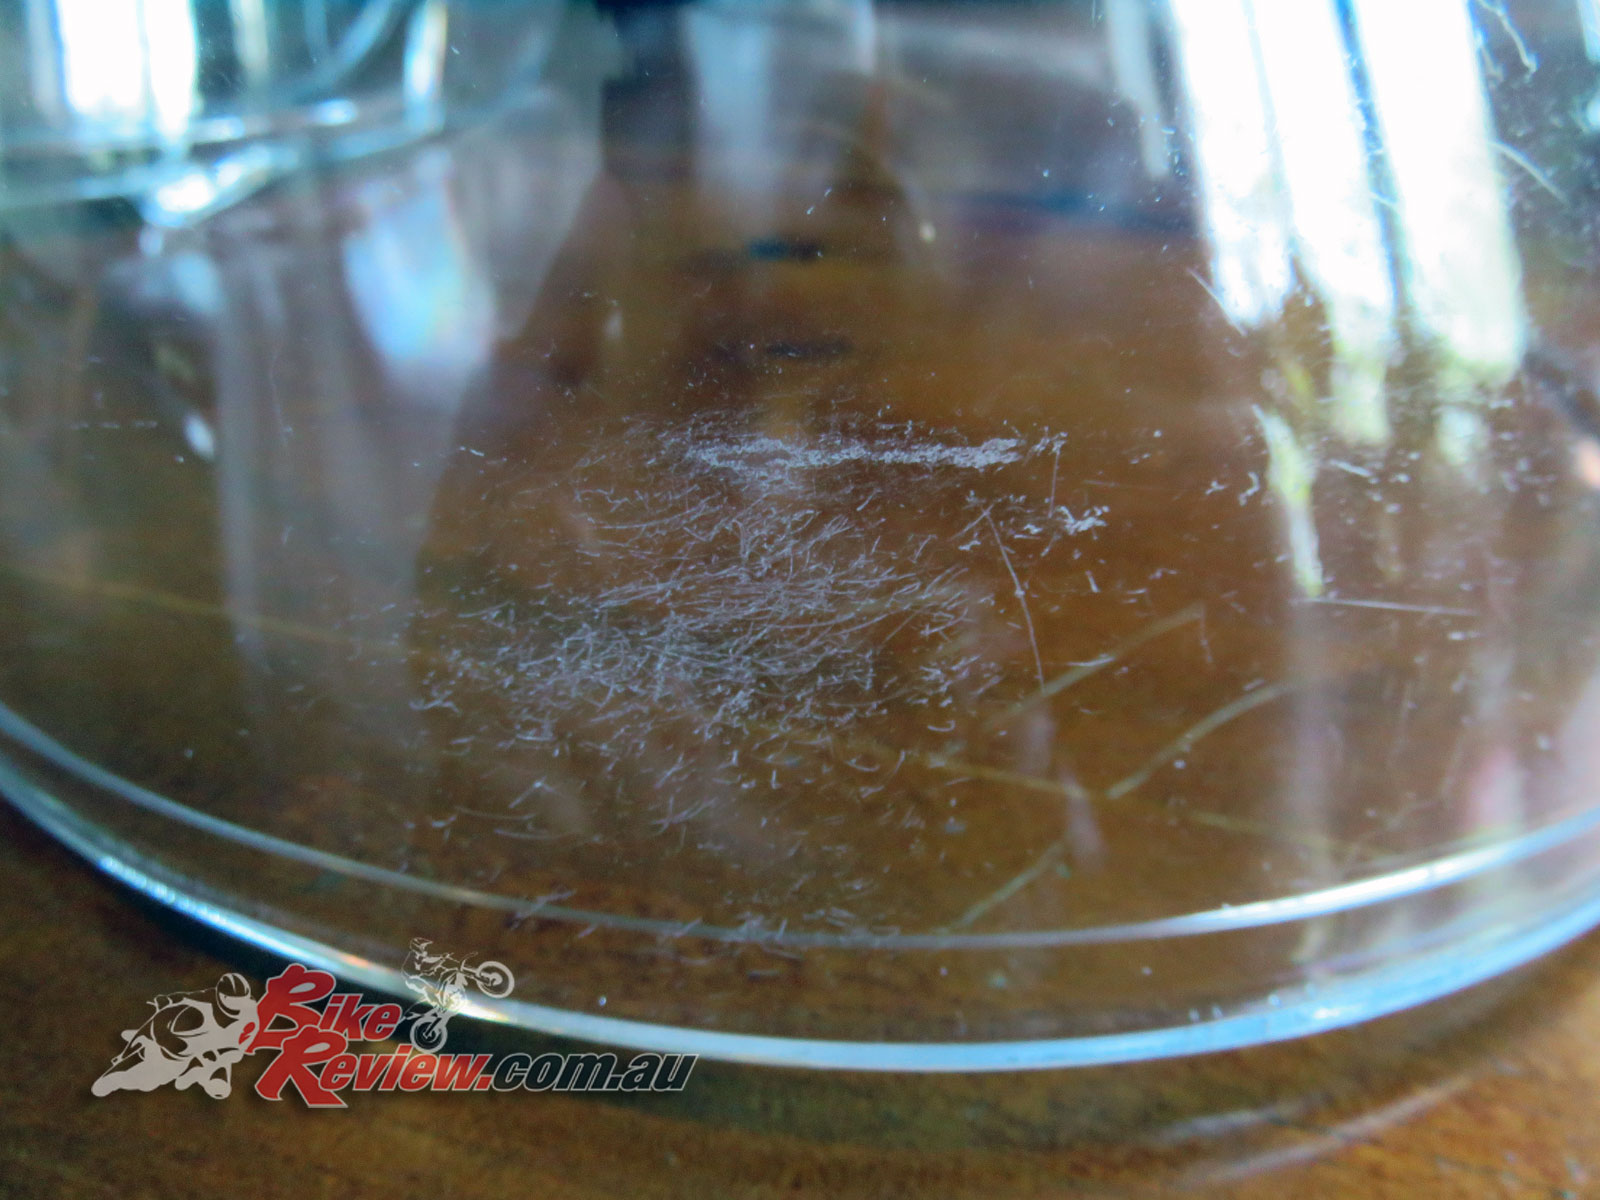
Damaged Shoei NXR visor
Knowing I would be replacing all the internal foam (the cheek pads and centre-pad) I just closed all the vents and went a little mad, so the original foam did get quite damp, but these are washable and if you don’t wish to purchase new foam liners you can simply take the old ones out and give them a hand wash, and leave them to dry. Just be really gentle washing them.
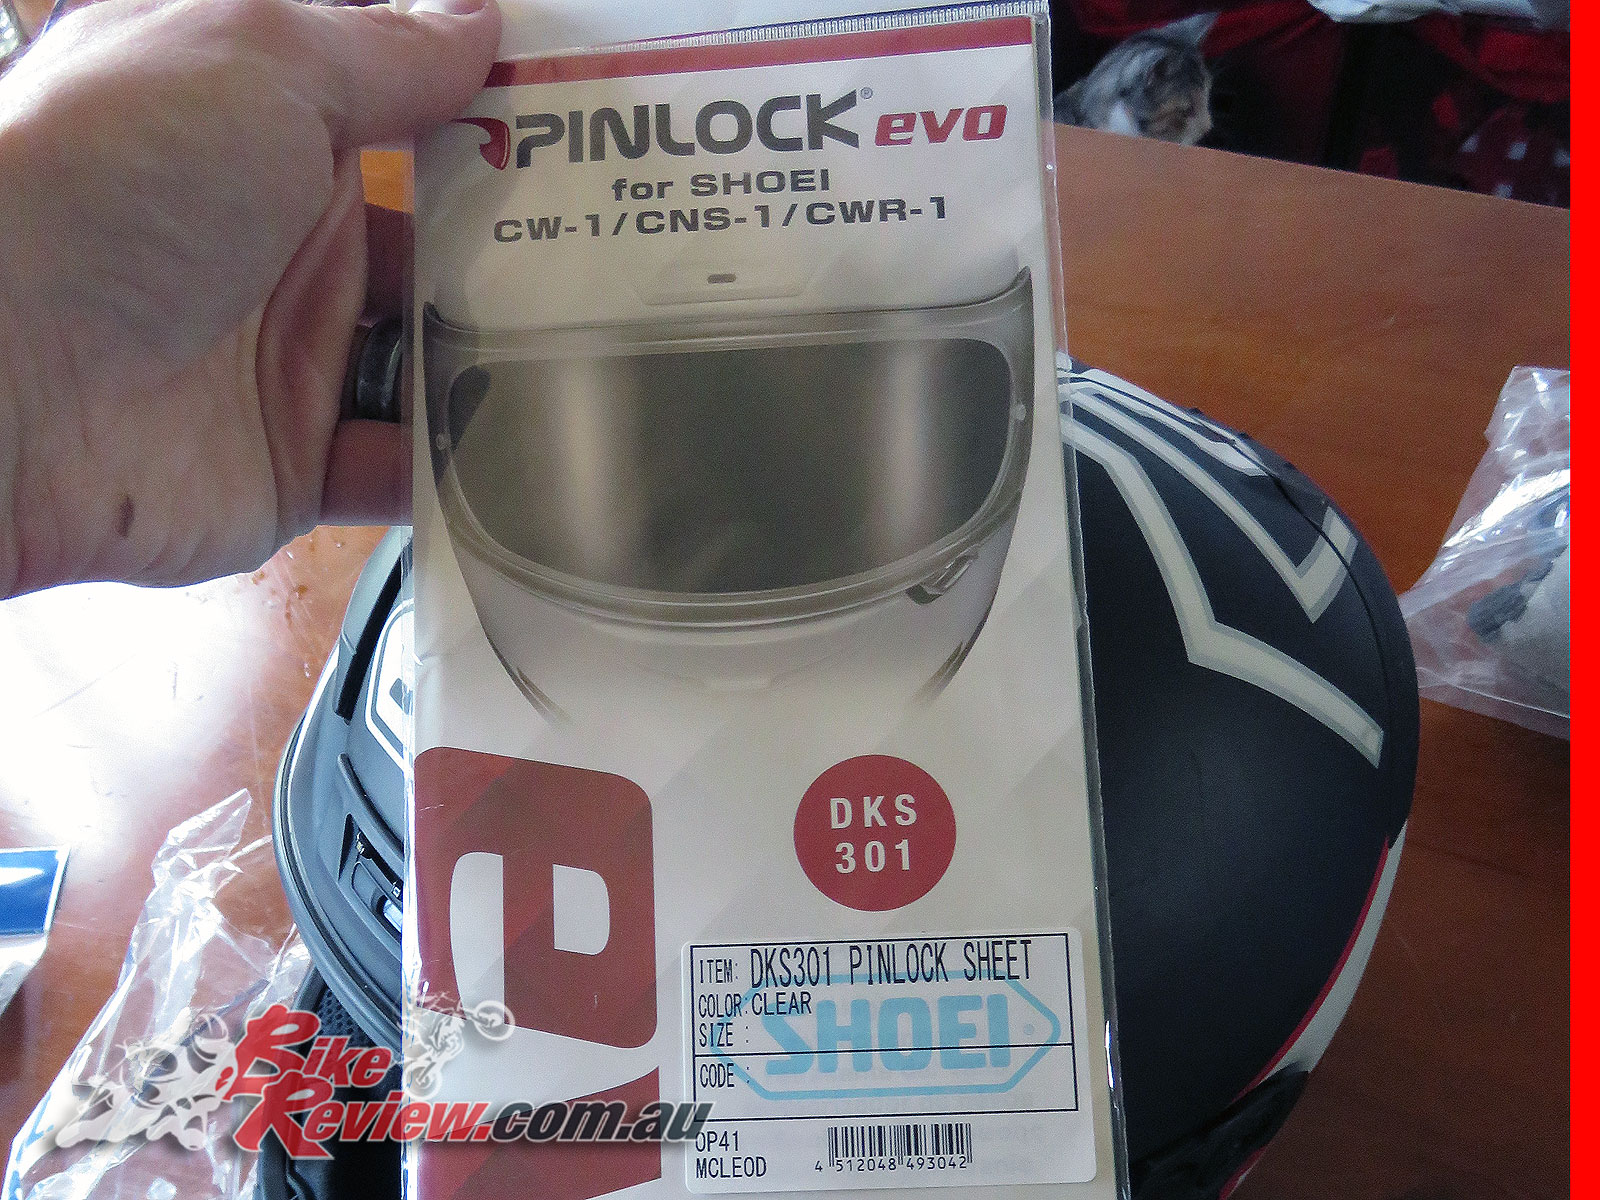
Shoei NXR helmet, Pinlock EVO for CWR-1 visor
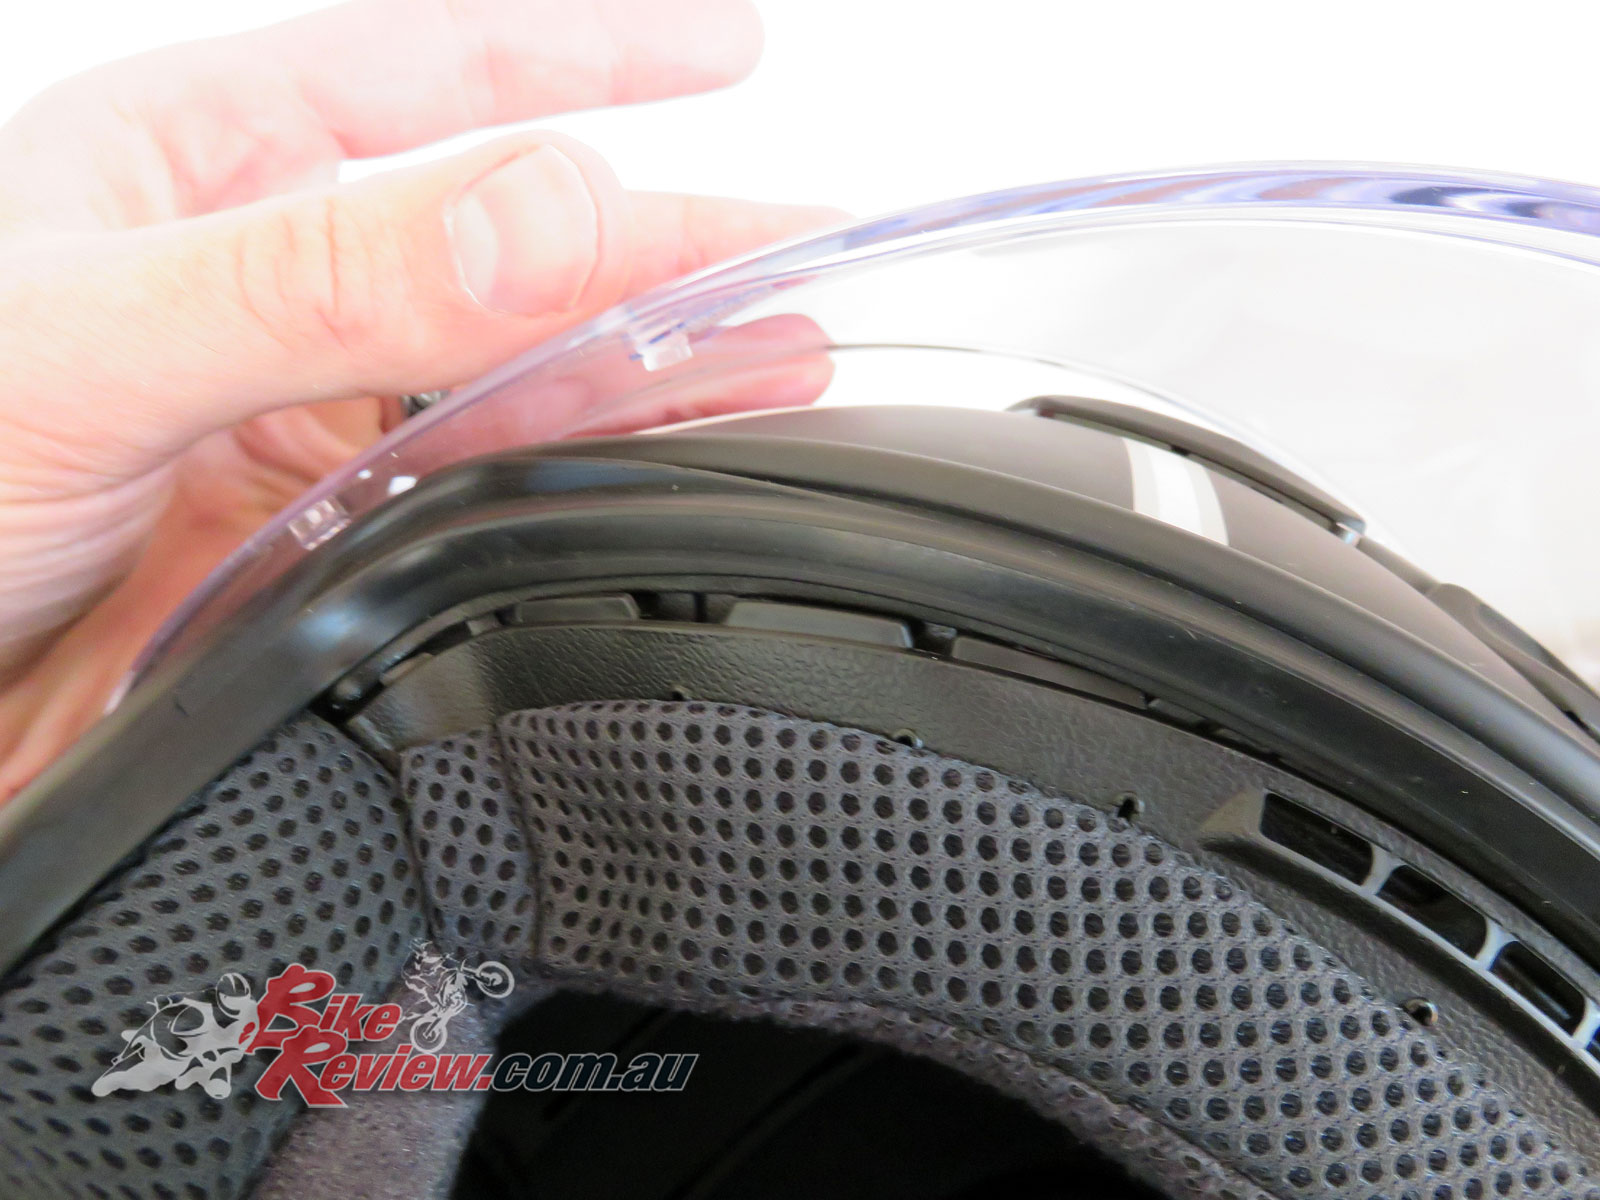
The visor is a simple replacement, you just pop the old item off and click the new one into place in the fully up position. Ever since I first started using a Pinlock I absolutely swear by them. They totally remove the inconvenience of having your visor fog up in the cooler and wet weather, which means it’s safer!

Shoei NXR replacement visor. CWR-1 for the NXR, clear.
Pinlock installation is really easy. Make sure your visor is extremely clean and clip one end of the Pinlock into the visor’s installation point (the ‘pin’). The main thing to do here is make sure you avoid putting your fingers on the inside of the Pinlock and that the Pinlock is the right way up – flat edge to the top of the helmet and the rubber sealing gasket facing down onto the visor.
You can either bend your visor down flatter (carefully) here to get the other end into its installation point, or I bend the Pinlock away from the helmet, get the other end in, then press it flat along the visor inner surface. If it’s not straight or correctly aligned, you can just flatten out the visor again and it’ll lift off, freeing the sealing edge, and most likely align itself. If not just give it a nudge into position.
Also don’t stress too much with the Pinlock system, there’s no adhesive and like your visor they can be removed, washed and refitted. Just avoid getting lint on the inside of the Pinlock and avoid scratching it or damaging the sealing gasket. I have rinsed them under warm soapy water and left them to dry, or wiped them down with a lint free cloth with great success.

Shoei NXR helmet, Cheek Pad clips
For the helmet itself, carefully remove the cheek pads. I recommend starting on the inside where the strap connects to the helmet and pulling the cheek pad away from the inside of the helmet, with this Shoei helmet it is held in place by three clips. Pull them free.
It’ll now be connected by a strip of plastic that is clipped into the bottom edge of the helmet, wedged between the outside edge of the helmet and the inner helmet lining.
Starting at the nose/front end of the helmet pull the plastic straight down and away. Once loose, pull the rest of the plastic strip down until you reach the rear connection point. To pull this loose simply pull the plastic strip of the cheek pad towards the front of the helmet.
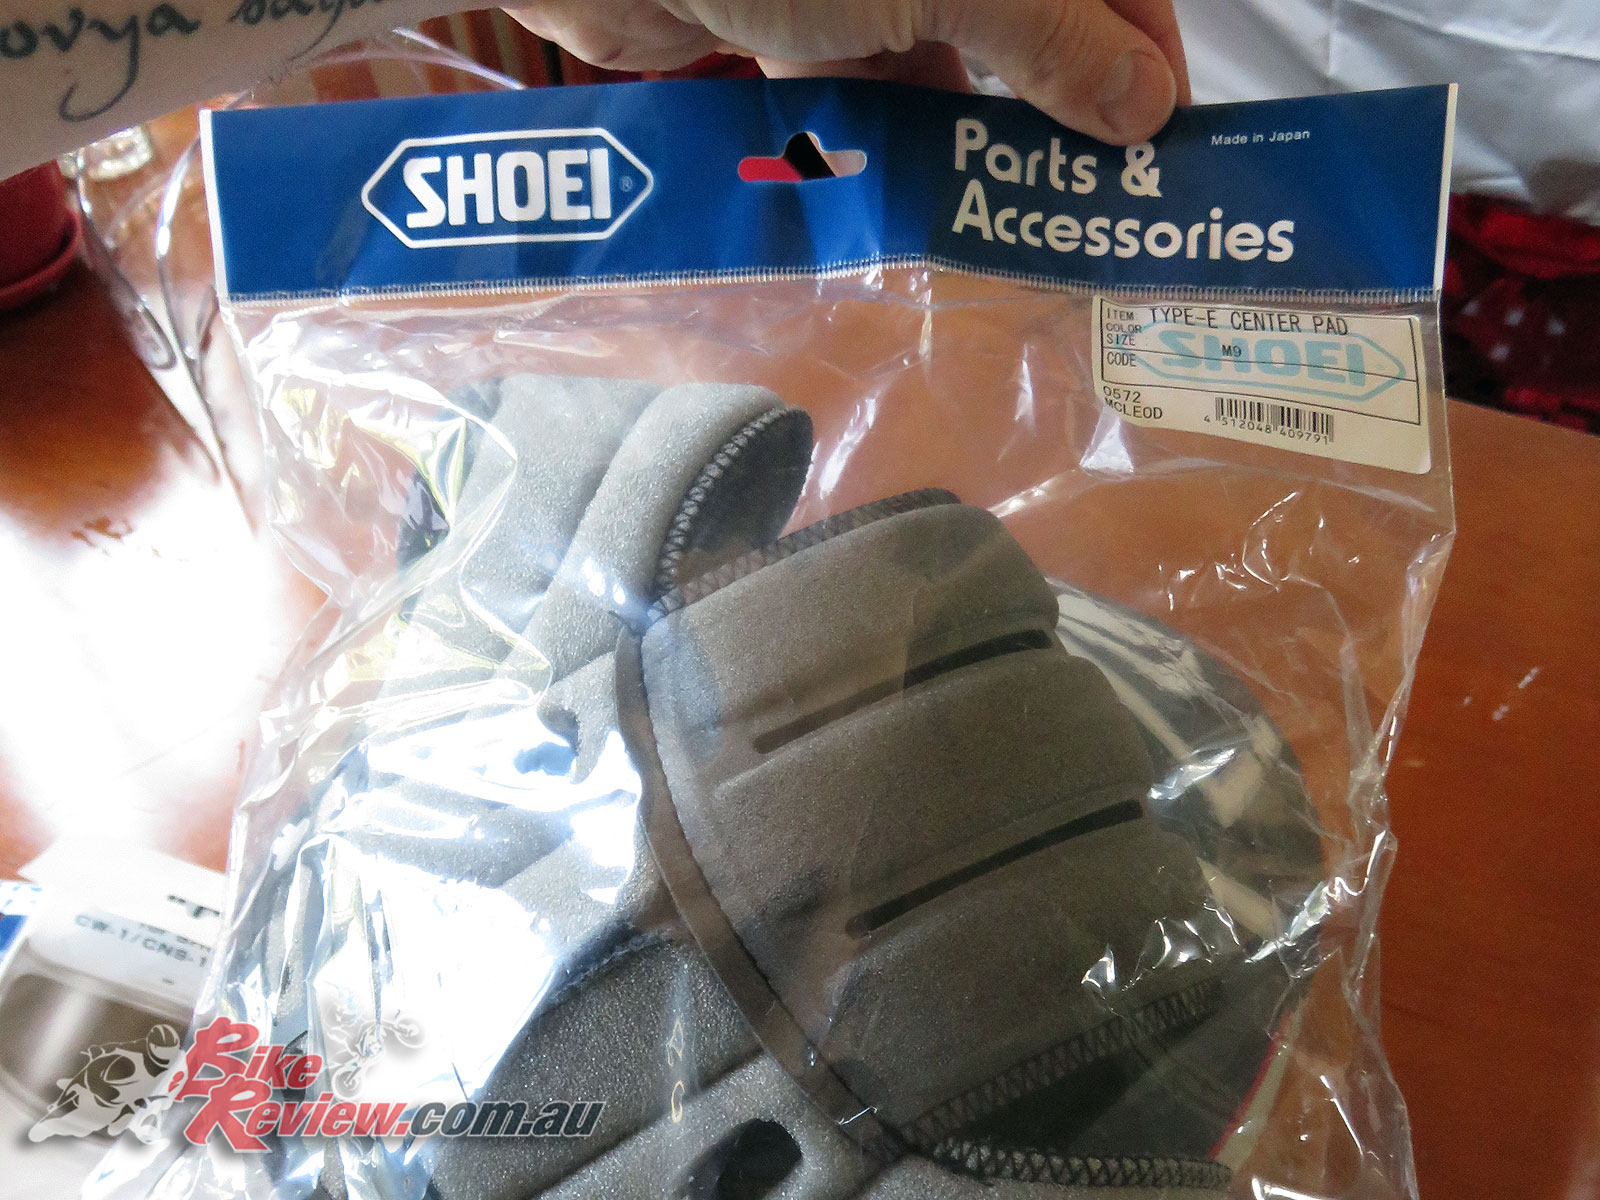
Shoei NXR helmet, replacement Center Pad
Remove both cheek pads and place them aside away from the new items. The centre pad that is basically a skull cap is easily removed. Simply start at the rear of the helmet, and pull the foam lining in the centre away. It is held in place by two clips, like the cheek pads.
Peel it out through the visor, where a plastic piece will be connected into the top of the visor hole, with large wide flat teeth that slot into the helmet.
Replacing these items is basically just working in reverse although I replace the cheek pads first.

Shoei NXR helmet, Cheek Pad clips. The cheek pads connect at the bottom of the helmet via a plastic tab that is pushed into place, and the three press-studs.
Look for the white tabs along the bottom of the helmet, you need to slide the plastic attachment on the cheek pads into these. Make sure the downward facing attachment is facing the front of the helmet and the sideways facing attachment is facing the rear. Start with the sideways piece and slide it into the white tab area until it clicks.
Then press the rest of the plastic into the same gap in the helmet until you reach the front. Push the downwards attachment straight down until it clicks.
Now just push the foam up into the helmet and pull the strap through the open section that accommodates it. There are three clip points with these cheek pads, you can slightly pull back the foam to check the alignment, once in the right position simply push them into place. They’ll click loudly.
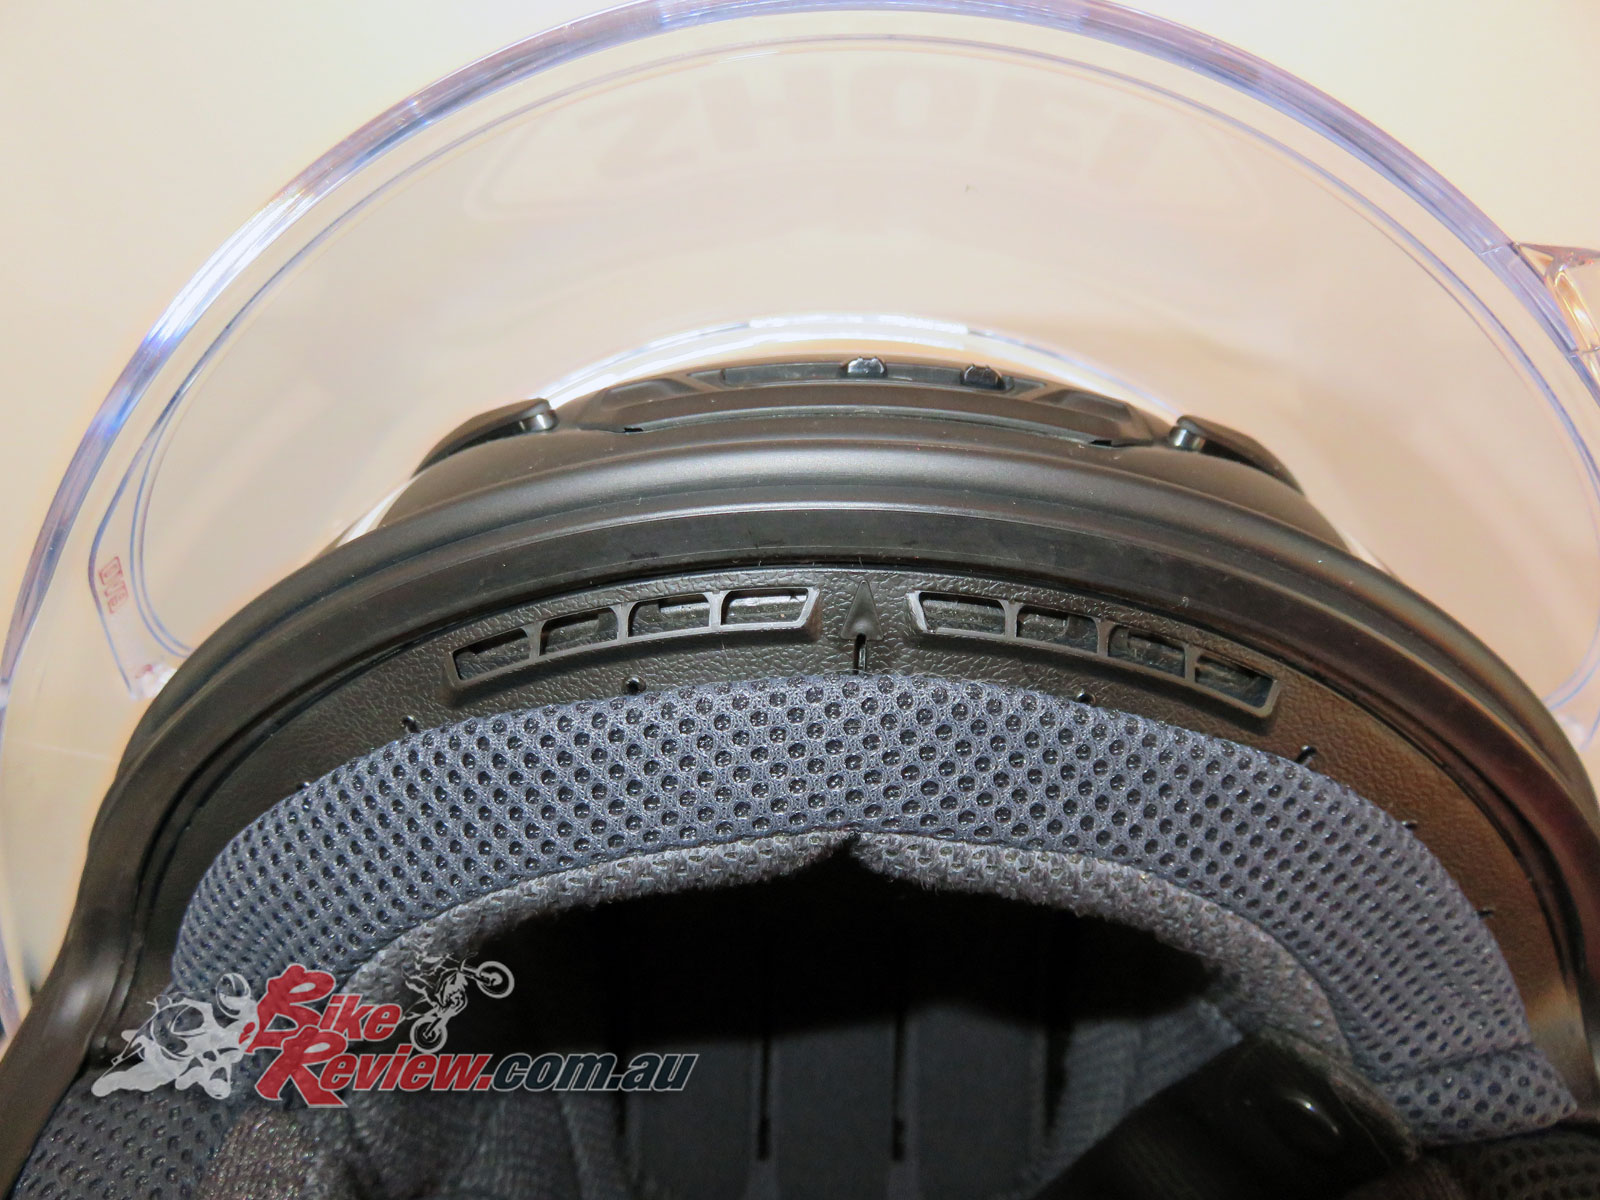
Shoei NXR helmet, Center Pad fitment (front), vents pointed down.
Once you’ve done both cheek pads, grab the centre pad and hold it so the plastic strip is is aligned with the top of the helmet visor hole. The vents should be pointed down.
Shoei NXR helmet, Center Pad fitment (front), the plastic teeth. They’ll slot into the correct holes easily.
Click one end into place and then push the ‘teeth’ of the plastic strip into the matching gaps in the lining around the edge of the visor gap.
Once it’s in place flatten the centre pad towards the back of the helmet, then push the two clips into place on the back edges.
Shoei NXR helmet, Lower Air Spoiler
The Lower Air Spoiler simply connects into the bottom edge of the chin of the Shoei NXR helmet but needs a firm hand. It would replace the helmets standard under-chin protector that helps keep wind off your chin and out of your eyes in winter if you’re riding in an upright position.
Oh and as a disclaimer – the Pinlock I’ve got says it’s not for night time use, with its rated light transmission slightly less than 80 per cent, with the Australian standard requiring 85 per cent or greater.
I’ve used one at night over the last three years without a problem, but that decision is up to the individual.
What you’ll need (for a Shoei NXR refresh):
- DKS301 – PinLock ‘EVO’ for CWR-1 ($54.95 RRP)
- NXR/R120 Cheek Pad ($69.95 RRP)
- Type-E Center Pad
- X-SPR3/14 Lower Air Spoiler
- CWR-1 with Pin Clear Visor ($109.95 RRP)
- And of course your Shoei NXR helmet. (From $879.90 RRP)
Shoei offer a huge range of liner/pad options for their helmets, allowing great customisability with sizing and comfort, not to mention replacements.
Special Thanks:
McLeod Accessories
McleodAccessories.com.au
You Might Also Like