
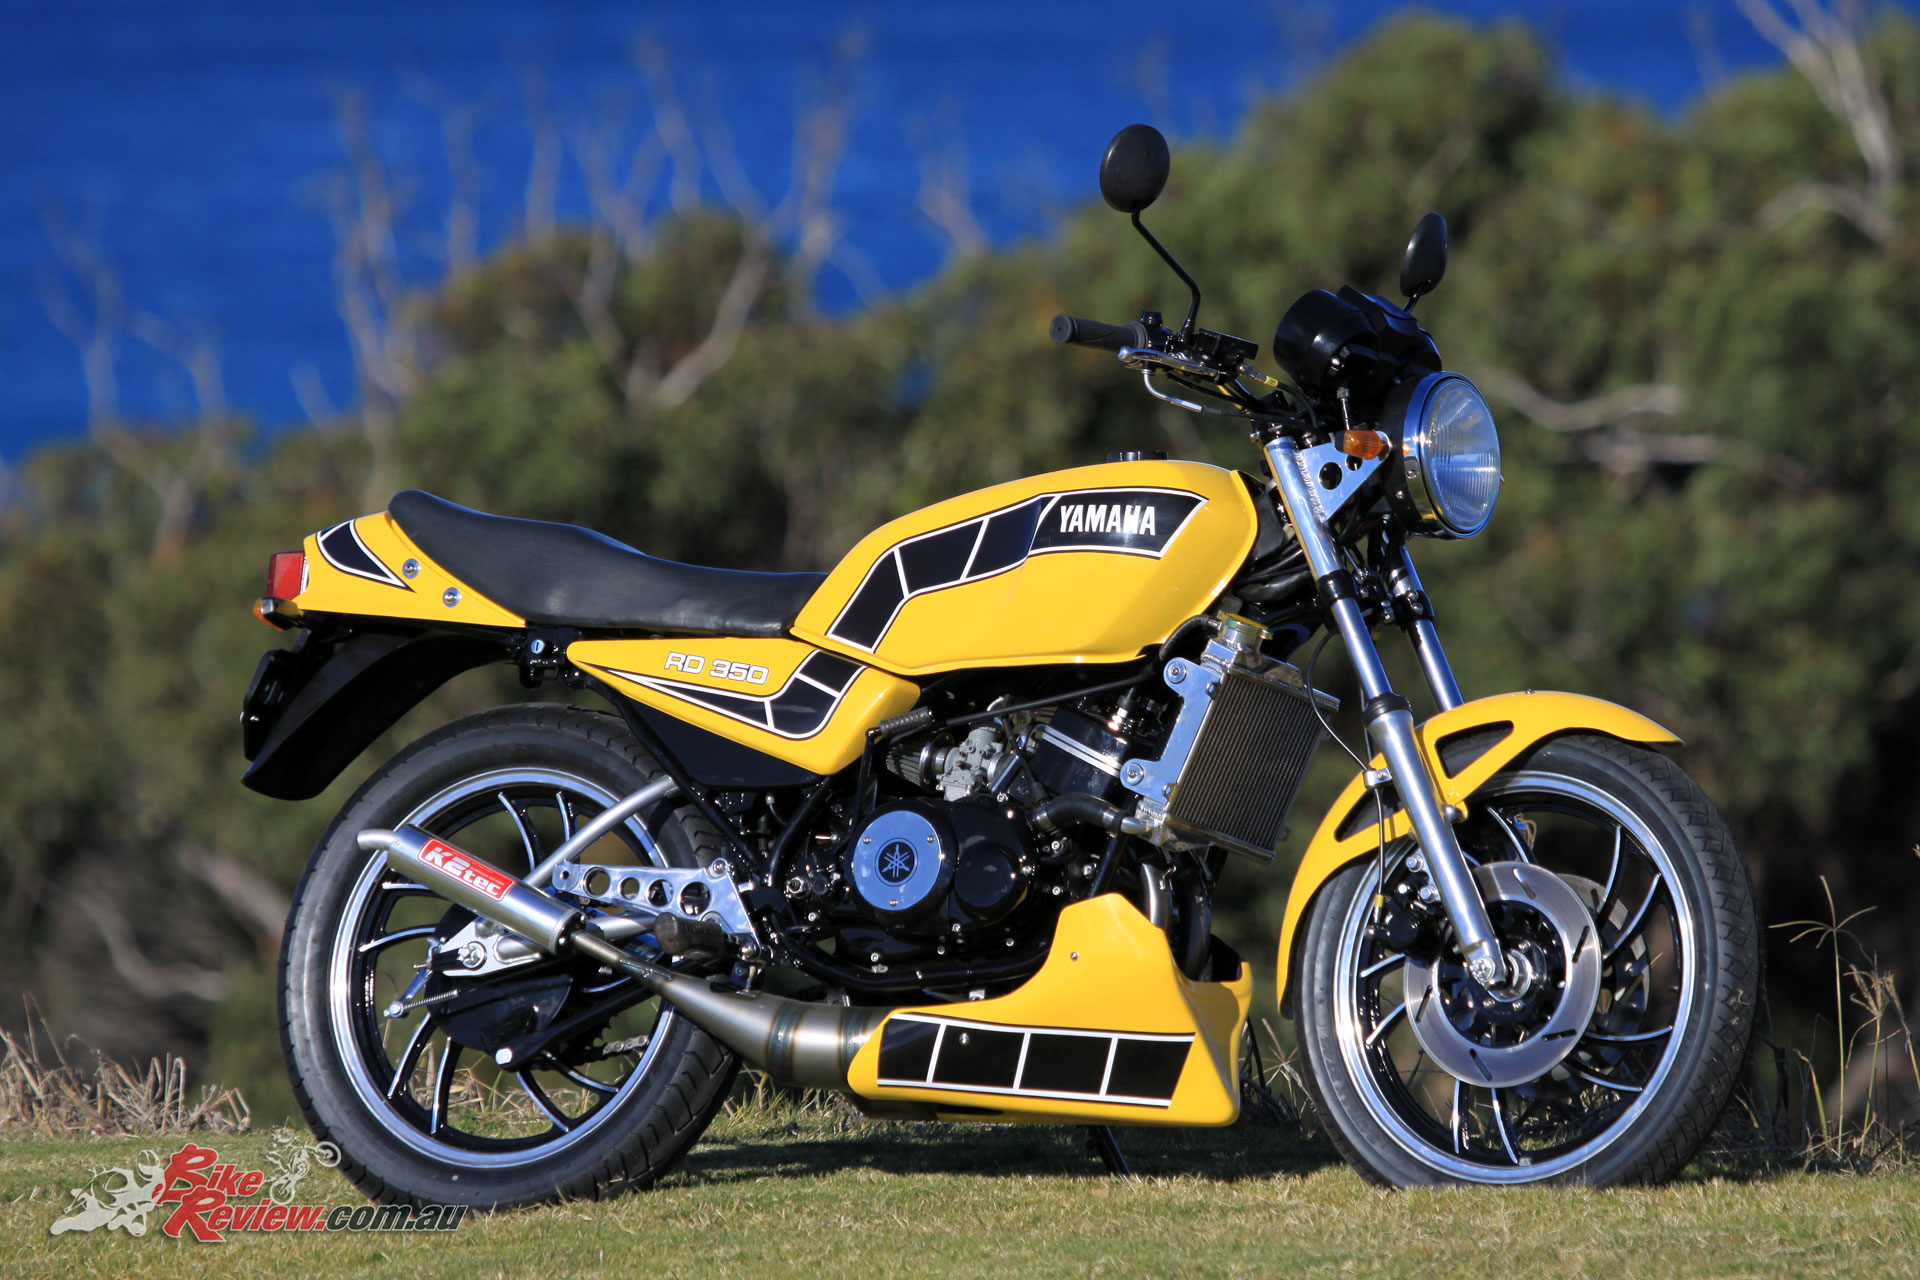
Tuning Tips: Pommie’s Yamaha RD350LC
Pommie re-jets his RD350LC and teaches us plug chops, timing and jetting plus fits DNA filters...Words & Images: Tony 'Pommie' Wilding
I was never really happy with the fuelling of my RD350LC, which was featured earlier in the year, and the reason I never bothered too much with jetting, was I knew I was going to refurbish the spare barrels I had in an attempt to extract more power.
 My first job was to clean and port the barrels, no being an expert on this I got some advise from an old two-stroke racer. I wasn’t going to go mad on the porting, I just lifted the exhaust port by 1mm, then cleaned all the rough edges off and polished the ports to a mirror finish.
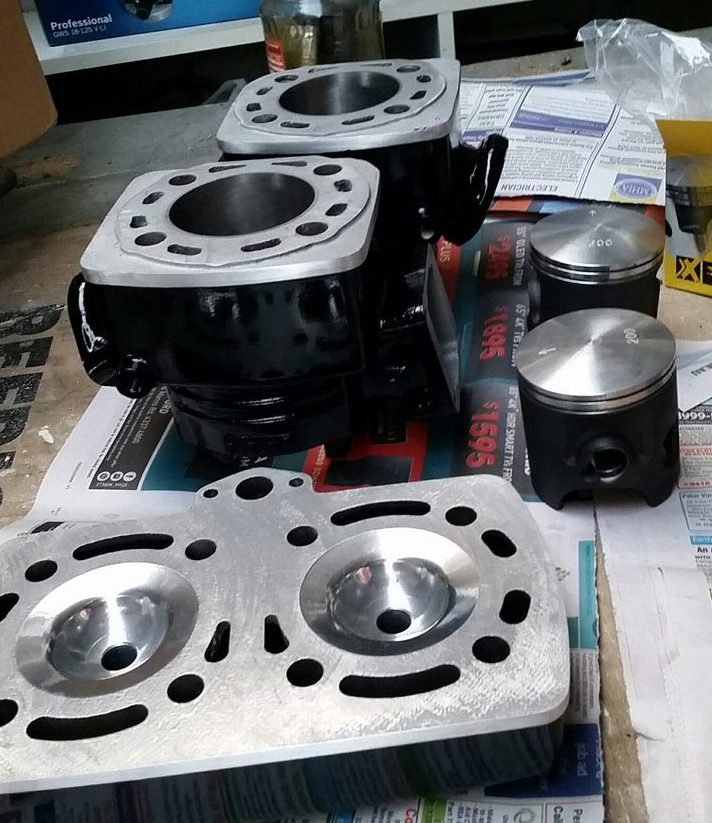
Barrels were bored to oversize, new pistons and ring, ported and polished and head skimmed.
With the inlet and transfer ports, I really just took all the rough edges and casting blemishes off, but left them un-polished. With that done, I gave the barrels and cylinder-head to Phil at Road and Race at Berkley Vave NSW.
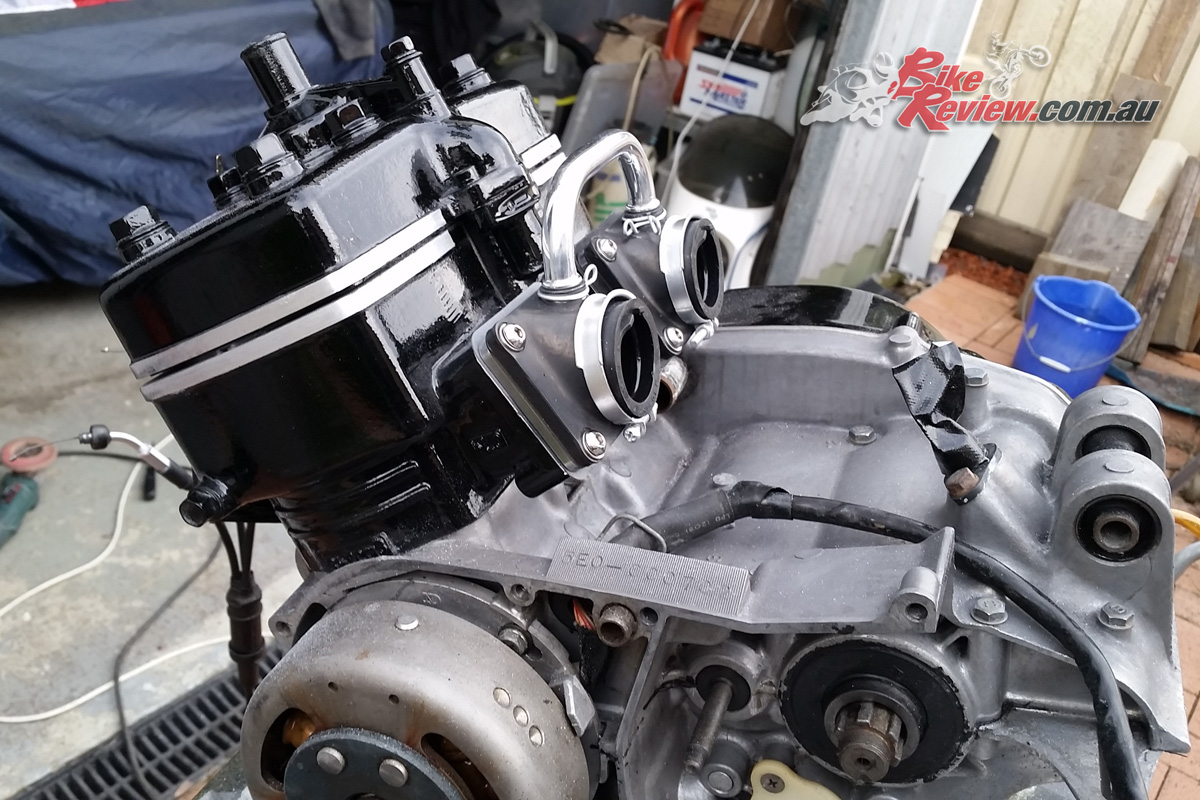
The top-end was assembled and the engine ready to go into the mint chassis.
The Barrels were re-bored to the maximum 2mm overbore, then the heads had 0.7mm skimmed off, to increase compression slightly. Once I got everything back from Phil’s, it took me literally an hour the fit the new barrels and pistons.
For correct installation, I had bought a new gasket set, but when I filled the radiator up with fluid, it was obvious that the head gasket was leaking even after torquing it down to the correct spec’s. To fix the problem I had to pull the head back off and spray both sides of the gasket with copper gasket spray, thankfully, this did the job of sealing the head correctly.
After DNA filters went on, the carbs were balanced and ignition timing checked it was time to start jetting.
With the engine back together I wanted to make sure the timing was correct, on the RD it should be 2mm BTDC (before top dead centre). This is easy to adjust by using a digital vernier gauge through the left side spark plug hole to locate TDC.
I then zeroed the gauge then rotated the engine to 2mm BTDC and see if the marks on the flywheel lined up, if not, you need to loosen the Stator coil and rotate it until it does. With the timing marks lined up, I then put the timing light on the bike, started the engine and checked the marks with the strobe light.
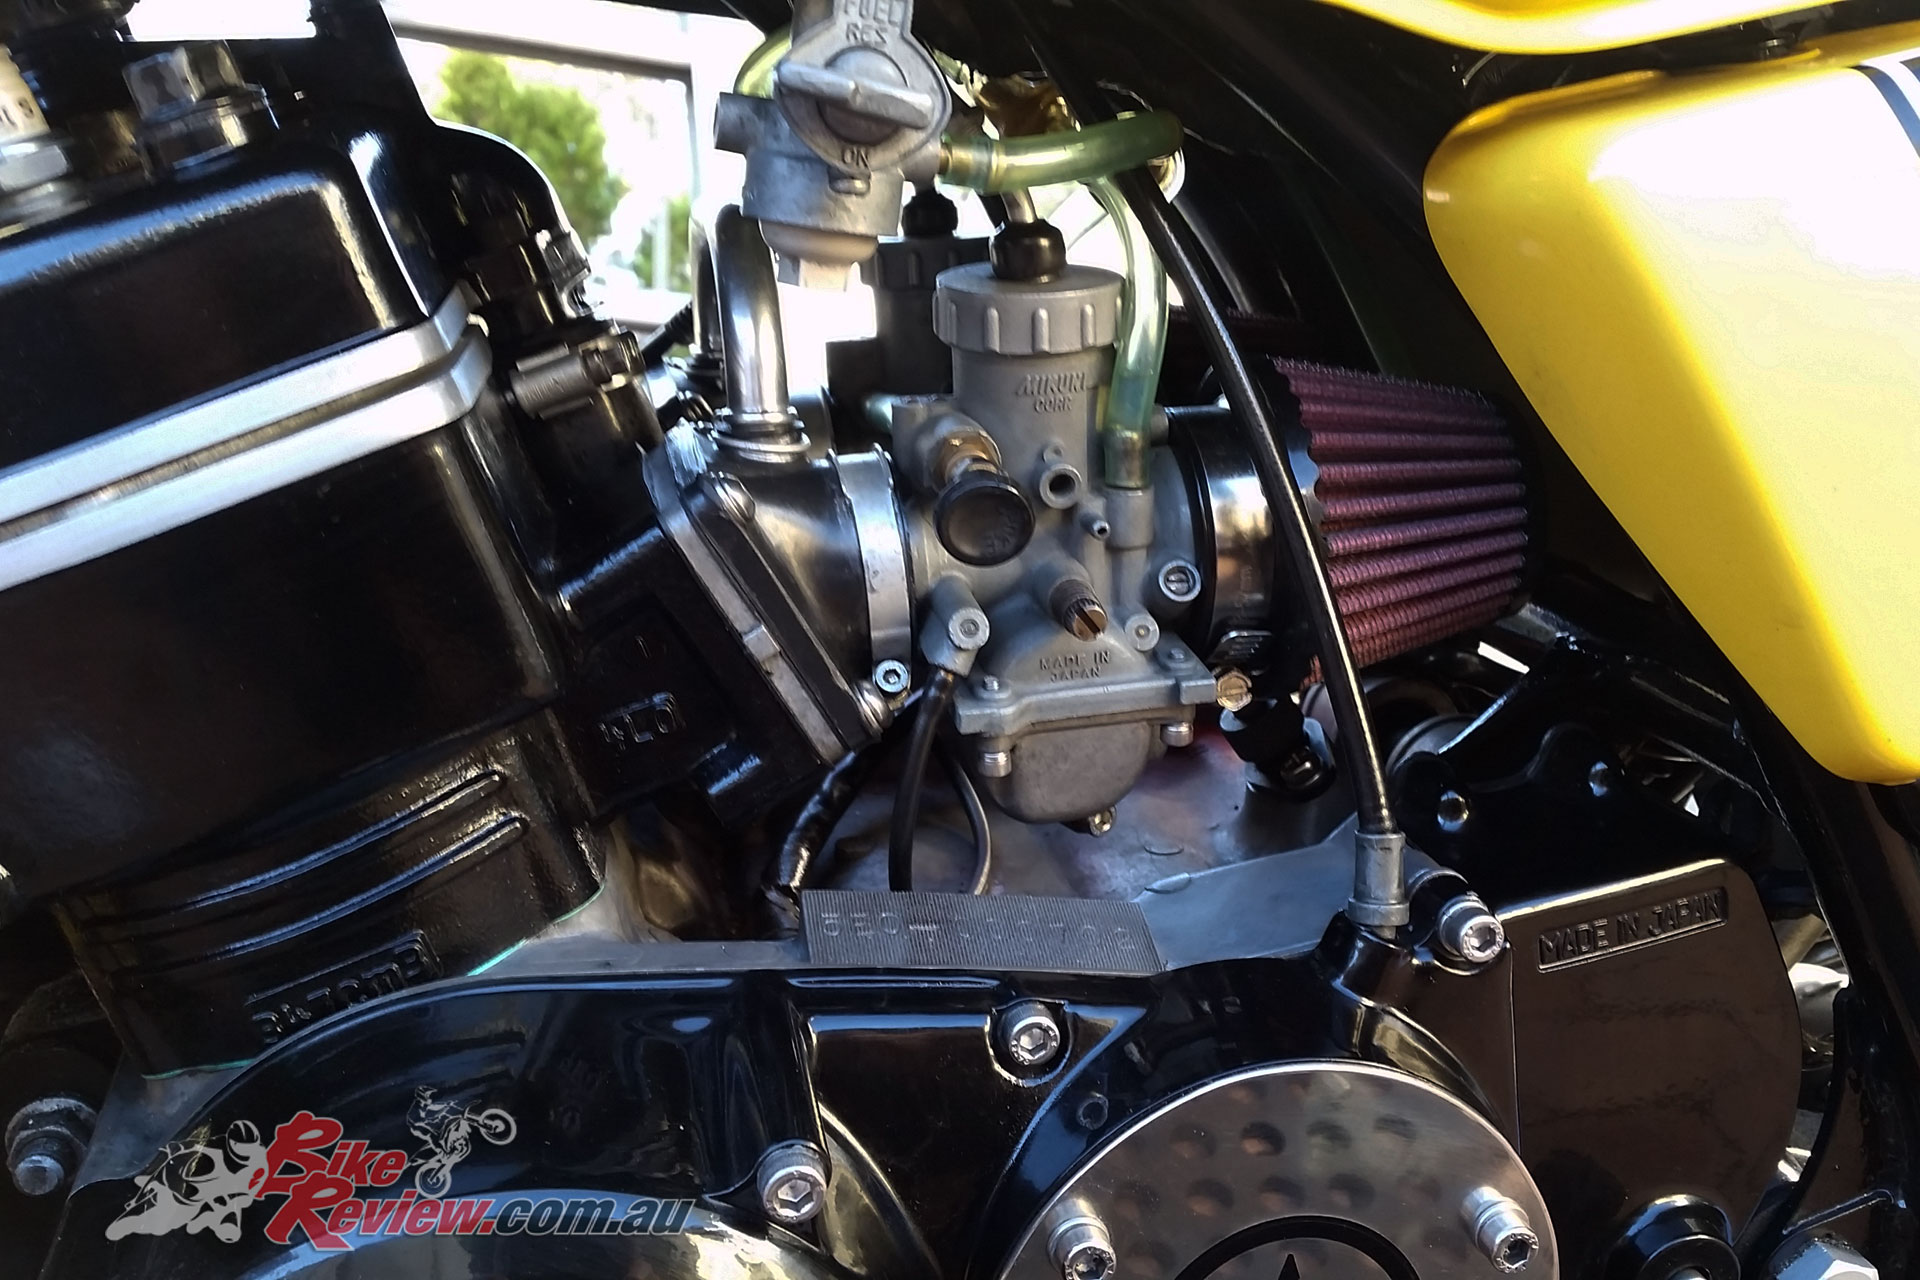
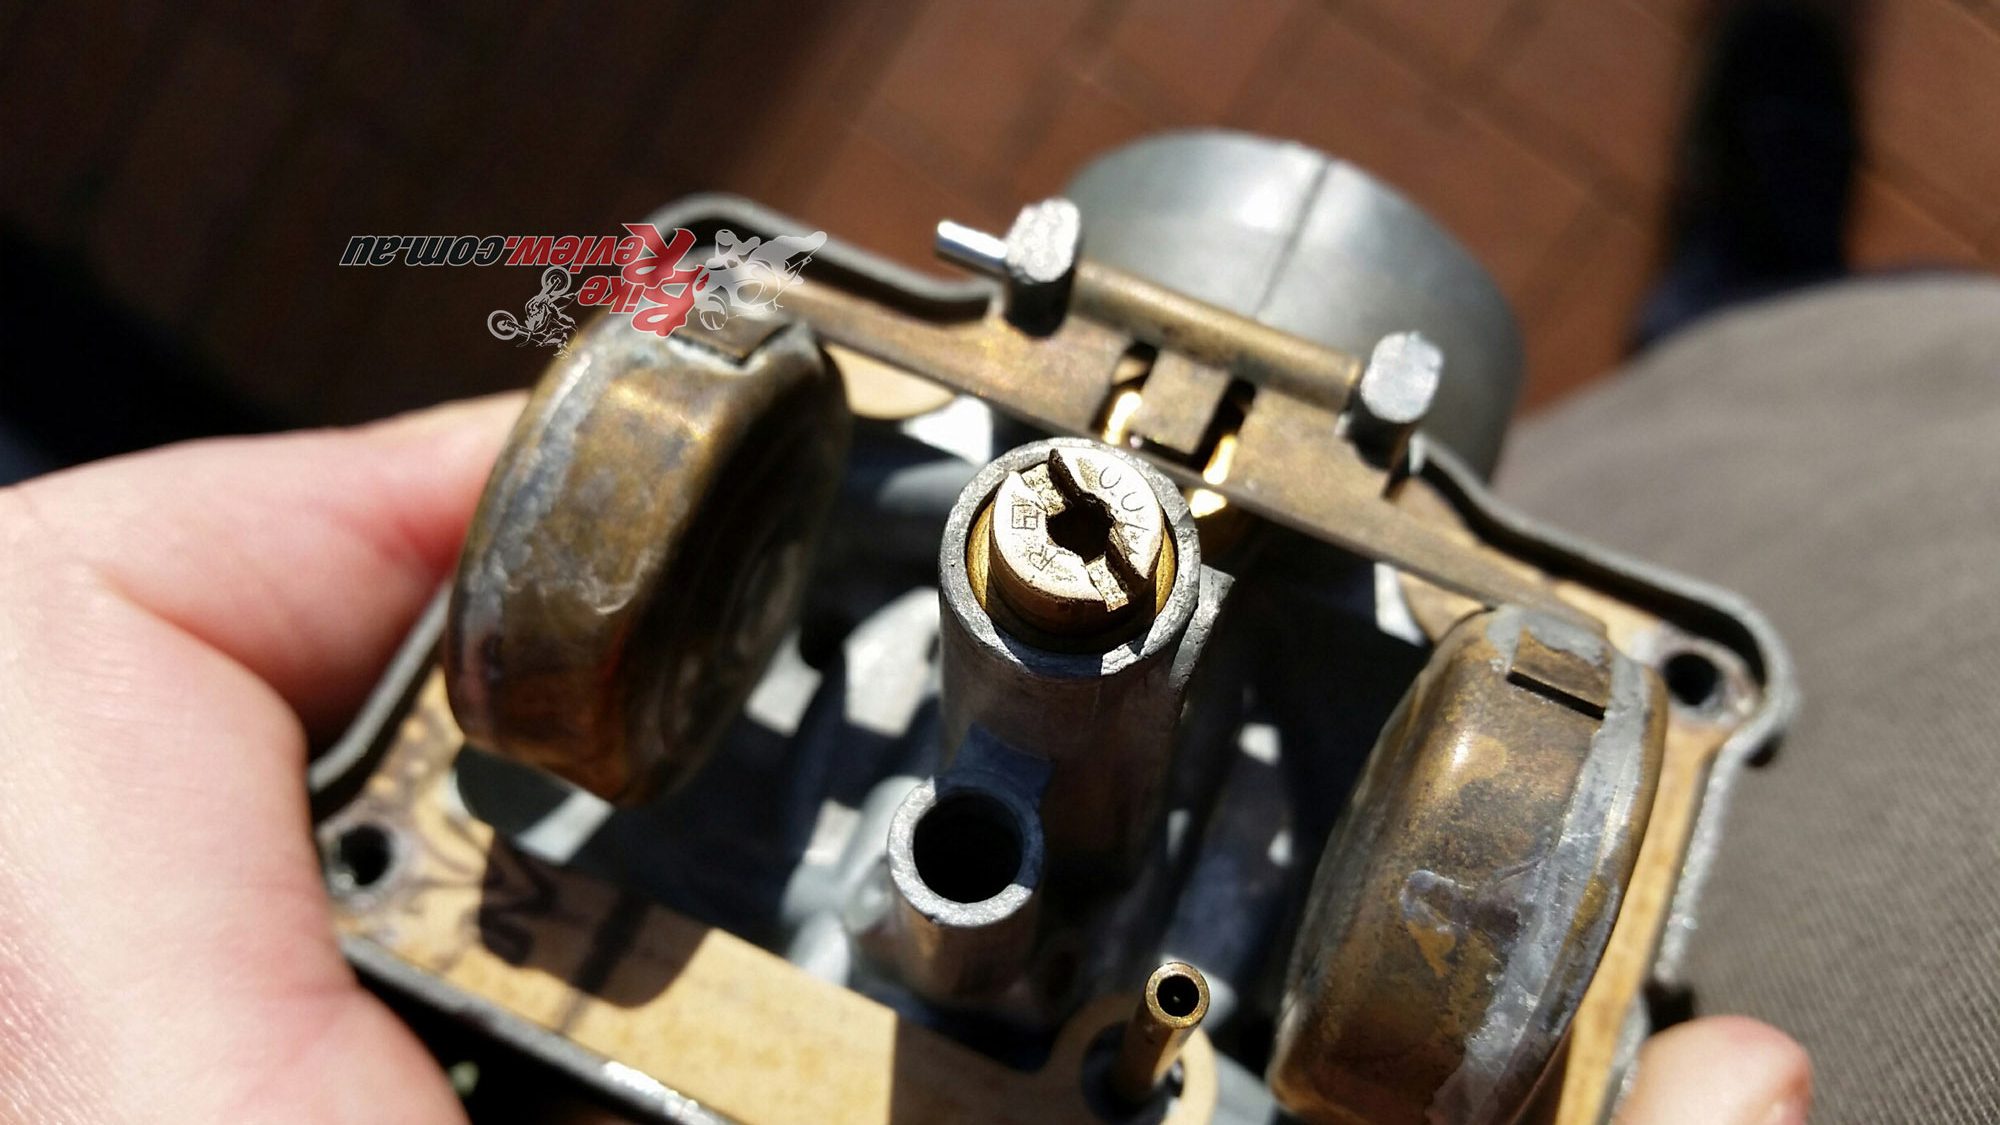
The next step was to fit the carburettors, but before I did I needed to increase the jet sizes, due to the fact I was running expansion chambers and a ported engine, but the main reason was the foam aftermarket pod filters I was running that provide way more air than the standard airbox.
Pommie persevered until he got the jetting spot on, no quick task but well worth the effort.
To change the jets is an easy job, it’s just a matter of pulling the carbs off and removing the float bowls, with these off you can get access to the main and pilot jets as well as being able to set the float heights. With jetting it is always better to start with a large jet first, if you put in a jet that’s too small you can damage your engine if it’s too lean, so start big you can always come down in size.
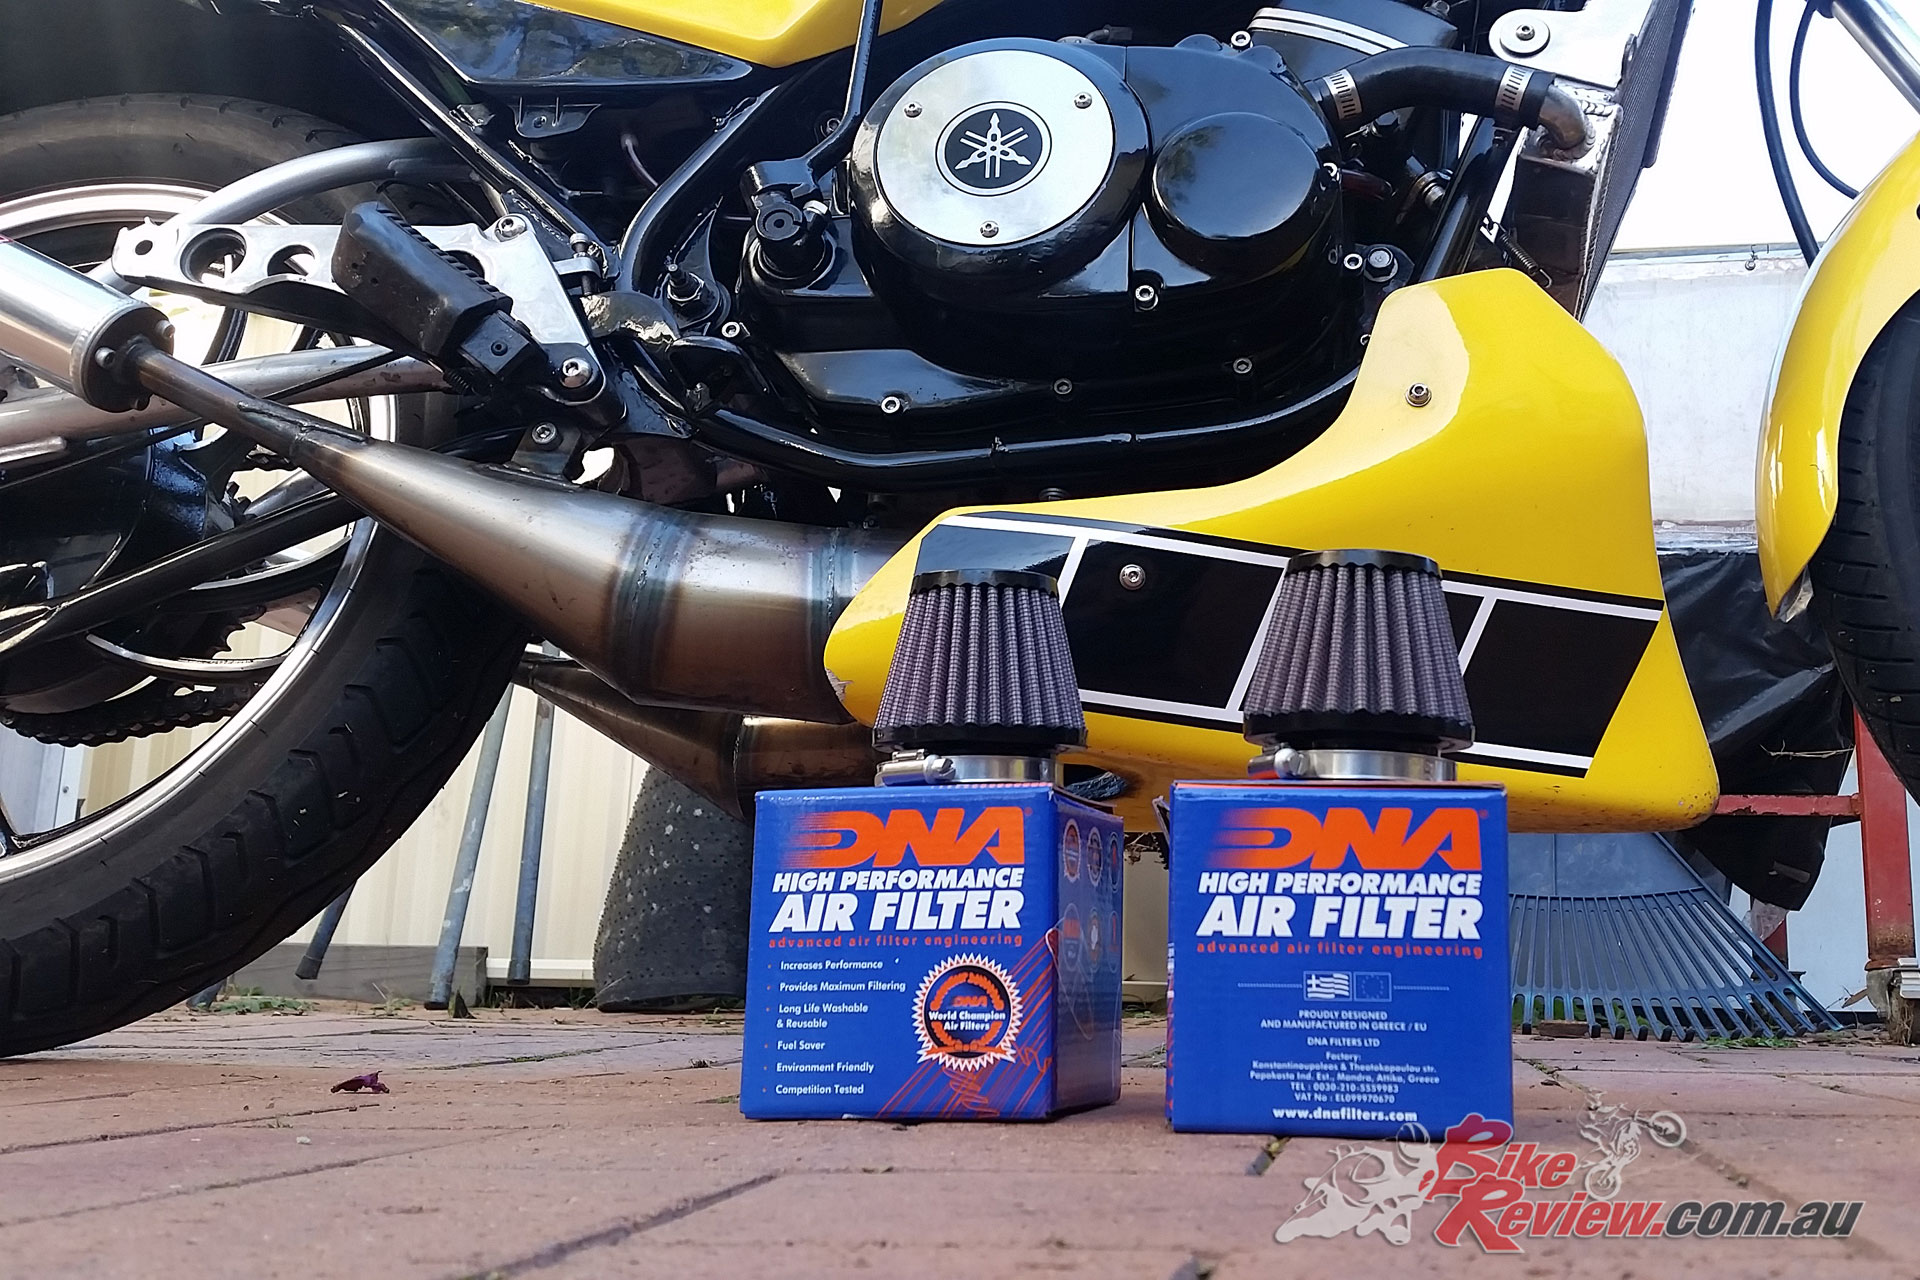
DNA filters are available from kenma.com.au and are much better than eBay junk foam filters.
The problem I was having was with the cheap airfilters, I found out that when on full throttle the foam was sucking in constricting the airflow so I was getting inconsistent results with my jetting. The solution was to find some better quality airfilters. I had previously used DNA filters on my Kawasaki H1 and found they work great, are easy to clean and produce consistent performance.

After a quick call to Mick Withers at Kenma Australia had a set of DNA pod filters on the way. After I received the filters, I oiled them as per instructions and then it was only a matter of minutes to fit them.
Before even attempting to get a correct reading for the jets, the carb’s have to be synchronised, this is easy on my standard Mikuni VM carbs as they have a mark on the slides that you can see through a small glass window on the carbs, you just need to adjust both carbs so each mark lines up, then you know the carbs are opening at the same time.

A wide range of jets is a must-have to complete the job properly.
The other thing that needs setting on the carburettors is the air screw, ideally this should be set at around 1.5 turns out, but this is dependent on the pilot jet, if you can’t get the bike ticking over and revving crisp off the throttle and then quickly returning to idle, then you have the wrong pilot jet.
With the carbs set, it is then a matter of taking the bike somewhere that you can hold the throttle wide open for around 20-seconds and do a plug chop. To do a plug chop, you need to first get the bike to temperature, pull over and remove the plugs, you then fit a brand new set, then set off straight away on full throttle going through the gears, if you haven’t got enough room you can trail the brakes a bit so you don’t end up going a crazy speed.
After around 20 seconds or so you kill the ignition, pull in the clutch and roll to a stop, you then remove the new plugs, put them in your pocket and take them home. Once home, you then have to cut off the bottom of the plug so you can clearly see the burn ring around the bottom of the ceramic, I have tried looking down the side of the plug, but the only true way of seeing it clearly is by chopping the threads off and at $6 per plug, this method can get expensive.

Chopping the thread off the plugs is the best way to get an accurate look at the plug reading.
The ideal plug chop is to have a 2mm coffee coloured line around the bottom of the ceramic section, too light and you are too lean and too dark and you’re too rich. This can be a time consuming process, pulling the carbs on and off multiple times and taking the bike somewhere safe to do a run, but the results are worth all the effort when you feel the engine hit the powerband and the sweet sound from those expansion chambers singing.
If you are not confident in doing the jetting yourself, you can always take your bike to a two-stroke specialist with a dyno, although they are few and far between these days and recommendations are a must for this dying art…
The end result for my RD350LC was 380 main jets (220 stock) 2.5 pilot (2.2 stock) needle two clips down from top. It screams now, just check out the video! – Pommie…
The Author
You Might Also Like


March 10, 2019
Hey Tony, blast from the past..
It is Martin Chapman here, I’m looking at getting a super adventure S next week. I was doing my homework and looking at the R vs the S and really had to do a double take at the guy on YouTube in the review. You are looking well mate. Definitely looks like it i s going well over there. Going to check out your reviews now. Me and Jackie are still living in Ulverston 2 kids 18 and 15, also have a mental Weimaraner. My mum n dad are doing great, Brendan is still a pain in the arse. Sold my Tiger 800 last year and looking for my new bike.. exciting times.